Up next in 10

VIVO Y21s Remove Factory Reset Protection:
https://www.hardreset.info/devices/vivo/vivo-y21s/faq/bypass-google-verification/
Find the way to unlock FRP in VIVO Y21s. In this video, we present the easy way to bypass Google verification in VIVO Y21s. You don't need to use PC, the method is completely free you can skip Google lock in a few minutes. Let's follow our steps and remove factory reset protection in VIVO Y21s.
How to skip Google lock on VIVO Y21s? How to bypass Google verification on VIVO Y21s? How to unlock FRP in VIVO Y21s? How to remove factory reset protection in VIVO Y21s? How to bypass Google Account protection in VIVO Y21s with Android 13 and security patch 05.2023?
#VivoY21s #bypassGoogle #UnlockFRP
Follow us on Instagram ► https://www.instagram.com/hardreset.info
Like us on Facebook ► https://www.facebook.com/hardresetinfo/
Tweet us on Twitter ► https://twitter.com/HardResetI
Support us on TikTok ► https://www.tiktok.com/@hardreset.info
Use Reset Guides for many popular Apps ► https://www.hardreset.info/apps/apps/
Show More Show Less View Video Transcript
0:00
Welcome. In front of me, I have the Vivo Y21S, and today I'll show you how you can bypass
0:06
the Google verification on this phone. I get started, I'm just going to quickly touch upon this device and just mention that it is locked
0:16
You can see it, so I would need to obviously draw the correct pattern to unlock it, or use the Google
0:23
account instead to unlock it. So this will be showing you how we can unlock it without providing anything
0:30
this sorts. But unfortunately for this we will need another Android device, hence why I have
0:35
some RealMe device here. And we'll also need a SIM card with a pin set on it. So you just need
0:41
some kind of pin set on it. You don't even need to know that pen. We just need it so it
0:46
locks the device. You'll see what I mean in a second. Now on your Android device, the unlocked
0:53
one that you will be using for this, just make sure you are signed in into a Google account already
0:59
so you can use the Google Play Store. And that's really all we need right here
1:04
I'm going to set this to the side. For now, we're going to come back to it in a moment
1:09
once we have our device prepared. So let's move that to the side. So we're going to start off by inserting our SIM card
1:18
Actually, before we do that, there is one more thing. Make sure you're connected to Wi-Fi network
1:27
As you can see, I am connected right here. so sign in to your network and then insert the SIM card
1:46
Then grab your little eject tool again. Once you see the insert pin or enter pin, take out the SIM card
1:57
Now what will happen? now as the device will stay on the lock screen and here you can barely see this
2:03
little dialer icon you want to grab it and slide it up to the top this will
2:09
open up the dialer and here just type in any kind of random numbers any number
2:15
will work and once you press any numbers it will show up with these three options
2:20
we are interested in the last one the send a message and then in the text
2:27
message type www. YouTube.com There we go. Now, crucial part of this
2:43
make sure you add the WWW extension. Otherwise, if you don't, it will open up YouTube in a pop-up window
2:52
which will completely brick the attempt at this. the pop-up version of YouTube will not give us access to the section in the settings that we need
3:02
so make sure you add this if you have already typed in the YouTube.com without the extension
3:09
beginning and sent it then what you need to do to basically be able to finish this is start over
3:16
from the beginning and you want to reset the device to exists recovery mode back to the factory
3:22
settings and just progress from the start again. this is kind of a downside if you already have done it but if actually waited for me and put in the extension
3:33
obviously you don't need to do anything extra here so we're just going to send it give at a moment it will show up with this
3:38
top to load preview want to top on it and then click on the YouTube image and as you can see with the
3:47
WWW extension it opens up YouTube in a full application format so it takes full screen
3:54
and that's what we need. Here we're going to navigate to the account icon
4:00
I'm going to go to Settings, About, and then Google Privacy Policy
4:07
Here you want to select Accept and continue, and no thanks. Again, no thanks
4:14
And in the search bar, we're going to navigate it to Hard Reset. That info slash bypass
4:24
Like so If you need a moment to write this down, pause the video
4:39
Now in here, select consent and we're going to scroll down to settings, click on it
4:49
and scroll all the way down to system. Select phone clone. Check the box and select agree
4:59
And we're going to select that this is the new device, so new phone
5:05
Old phone is an Android, so that's what we're going to select
5:09
Got it. We need to allow access to everything that it asks, so do so
5:16
And as you can see, it enables the... enables the camera. So there we go
5:23
And give me a sec, because YouTube decided to play. Anyway, so this phone is now prepared
5:30
We can just lock it for now and move to our other device
5:37
So here we're going to not get to Play Store. And we're going to look for activity launcher
5:46
There we go. activity launcher selected select install and while this is installing i'm going to go back and then
5:55
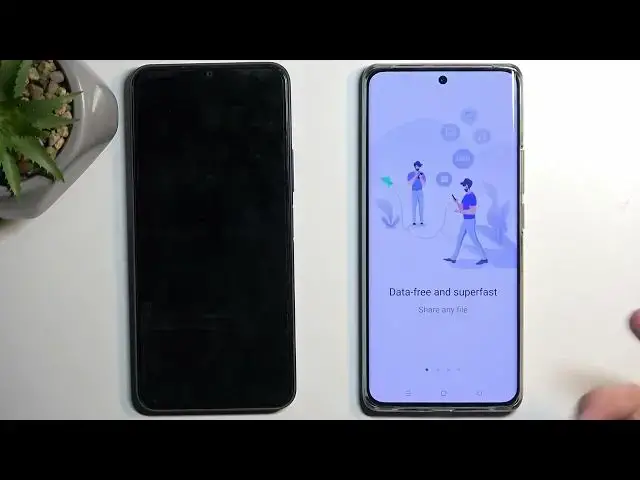
search for i think it's easy share i'm going to check yep so easy share as you can see it will
6:06
be labeled as a vivo communication i think it is so that's the one that we're looking for and you
6:12
want to again download it Once it's downloaded and installed, click on Open
6:27
I'm going to select that we have agreed. I'm going to swipe to the left, start
6:37
and then tap on this title, phone clone. And this phone is old phone, so that's what we're going to select
6:45
set now whatever it opens up you always want to enable it
6:52
again I'm going to click once more on this got it and again we're going to agree to
6:59
everything that it pops up with as you can see this brings up this QR code
7:03
for us to scan so we're going to grab our locked device and we're
7:07
going to simply point the camera on this right here you have this sound
7:15
it connects to the, or tries to connect these two devices, give it a moment
7:20
Set now. Now once it opens up this kind of view right here
7:25
look for the easy share application, like this one, and enable it and then go back
7:33
And we need to allow several more things. It will start scanning the device for all the data
7:41
So right here, we will deselect everything. thing. There we go
7:52
And then click on the apps itself as a text and check activity launcher
7:58
That's all we want. Click on OK. And select Start Phone Clone
8:09
As you can see, this goes really quickly. Let's give it a moment
8:14
Now we can already get rid of this device. And on here you can see that process is now finished
8:25
We're going to select start using your new phone. You want to click right here on this time icon
8:32
Select apps and then open the activity launcher. Select OK. Okay, so once we have all the activities being shown to us, we will select Android setup, as you can see right here
9:10
And what you're looking for is an option that will have no gear icon
9:14
So start scrolling, and there is this one. there's only one once you see it in top on it this will bring us right here to well back to the
9:25
setup screen now it tells us that finish or whatever setup so right here we will
9:33
quickly make sure if i'm to if i want to check which option i need to actually select right here so
9:47
Okay, so we're going to select Start
9:58
Now we're also going to bring the other device into view. coração unlock it because we will need it
10:05
I'm going to select Skip. Now here we're going to select Next with the copy apps and data
10:57
Then I'm going to select Next again. No cable. Copy without cable
11:08
And now, I'm going to select next again
11:28
Use my Google account instead. And we're looking for a pop-up right on this
11:38
device. Let's give it a second. So open a Google app on your old device, which
11:49
it pops up with it anyway, so I'm going to click on it. Give it a moment. Next
12:00
copy to your new device. Copy. Copy. and what's happening right now is we just need to simply sign in on this device with the same account that you have right here
12:25
so it automatically already fills the google account and you just need to provide the password for
12:31
this device so i'm going to point it out you can pay attention to what the email is right here so it's
12:38
for test only a 1 with a double Y. I'm going to put in the password for this
12:44
I'm going to do this off the screen. And let's go
12:54
Let's go. Now as you've seen, that was the Google account. In a second, once this is done doing whatever it's doing
13:06
I'm going to close it and show you what the Google account. show you what the Google account is here just so you can see that it is the exact same one
13:10
So basically you can remove any kind of stigma that maybe I just signing in with this devices account And I select don copy
13:25
And then don't copy, don't copy. Next. Now, we're almost done
13:36
I'm going to navigate to the settings just to show you the account. So, user and accounts
13:42
And you can see this is the account. for test only double y with a one
13:46
So I signed in to this device with this account. So we can move this to the side
13:54
And here we can now finish up the setup. I'm gonna be skipping everything that it pops up with just to
14:11
I'm going to be skipping everything that it pops up with just to save a little bit on time
14:24
Oh boy, oh boy, oh boy, oh boy, oh boy. Sorry for that
14:41
Select your location, whatever that works. For some reason we're back at the beginning, hopefully this one correctly
14:55
Yep, so there we go, account added. So this is the account obviously that you've seen right here
15:04
So what happened now is that account that we have signed into basically has replaced the old account that was
15:11
used as a verification method. And now we can finish up the setup
15:30
There was a little bit wonkiness as you've seen it brought me back to the beginning of the setup, but that's fine
15:41
to the home screen. Now, there is one last thing that I recommend
15:45
doing to finish of the reset, or actually, bypass. And that is
15:51
navigating to your settings. Come on, phone. Please cooperate. So yeah
16:04
it's not fully bypassed just yet. That's why there is one last thing
16:08
As you can also see, we don't have our old buttons at the bottom. So what do we want to do is navigate the settings right now and navigate all the way down to system
16:19
Select reset options erase all data factory reset as you can see tells us that it's going to remove one account which is fine
16:27
Erase and press on the button once again to erase all data now I'm not going to go over this on the video
16:33
I will be recording this as a separate video so if you're interested in me seeing like how this actually goes I
16:41
you can tune to another video, kind of a shame-less plug, but I think this is just a little bit more efficient way
16:48
But yeah, so I'll be recording this in a separate video. I'm telling you to basically select erase all data to finish off the bypass
16:56
Now, the reason I'm telling you to do this is because by performing a factory reset
17:00
through settings, once we actually have access to the home screen, the device removes all the protection from it
17:06
It thinks that it's right now unlocked and everything is, you know, friendly and whatever
17:11
So by factory resetting it, it just considers that removing all the accounts
17:16
and any kind of protections that were on the device is okay, which typically it would be, and therefore it unlocks itself
17:23
and that's why it's the last thing that I recommend doing. Now with that being said, hopefully you found this video helpful
17:30
If you did, don't forget to hit like, subscribe, and thanks for watching