0:00
Welcome. Infoomone is a RealMe 9 Pro Plus, and today I'll show you a couple tweaks and tricks you can do on this phone
0:11
So starting off, we're going to open up our settings application. And from here we're going to begin by navigating into personalize
0:21
There we go, or personalizations. And this will give us access to a bunch of different options to customize how our device just
0:29
looks. So quickly going into a couple of these. I'm not going to touch upon all of them
0:35
I can just do that on your own. But quickly going to a couple of them, we have icons. So if you have
0:40
some kind of different icon packs installed, you can then switch them here. And this is just
0:46
really nice because a lot of the default launchers for phones will only just use the icons that
0:53
whatever company has. So for instance, Samsung has their own like one UI trash that
1:00
you just have to use or you have to download literally a separate launcher to change the look of the icons
1:05
but here you can actually do it whenever he wants to with whatever packs he wants to
1:09
then we have things like quick settings this allows you to just choose the shape of these tagos right here
1:15
how they are shaped you have a couple different ones and then you can also take it a little bit further
1:20
with colors just allowing you to select different kind of color presets you can also create your own
1:25
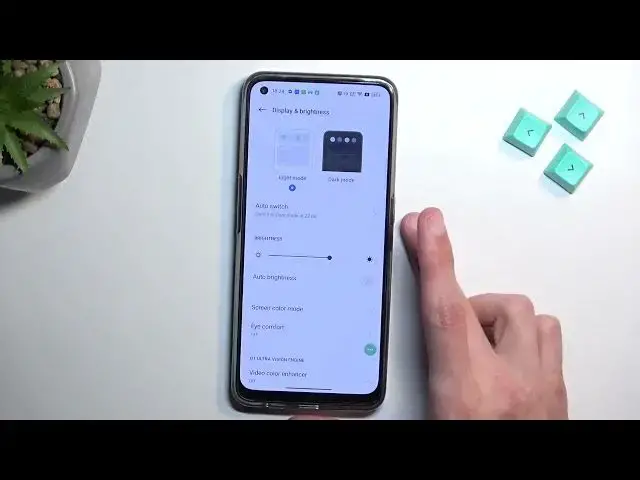
if you want to or you can have it based on a wallpaper which is actually pretty nice and works really well from experience Now moving on to the next option it going to be the display section right here And we going to start off with the dark mode Now I not going to touch upon the dark and light mode
1:40
I'm going to touch upon more on the auto switch, which allows you to have it set sort automatically swaths between light and dark mode
1:46
based on, or by default, when you enable this, sunset to sunrise, but you can also select it to be at a custom time
1:52
So you can select light mode is from 6 a.m. and dark mode is starting from 10 p.m. and runs still obviously 6 a.m
2:04
So pretty nice options right here. Now moving on to the next things which are also under the display we have the
2:14
video color enhancer. You can tap on it and this will give you a quick preview on
2:18
what it's going to change. So if you like the changes these are the changes that will
2:24
Track the new look, let's call it this. This is how it's apparently looking right now
2:29
So when enabled, that's basically what you're going to have, which is a little bit more bright and colorful image
2:35
compared to this more gloomy one. Now, going back, we have another thing in here
2:41
which is a refresh rate, right over here. So we have three different options
2:46
We have the auto-select, high-end standard. Standard is just a typical 60 frames per second
2:51
Then we have high, which is 90. I wouldn't really call that high. but to each their own
2:56
And then we have the Auto Select, which swaps between them too. Now if you planning to prioritize battery life above all then I recommend sticking with the 60 which is standard For everybody else stick with the Auto Select which will swap between 60 and the 90 based on what you doing
3:12
So when the content can be displayed at 90 and you have, well, the use for it, then it will swap to 90
3:20
which is basically anytime anything is moving on the screen. While the image is stationary like this one, where nothing is happening
3:28
then it's going to drop to 60 just to preserve a little bit of battery
3:32
It's not going to be as good as the stand-alone 60. Now moving on to the next
3:38
thing, it's going to be the notification history, which I believe was
3:42
introduced in Android 11 or 12, one of those two. So, if you
3:48
want to have notification history, so for instance you have a bunch of notifications, you clear
3:52
them all, and now you're wondering what the heck was one of those notifications
3:56
that you just got a glimpse of, you can enable history for notifications and then go back to it just to check out what were the notifications
4:04
that you just removed. So to do so, we're going to go into notifications and status bar
4:09
I'm going to go to more settings and then notification history and you can toggle it on in here
4:14
Now when you toggle it on, you will need to wait, actually have some notifications that you can
4:19
then remove which I can't remove any of those unfortunately. And once you get rid of them
4:24
they will appear in here. And moving up to the next thing, it's going to be the flexible Windows, which is under special features
4:32
Let's go back. There special features And flexible windows And this is turned off I believe It actually on by default
4:44
So it's right over here. Although we need to agree to it
4:48
Let's try it again. There we go. So it gives us this overlay right here
4:52
We have couple applications and a couple shortcuts like screenshots, screen recording, and so on
4:58
And you can edit this. You can add more apps into here
5:03
and when you're launching apps through this I believe they should open up yep in this
5:07
kind of pop-up view right here oh there we go okay and you can use the
5:15
app however you want right now I believe if you go home yep it should kind of minimize
5:21
it's not going to minimize into uphead unfortunately so that's a little bit of a
5:24
bummer but obviously it gives you a little bit of more versatility so you can open
5:31
up some kind of other app in the background, interact with this one
5:35
For instance, copy some links from here, if there were links here, and then paste them on into
5:40
whatever you're doing here. And yeah, just a pretty neat way of multitasking
5:46
And you also have two options so you can close, maximize it, and just drag it around
5:52
So there we go. Now with this being said, and this would conclude the tweaks, tricks that wanted to show you
5:57
so if you found this very helpful, don't forget to hit like, subscribe, and thanks for watching