Up next in 10

How to use XP Pen Deco Mini 4 - XP Pen Deco Mini 4 Graphics Tablet Complete user guide
Jul 31, 2024
More info about your household devices you can find by following this link: hardreset.info
This YouTube tutorial provides a complete guide on how to use the XP Pen Deco Mini 4 graphics tablet. Whether you're a beginner or an experienced artist, this video will walk you through all the essential steps to get started with your XP Pen Deco Mini 4 and unleash your creativity. The tutorial covers topics such as setting up the tablet, installing drivers, customizing pen settings, and navigating the tablet's interface. It also demonstrates various techniques for drawing, sketching, and using different software applications compatible with the XP Pen Deco Mini 4. With this comprehensive guide, you'll learn how to make the most out of your XP Pen Deco Mini 4 and enhance your digital art experience.
How to Use XP Pen Deco Mini 4 Graphics Tablet?
How to get started use XP Pen Deco Mini 4 Graphics Tablet?
How to set up XP Pen Deco Mini 4 Pen Tablet?
#xppen #xppendecomini4 #digitalart
Follow us on Instagram ► https://www.instagram.com/hardreset.info
Like us on Facebook ► https://www.facebook.com/hardresetinfo/
Tweet us on Twitter ► https://twitter.com/HardResetI
Support us on TikTok ► https://www.tiktok.com/@hardreset.info
Use Reset Guides for many popular Apps ► https://www.hardreset.info/apps/apps/
Show More Show Less View Video Transcript
0:00
Hi, welcome to Harrodrisid info channel, J-Viewers, in front of me Deco Mini 4, XPPPan2 Mini 4
0:07
and now I'm going to show you how to use it. Now you will see the complete guide of how to use this XPPan Deco Mini 4
0:22
So firstly let's open it. So here we have the Deco Mini 4 device. Here we have the Deco Mini 4 device
0:29
Here we have the power cable and NIPS and of course our pen
0:37
Stilus. Here we have two adapters, so if you want to connect it to device without normal USBA
0:47
So you can connect it using this adapter and in this way this cable you need to connect to tablet
0:57
and this to your MacBook for example. because MacBook doesn't have this port
1:05
It's usually a port. Great. And cool. As you can see, now I have no the neb on my XP pen
1:14
So I need to install it. To install a neb, you just need to open this case
1:23
And here you will see nebs. So just select one of the ten I think here we have ten nips in the complete so take one nip and install it
1:39
so to do it just insert it into the stiluice and press great nip was successfully
1:46
installed it's very easy to install and as you can see it works if you want to reinstall it
1:53
if you want to install new nip you need to use scissors or even
1:59
even just you can use just your teeth for example but I guess to use just your hand so just
2:09
use the piece of paper and in this way as you can see you can
2:15
it easily take off the nip and reinstall it okay then so here we have the tablet here we have
2:28
the our workspace so as you can see the tablet is big but the workspace only in this square so here is
2:38
your tablet is not working here is two here two here two so only in this square so I don't know how
2:46
many inches we have here but as you can see the workspace is really small so here we have
2:54
maybe not professional but maybe in the middle middle price pressure sensitivity we have 8,000 levels
3:10
resolution we have even in mid range report rate 2
3:19
reading hate 2 but we have we have have now the big workspace so we have really small workspace and of course on our device we have no
3:36
batteries so we have no batteries in the steels we don't need to have it it works without
3:42
the batteries and it's really great so let's connect it to the computer and i'll show you how to use
3:49
it so first we need to open the cable connect it to
3:54
connect the cable to the tablet and then wait a while and then connect the cable to your PC
4:16
When you will connect you will see here the logo of text input so it means
4:24
that Comptor has detected my graphic tablet. And as you can see, here I can move my mouse using the..
4:35
Wait a while. Okay I can move my mouse using the stools So it really great it really good but as you can see I can set up it
4:52
So it works like, maybe not like a mouse, but I don't know, but like..
5:00
So here is my screen and for example if I will touch here, so as you can see, the mouse is
5:08
my top right corner here is left top corner and as you can see here is just my normal
5:16
screen for me it's not handy to use so I want to switch to mouse mode for example and how to do
5:26
it how to set it up so for example I will open I don't have illustrator or
5:32
Photoshop on my work computer so I will show you how to use it just in paint and as you can see I can write using this mouse using this tablet
5:47
just in the just without any applications just without any drivers but it because I have
5:59
enabled Windows up to update and Windows automatically installing the drivers for
6:05
for new devices. If your tablet is not working, so not afraid, we will, I'll show you how to
6:18
how to install drivers and how to set it up. So to use, normal use, your device, you need to open
6:25
the browser and enter XP-P-P-P-Pen driver, oh, XP-Pen, yeah, okay
6:35
download and find the first web page XP pen.com slash download find your category
6:47
for example I have a Deco series pen tablet find here your Deco tablet I have Deco
6:54
tablet I have Deco Mini 4 then find here your operation system for
7:02
for example I have Windows 10 and find the drivers click download and great now we need to disable the antivirus to do it open settings
7:13
update and security Windows security virus and trick protection scroll down find your
7:20
managed settings disable real-time protection and other types of protection too we will
7:28
enable it but later great flow the browser and I have downloaded the drivers
7:35
So it's here and now we need to open this archive of course if you don't have
7:42
archive up you need to install any of the archive app like 70 or Vinar I suggest to use
7:49
Winrar so great it's here now click on it twice open it click okay I read install
7:58
wait a while and then you will need to reboot your PC as you can see I
8:05
have these drivers on my device. I just showing how to install it step by step, but I have these
8:12
drivers on my device. And you need to click restart now, but I will click restart later. So, restart your
8:21
device. And now, wait for it. Now, we, oh, okay, now we have new application here, as you can see
8:32
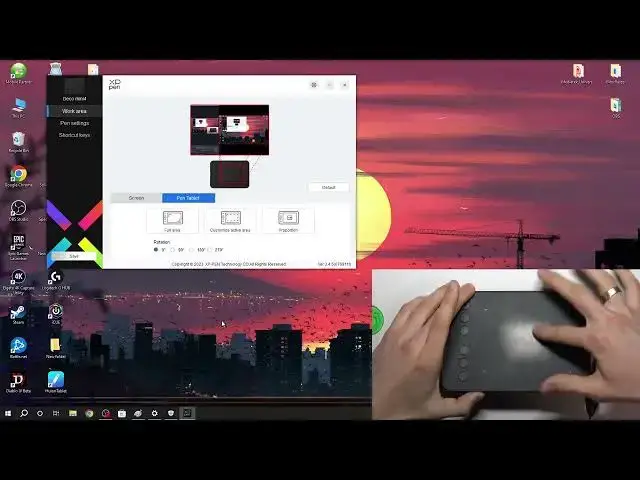
pen tablet so open it and here you will see your pen tablet application and now we can set up our device so
8:42
for example we can set up screen for example set full screen all customized screen area we can customize
8:50
our screen era for example i want to use my pen only on this area and as you can see now my
9:01
top right corner is okay it's not working right now click to set area okay and set
9:11
era for example I want to use it only on this area okay and now as you can see my
9:20
right top corner so I don know why it doesn work okay oh okay and as you can see now I can move to my screen right corner
9:33
I can use it only in the era I have two to choose a while ago
9:39
And as you can see in this way, you can open the drawing application, for example
9:45
and draw only in this area. It's very simple to use and really intuitive
9:51
and if you need it you can use it but I for example want to use customize screen
9:59
and I want to use it on my full screen okay click okay and create
10:13
you can use pen tablet here you can change the range active area
10:21
on your tablet. For example, you can set that only this area will be your workspace
10:29
You can draw your workspace using the marker on your device. If, for example, this arrow has used, as you can see, we can use one error
10:42
but I don't know how much you need to draw on your device to use the error
10:46
But if you need, you can. You can, for example, make that only this part
10:51
will your workspace but and not of all workspace great open pen settings in the
11:01
pen settings we can change the buttons so for example top button I can use like I
11:11
don't know like like a precision mode for example
11:21
okay and now when I will click right when I will click up button I can I am
11:33
enabling the precision mode so it's fine detail mode as you can see we can use
11:39
it in this mode we can and create how to disable it okay
11:51
we need to click escape to disable it so I will use pen eraser great right click
11:58
we can customize too here we can customize the pressure pressure sensivity for
12:05
example now just press on the free area just press and as you can see it's very
12:14
easy to to make the hard press and I want to make it harder for
12:21
and now I need to have I need to use more power to to create hard press okay
12:30
and in this way you can you can make revert settings and here you can use mouse
12:43
I for example like to use this mode because in this mode you can use your stills like a
12:50
like mouse so now when i'm clicking on the for example left top corner of my era of my working
13:00
era and as you can see it's not jumping from one place of my screen to other i can use it on
13:09
just like a normal mouse so i like to use mouse mode you can enable windowsync you can change the
13:17
sensitivity of the mouse for example Oh, it's not too great to use in this mode, wait a while
13:27
Okay, you can change sensitivity and great. So now let's move to shortcut keys
13:37
So here we have six shortcuts and we can set up it
13:41
Here we have key one, key two and from one to key six
13:47
Click Show All to show all your keys and now you're you can set up all of your keys. For example, here we can customize, for example, B
13:59
If in your program for example in program you use you need to use B button yes you can set it up to for example key one it B as brush or key two it E eraser it like like in Photoshop like an illustrator
14:20
a control plus plus control plus minus and show driver panel so I don't
14:28
driver panel okay and okay using this button you can open driver panel
14:35
So it's a great setup, but I don't need, for example, Control++
14:41
I need to use Control Z. It's move back. And control shift Z, move forward
14:52
So in this way, I will set it up. I'll show you how to do it. So to do it, you just need to open keyboard setup
15:02
And here, just using... your keyboard, enter the shortcut. For example, I want to use Control Shift Z. So to do it, I
15:14
clicking and holding Control Shift Z. Great. Now click OK, and let's check it. For example
15:24
where in which application I can use it. So maybe normal here. For example
15:35
high or hard reset that info clicking control z okay maybe maybe not in this application so I
15:46
will use for example note path for example so control z maybe I don't change
16:01
key 3 control z key 2 oh my god i'm not sitting i customize key 4 okay so try again
16:16
control z okay and control shift z okay it works it works in this way so move back and move forward
16:28
great so and of course we can reset all of our settings to default just click
16:40
default default in this way we can we can reset our settings we can select
16:50
applications for example we can create the setup for desired application so
16:56
for example I want to use I want to use it for okay to add Gward for you to
17:09
AD application in MD I will have these setting set up for example I can
17:16
change the setup for for this application yes okay but for that other app
17:26
I will have for example for other application I can have so for for one
17:36
application I can have one set up for a second application I can have the
17:42
other setup so you can set it up in the way you want for example for
17:47
Adobe Photoshop you will have one key one shortcuts and working space working
17:54
area set up for a second application for i don't know for adobe illustrator you will have the other
18:01
keyboard and shortcuts set up and working area and pen precision you can set it up for other
18:09
applications for every application you have on your computer and and that's it and that's e i think
18:19
I have showed you all futures of this graphic tablet if this video was helpful for you
18:27
So leave me a like and leave the comment for this video
18:35
And that's it. Thanks for watching. Like this video, subscribe to the Ava channel and bye
18:42
See you
#Science
#Other