live_tv
Livestream Starting Soon
00
Hours
:
00
Minutes
:
00
Seconds
Up next in 10

How to Unlock FRP in TCL 408 - Bypass Google Account Verification Free Method Android 2023
Mar 10, 2024
TCL 408 Remove Factory Reset Protection:
https://www.hardreset.info/devices/tcl/tcl-408/faq/bypass-google-verification/frp-infinix-android-11-2022/
If you would like to skip Google lock in TCL 408 you are in the right place. This unlocks FRP method will help you to activate TCL 408 without Google password. It's the only solution for a forgotten Google account after hard reset. Let's remove factory reset protection in TCL 408 by using this tutorial.
How to skip Google lock in TCL 408? How to bypass Google verification in TCL 408? How to remove factory reset protection in TCL 408? How to activate TCL 408 without Google account?
How to bypass Google Account protection in TCL 408 with Android 11/12/13 and security patch 06.2023?
#TCL408 #TCLBypass #TCLUnlockFRP
Follow us on Instagram ► https://www.instagram.com/hardreset.info
Like us on Facebook ► https://www.facebook.com/hardresetinfo/
Tweet us on Twitter ► https://twitter.com/HardResetI
Support us on TikTok ► https://www.tiktok.com/@hardreset.info
Use Reset Guides for many popular Apps ► https://www.hardreset.info/apps/apps/
Show More Show Less View Video Transcript
0:00
Welcome and follow me is a TCL 408 and today I'll show you how we can bypass
0:06
the Google verification on this phone. Now before I get started I'm just gonna quickly mention that you can see the
0:15
phone I have right over here is locked. It's telling me to draw the verification pattern to unlock it and obviously I can also use the Google
0:21
account as alternative method of unlocking it which you will see in a
0:26
second. There we go. So it is obviously locked. Now for this bypass we will need
0:33
a computer that's why I'm recording it on the computer. We will need a cable so
0:38
we can plug in our phone to the computer. I have a cable prepared for this and
0:43
obviously we'll need internet connection which if you're watching this video you
0:48
have that. So now in the description of the video hopefully there is a link to
0:54
our website and it will look like this hopefully. Now disregard the fact that
1:01
this is for the TCL 40SE. The process is exactly the same between these two
1:06
devices. I do have the 40SE as well. So in both cases it works exactly the same
1:13
It's the same phone, same software so hence the process is exactly the same
1:18
But for this one just go to the description. If there is a link click on
1:24
it and then download the two different things. Now if there is no link for some
1:28
odd reason which honestly could be possible then just navigate to our
1:33
website which is hardreset.info. So I'm just gonna open it up and kind of go
1:39
through this process. So comes up hardreset.info and then in the searching the search field right here you want to type in your phone model so
1:51
TCL 408. I guess I'm gonna go with this one and here right at the top you will
2:03
see bypass Google verification. So click on this. If you don't see this for some
2:08
reason which I think sometimes might happen you can click on any other one or
2:13
just scroll down and there should be... let's see. If you select any of them you'll have
2:20
this on the side and obviously we're looking for the bypass Google verification so it will be in the factory reset protection drop-down. And
2:29
as you can see it's exactly the same. We need the same tools. I'm actually gonna
2:33
close this. There we go. Now before I get into downloading this software's programs
2:41
that we will need and going into the process I'm gonna go into preparation of
2:46
your computer for this. We do need to just kind of prepare it a little bit. So
2:51
one and the most important thing is you will need to disable your antivirus. Now
2:56
I disable it or just stop it for a brief moment. Whatever you feel comfortable
3:02
with. This is kind of required because when we download the one of these tools
3:09
I don't remember which one it is. It could be this one the Mediatek FRP bypass tool. Windows will automatically flag it as a virus and remove it. Now
3:16
Windows does flag a lot of things as virus even though they're not. So that's
3:24
why we need to disable the antivirus. It's gonna delete the exe obviously that
3:29
one that we need to run to bypass the device. I will be running it straight
3:34
from here so I'll be downloading these specific links and you'll see that I'm gonna be using them and they will work hopefully. I've done this before and I
3:41
know they work but there is some gimmick to it in terms of Windows and
3:46
the drivers. So Windows does install their own drivers, tries to override
3:51
your own and that creates a lot of problems. So I'm gonna see if I have any
3:55
problems. I have done this before so hopefully everything will go smoothly but there is a chance that it won't and I'll be also touching up on everything
4:05
that could go wrong and how to solve it. So yeah let's start with that. So we're
4:12
gonna navigate to our start button and we're gonna go into the settings. This is for the antivirus. Just make this a little bit smaller. I'm gonna minimize
4:19
this for now. So in here we're gonna go to update and security at the bottom and
4:24
then I'm gonna select Windows security and we're gonna scroll down. We're gonna
4:31
select this. Virus and threat protection right over here. It opens up a new window
4:35
that's fine and here we're gonna go again to virus threat protection which
4:41
we already are actually located in and we want to now select
4:49
there we go. The virus and threat protection settings and then you can
4:54
select manage settings. Now I have two different ways of disabling this so
5:00
I have it right here so real-time protection is off though this does come
5:04
up with like this pop-up a notification pop-up that shows up right here and if
5:09
you click on it it will automatically re-enable your your firewall. So the
5:17
better option the one that I personally like is by scrolling down and you'll
5:21
find exclusions right here and you can select add or remove exclusions and I
5:28
have added the downloads folder to exclusion so anything that I download
5:32
through the browser automatically goes to this folder downloads folder and Windows has no business mingling around with this folder and changing anything
5:40
in it so even if I download a straight-up viruses Windows actually
5:44
won't be able to do anything about it. Now I am aware of what I'm downloading I
5:50
try to stay away from sketchy things so that's fine for me but if you're not
5:57
like you know PC whiz or something I would probably recommend if you're gonna
6:03
go this route which is a little bit better to remove the downloads a folder
6:08
from here later on just for the safety obviously. So now that that's said with
6:17
those settings we can now download these files without Windows actually removing
6:23
them. Now before I start downloading them I'm gonna just make sure that I don't have them in here which I probably do and there we go it's now completely gone
6:36
come on okay so I'm gonna open this up in a new tab and this in a new tab I'm
6:46
gonna select download download and we're good to go so now let's go to our
6:54
downloads folder because that's where it downloaded for me and we're gonna
6:59
extract both of them so one and two obviously you need a winrar for this it
7:06
looks like I already have this right over here so I mean just get rid of
7:14
that and extract it there we go so now I'm running exactly the same same drivers
7:27
and same software as you will be so yeah now from here we're gonna start off with
7:34
the MTK drivers auto install and there's two versions the 64 or 86 now if you
7:42
don't know which one you're supposed to pick basically the general consensus is
7:46
you pick 86 if you have I believe below or up to 8 gigabytes of RAM and anything
7:55
below 8 if you have over 8 so for instance like 16 you go for the x64 I
8:03
believe it actually could be even up to well 4 gigabytes that this goes and 8 8
8:09
and 16 already falls under this I don't exactly remember but if you don't have
8:15
enough RAM which you can check by clicking right clicking on your start
8:19
and selecting system it will then display how much RAM you have right over
8:24
here so if you have below the required amount and you try to install the x64
8:30
Windows will not allow you to it it just won't work so it will tell you that this
8:35
isn't like supported for your computer so obviously you're gonna select the other one the x86 so I'm gonna install them although it might give me this
8:48
pop-up because the drivers are already installed so for me it's giving me now the modify repair or remove so I don't want to do any of those because the
8:56
drivers already installed I'm not gonna modify repair or remove something's gonna cancel this actually but obviously it only pops this window up if the drivers
9:05
are installed already so that's number one number two is what I recommend doing
9:13
now because that will be more of a recommendation just to have a clear idea
9:18
how it's if it's working or not we're gonna right click on our start we're
9:22
gonna go to device manager give it a second and then simply plug in your
9:28
device now the reason we're doing this is because in here it's either gonna
9:36
show up as an MTP or something like that device for some reason probably move
9:44
this as you can see pops me up with these TCL 408 I'm not sure why it's
9:48
disappearing constantly this could be the cable it's not actually connecting
9:58
to it right now so that's obviously not what we need now while it's doing
10:04
whatever it's doing I'm actually gonna check out if the program can see it because that could be a problem that I need to solve so anyway I'm gonna go
10:11
back in my downloads folder go to the MediaTek universal tool and we're gonna
10:17
simply run it right here MediaTek universal tool I recommend running it as
10:20
admin I'm gonna unplug it so now when I plug it in it's not gonna show up okay
10:35
so it looks like I need to troubleshoot something I'm gonna try to figure it out I believe it might be just problem of a cable so I'm gonna go find a new cable
10:43
and then resume the recording okay so using a different cable did solve my
10:52
problem and just to demonstrate this I'm just gonna plug it in it connects stays
11:00
connected and there's no problem it doesn't like continuously tries to reconnect so with that being said you can also find it under the device
11:08
manager and if it's visible under portable devices as well the name of the
11:13
device that's great I believe how it's supposed to be if it shows up under
11:18
like comport I believe it is then you want to select that because there will
11:23
be most likely only a single device showing up when you plug it in if you
11:27
unplug it and the comport disappears obviously that's your phone so when you
11:31
see this comport whatever shows up under there I right-click on it select
11:35
properties then go to drivers and you want to disable drivers and then once
11:43
you disable the drivers you will then want to go back to the other ones that
11:48
we downloaded the MTK drivers right over here and reinstall them now the reason
11:54
we would need to do this just to explain this so there is some kind of logic to
11:58
this is what happens is when you install them Windows has priority over their own
12:05
drivers so if you plug it in it sometimes will download the drivers itself even though it already has functional drivers and they are well
12:13
let's not kid ourselves shit so they will just not work for us they're not
12:18
what we need so that's why you want to disable it and obviously if it appears
12:23
as comport instead of the device that that's no bueno that's not how it's supposed to look like so just disable it and then reinstall these drivers to
12:31
basically force it so the drivers that we have are the primary ones now with
12:37
that being said I can now move over to the next step so that is minimize this
12:45
close this that's running the program so that is that is this one the MediaTek
12:52
universal tool and it's this exe right over here now like I mentioned before
12:58
run it as admin now from here once you plug it in you will then select tools
13:04
drivers and again select the drivers that you want to utilize so I'm gonna be
13:08
using the x64 now I believe before we do this we might need to be in test mode on
13:17
Windows which is as you can see right over here different mode but I don't see
13:22
an option to boot us into it from here so I'm gonna check on our website if that is required
13:42
nope it looks like that that's actually not required okay so from here like I
13:49
mentioned we're gonna install the drivers now it might force us to reboot
13:53
the device I was just gonna close the program I believe so yeah now we're
14:00
gonna select the tools drivers I'm selecting x64 but if you have like 4
14:06
gigs of RAM select the x86 it's gonna install it and now next thing that we
14:17
need to do is reopen the program if it closed it I'll select erase FRP and
14:23
select start so I'll select erase FRP phone is plugged and start
14:37
okay so we need to turn off the device and hold a volume up volume down and
14:49
then insert the USB cable so let's unplug it and turn it off let's give it
14:58
a second now when it's off volume up a volume down and plug it in now you do
15:09
want to wait for that vibration there is a vibration on a device once it's fully off so wait for that I'm gonna hold both of these volume buttons plug it in it
15:21
automatically appear on here so you can let go of this keys let progress
15:28
completed and now all we need to do is I believe just simply wait for the
15:33
device to turn back on I'm gonna press power button just in case there we go I
15:46
don't know why I didn't want to turn on the first time around I just gave it a little bit of time maybe it was still doing something in the background but as
15:52
you've seen once we unplug it or once I unplugged it and then give it like a
15:57
minute holding it turns on the device but it's gonna be turning on for a
16:01
little bit longer than we might be used to because it is right now going through
16:05
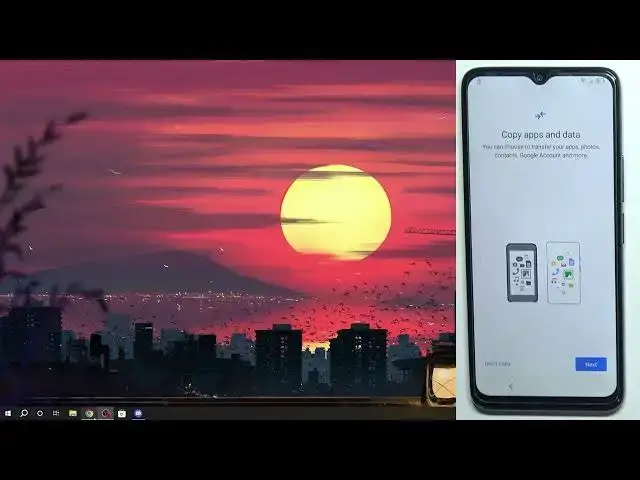
a reset basically if I remember correctly we will see now as you can see it's now telling me to simply sign in to the Google account
16:24
which I can skip skip there we go and I can now finish up the setup now all this
16:39
is still processing I'm just gonna quickly finish this off so I showing
16:45
this bypass hopefully worked for you I tried to focus on every every portion of
16:53
this that could have gone wrong because in most circumstances not everything
16:58
will go as smoothly as it did for me so hopefully I did touch upon everything
17:04
that I that I know that could go wrong I might have missed something hopefully if
17:09
for for you it's failing at some other point I can hopefully troubleshoot the
17:16
process the program and everything works fine for this it's that's not really the
17:22
problem so much mainly if you have any kind of problem that you encounter it
17:27
will be to do with Windows and drivers so if you're struggling with something
17:32
along those lines if whatever I showed you didn't work for you just try to
17:36
mingle with the drivers and like device managers and installing the ones that I
17:41
gave you and hopefully that will solve your problem but anyway with that being
17:46
said as you can see in a second we will have our home screen right there and the
17:52
bypass worked no problem the phone is now fully unlocked and there you go and
17:57
there's one more thing that I could recommend doing just to be like
18:00
absolutely certain that the device is unlocked and that's going into these
18:04
settings and performing a factory reset of the device so to do so you just scroll all the way down to system and select reset erase all data and then
18:13
erase all data twice and this will perform a factory reset of your device and the reason I would recommend this is because if there is still some kind of
18:21
leftover from the old like protection performing this kind of reset will
18:26
remove it so that's why I recommend doing it but anyway that being said
18:31
hopefully you found this video helpful informative if you did it don't forget don't forget to hit that like button subscribe and thanks for watching
#Computer Security
#Software
#Online Communities