Up next in 10

How to Skip Google Lock on SAMSUNG Galaxy Xcover 6 Pro | Bypass Google Account Verification
Mar 30, 2024
SAMSUNG Galaxy Xcover 6 Pro Remove Factory Reset Protection:
https://www.hardreset.info/devices/samsung/samsung-galaxy-xcover-6-pro/tutorials/
In this video, you can find the way to remove factory reset protection on SAMSUNG Galaxy Xcover 6 Pro. Let's follow our steps and skip Google account verification on SAMSUNG Galaxy Xcover 6 Pro. If you forgot the Google password, the only way to activate SAMSUNG Galaxy Xcover 6 Pro is by unlocking FRP.
How to remove factory reset protection on SAMSUNG Galaxy Xcover 6 Pro? How to bypass screen lock on SAMSUNG Galaxy Xcover 6 Pro? How to unlock FRP on SAMSUNG Galaxy Xcover 6 Pro? How to activate SAMSUNG Galaxy Xcover 6 Pro without a Google account? How to skip Google lock on SAMSUNG Galaxy Xcover 6 Pro?
#RealmeUnlock #BypassGoogleVerification #RemoveFRP
Follow us on Instagram ► https://www.instagram.com/hardreset.info
Like us on Facebook ► https://www.facebook.com/hardresetinfo/
Tweet us on Twitter ► https://twitter.com/HardResetI
Support us on TikTok ► https://www.tiktok.com/@hardreset.info
Use Reset Guides for many popular Apps ► https://www.hardreset.info/apps/apps/
Show More Show Less View Video Transcript
0:00
Welcome, and from I'm using a Samsung Galaxy X-Cover Pro
0:03
and today I'll show you how to bypass the Google verification on this device. Now for this process, we'll need several different things that might be a little bit hard to come by
0:16
As an example, one of those would be a phone. Now that needs to be another Samsung device
0:22
So I do have a, what is it, A72, but it can be basically any kind of Samsung device with one UI
0:30
And the reason we need that Samsung device, it is literally required
0:34
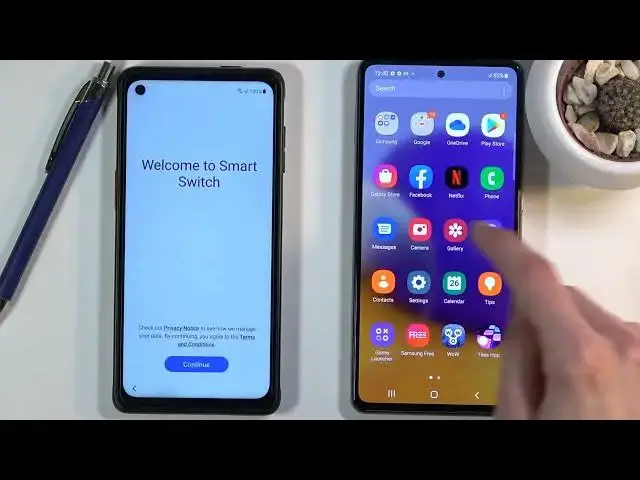
is because Samsung devices come with an application called Smart Switch. And this application is only accessible on the Samsung devices
0:42
Without it, this process won't work. So basically what we use it for is on the other Samsung device, which for me, like I said, it's the 72A
0:52
It needs to be unlocked, and all you do is basically add a Google account to it in the settings
0:57
So let's just quickly check if I have one here. accounts and backup, my accounts, and yep, there it is
1:03
So you can see I do have an account added right here. And what we will do is use Smart Switch to move that account over to this
1:10
luck device overriding the old account that is blocking us. So let's get to it
1:15
Now, I should also mention that we need a couple additional things for actually progressing further
1:20
So for this process, I'm going to be using a Type C to Type C cable so I can connect the two devices together
1:27
So I can do the transfer. Now, it can be done over Wi-Fi
1:31
There is an option to do it over Wi-Fi, but it's just going to be a slower process
1:36
So this one I'm going to be using the Type C to Type C. Now, if you have any newer Samsung device
1:41
this cable comes in a box, so we can use it as well if you have anything newer
1:47
And additionally, we will need just a normal Type C to Type 8
1:50
so you can connect it to your computer and obviously the computer. So now that we know everything that you actually need for this process
1:57
let's jump to the computer side where we can actually begin it, well begin the process
2:02
So moving over. Okay, so as you can see, now that we're done with the computer side, hopefully unlike me, you didn't get a blue screen with that crappy software
2:26
But yeah, life is life, so my computer is right now in blue screen mode
2:31
Awesome. But anyway, it still worked. So as you can see, there is the pop-up, which is what we are required to
2:38
Oh, no. Oh, I clicked off of the screen. And that basically closed it
2:45
Great. Give me a moment. Once my computer actually boots back up, I can try that again
2:50
Okay I should be getting the pop any moment And There we go
3:02
Okay, so let's progress through it again. Hopefully I don't get blue screen once more
3:07
So once you see this pop-up, click on the view button, and this will open up our web browser
3:12
And from here, let's just tap on the accept and continue. No thanks
3:18
and now I'm going to close the program. And now in the Chrome browser you want to tap right at the top
3:25
and navigate to harder reset that info slash bypass. There we go
3:31
If you need a moment, pause it. I'm going to otherwise progress further. And from here, stop consent, whatever
3:39
and choose the Galaxy Store. So once you top on it, we'll take you to the Samsung website
3:44
with a link to try now. As you can see right here, this will link us to the Galaxy Store
3:52
So from here, let's tap that top that you agree. And continue
3:58
And now we do need to update our Galaxy Store. So let's select it
4:04
Also, this is the time that we can actually unplug the cable because it's not actually needed anymore
4:10
And once the Galaxy Store has updated, it will take us back to the web browser
4:14
So from here, again, tap on Try Now. and this will relaunch Galaxy Store already updated
4:20
And now, let's stop on a search button, and what you want to choose
4:25
here is the Smart Switch Mobile. If you don't see this in the suggested list
4:30
simply type it in. From there, tap on the download link, this button that was right here
4:35
looking like this one, and this will initiate download. Now, while this is downloading
4:41
you could also get your other device right here and do the same thing. So, let me move this over
4:46
bring this up here and I'm gonna launch this here and and this device I'm just
4:53
gonna open up the LXE store right over here and also download I guess I'm
4:59
not gonna be downloading it just yet put in a password there we go just continue here
5:11
and allow and also right here on the LAC device let's choose that the luck device will be
5:16
receiving data from a Galaxy Android and it's going to be at least for me receiving it via
5:21
a cable there we go and I'm also going to get that cable and plug it in
5:28
there we go and on here I'm just kind of deal with the cable so it doesn't move around
5:36
and here let's try again there we go again we do need to also update this
5:46
Here we go so we relaunch it after it updated And let search for the Smart Switch app which should be again somewhere here right there
6:04
there we go. Again we do need to download it again. Or maybe not again, I'm downloading it for the first time on this device, which is the unlocked one
6:15
and again let's open it up continue allow and in here we're going to select that this device
6:23
will be sending data and it's going to be sending it over a USB cable and from here all
6:30
we need to do now is simply plug in the other cable and give it a moment it will bring up
6:37
this many right here once it connects together so again let's allow access and allow here as well
6:43
And what this device is doing right now, the locked one, it's reading all the data that is on the unlocked device
6:50
the data that it can transfer over to itself. And once it's finished, you will see all the things that we can transfer
6:57
So I would suggest you if the other Samsung device is something that you use on a daily basis
7:03
it's probably going to have a little bit more than 600 megabytes. So let's deselect all of this and then only choose the account
7:13
home screen and settings so the three different options right here settings home screen
7:18
and accounts that's all you need from there scroll down and select transfer and this
7:26
will prompt us with the question if we want to transfer over the account that is on
7:31
this device and that is a yes so let's stop on copy and now it will tell us that we
7:37
need to log in on the lacked device with the account now this account is the hard
7:43
that is logged in on this device. So it's right now telling us to log in, which I'm
7:49
going to obviously do right here. Sign in. And there we go. Once it signs in, it
8:00
automatically will begin moving over all the data. And once the process is finished
8:10
we can basically unplug the device. This one, get right. of it it's not needed anymore and then also unplug this one so I can move it to the middle
8:18
and let's click on go to the home screen and it won't actually take us to the home screen
8:23
it's going to take us back to the first page of setup but it doesn't really matter so from here
8:27
let's stop on start and go through the setup of our device and while you're doing this right now
8:33
i would recommend you just to skip everything that you can because at this moment it doesn't
8:37
really matter what we set up and also as you can see right here it gives us a message that account was added providing us with the account that was on this device Now just to show it completely I going to leave this go into these settings
8:53
and then accounts and backup accounts. And you can clearly see it's the same account
8:58
So this account got moved to this device. And right now it simply allows us to click on next
9:04
and basically bypass the verification part. Now while you're doing this right now, skipping all of this
9:14
and even though you're going to have access to a home screen
9:17
the device is still not fully unlocked so just keep that in mind
9:22
I'm going to show you in a second how to fully unlock it and there we go so we should
9:36
have access to home screen. There we go. So from here let's go into the settings
9:49
scroll down to general management, select reset, and then choose factory data reset, which will basically remove everything from the device that is
10:01
including our Google account. As you can see provided at the bottom, but it also
10:05
removes the other Google account that is still on this device. So let's select reset and delete
10:10
all and let the magic happen. So this unfortunately will take a couple minutes. It is a factory
10:17
data reset after all. So once it's finished we should be then back in the setup screen
10:23
but at that point the device will be fully unlocked so we can set it up as however you like
10:28
Now not further ado, I'm just going to let it run and come back once it's finished
10:35
And as you can see now the process finished so we can now set up our device as however you like
10:52
Now again I'm just going to simply go through it as quick as I can
10:58
So I'm going to skip majority of the things that I can but you can do whatever you want
11:04
And there we go
11:23
So, as you can see, the device is now fully unlocked. And if you found this very helpful, don't forget to hit like, subscribe, and thanks for watching