0:00
Welcome! In front of me I have Nokia 8000 4G and I'm gonna show you how to go
0:12
through the first setup on this device. As you can see first we need to select
0:16
the language. To do it you can use the keypad right here to move up and down
0:21
through the list of languages. Now let's find the language you like to use, select
0:25
it. In my case I'm gonna select English USA but you can select any language
0:29
you like. Then press the middle button on the keypad to select the language. Like
0:34
that. It should say current on the language that it's selected and once
0:39
you select the language press the right selection button right here. The one
0:43
in the top right corner of the keypad to go next. Right here we can select the
0:51
keyboard language. As you can see it automatically selected English USA but
0:55
you can unselect it by pressing the keypad if you want to, the middle button
0:59
of the keypad and you can find the different languages if you want by
1:05
scrolling down up and down through the list finding the language you like to
1:09
select and pressing the button in the middle of the keypad to select it. As you
1:14
can see you can also have multiple languages selected if you want to have
1:17
multiple languages of a keyboard on your phone. Like this. Once you're done press
1:25
the right selection button to continue. Here as you can see there is a warning message that we could, the phone may use
1:38
the data over the mobile network if you have any. Then now let's press the middle
1:45
button right here to confirm and as you can see now we can connect to Wi-Fi. You
1:51
can also skip this step by pressing the right selection button but I recommend
1:56
you to connect to one so let's find the network you want to connect to by using
2:01
the keypad again pressing up and down to scroll through the list of networks. I'm
2:05
gonna select this one and once you select the network press the middle button and now we need to enter the password. To do it use the keypad, rather
2:14
keyboard right here. With the numbers you can enter the password with this
2:19
keyboard. Give me a second I'm gonna enter mine. Okay and once you're done entering the password press the right selection
3:08
button to connect. As you can see now it says that it's connected to our network
3:17
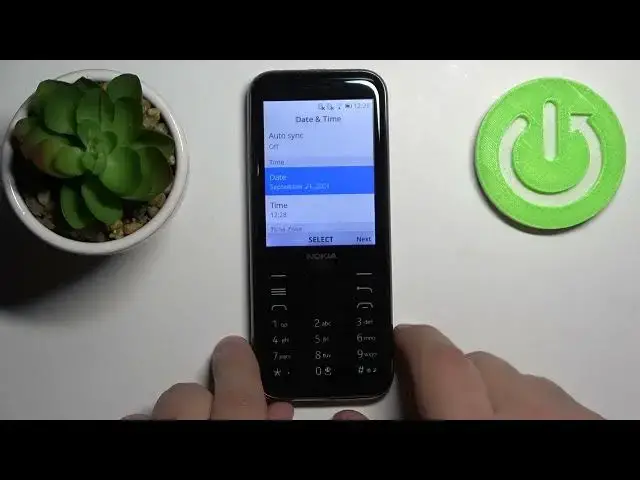
and we can press the right selection button to continue. Here we can set up
3:26
date and time settings. As you can see by default it's selected as auto sync. It's
3:31
gonna sync our time with the network we connected to, Wi-Fi for example. But if
3:36
you want to do it manually you can select auto sync option, press the middle
3:43
button on the keypad, scroll down to select yes and press the middle button
3:47
again to confirm. And now as you can see we can access the date and time settings
3:53
So let's scroll down by using the keypad, select date for example, select or rather
3:58
press the middle button to select it and here we can change the date. To do it use
4:03
the up and down buttons on the keypad to change the month as you can see. I'll
4:08
change it to for example October then press the right button on the keypad to
4:12
go to day. Now let's change the day. Next continue by pressing the right button
4:18
We should jump to the years or rather year. Select the year and once you're done
4:24
press the middle button on the keypad to confirm like this. Now let's scroll down
4:28
to time, select the time, again press the middle button and here we can change the
4:34
time. To do it simply use the up and down buttons like before and once you're done
4:39
press the right button to jump to minutes and once you're done press the
4:44
middle button like this. We can also change the time zone if you scroll down
4:50
To do it of course select it and press the middle button and here we
4:56
have the list of time zones we can select. Find the one you like to use for
4:59
example Santiago and then press the middle button to select it like this
5:05
We can scroll even more down and here we have also time format option. Basically
5:10
right here you can change the format of the time. You can have 12 hour format or
5:16
24 hour format. To do it press the middle or rather select the option called time
5:21
format, press the middle button to enter and here we can select the time format
5:26
by selecting it and pressing the middle button like this. And at the bottom we
5:32
have a home screen clock option and we have option called clock. Press the
5:40
middle button to enter and here we have two options show and hide. Basically if
5:45
your home screen is, I believe, this option allows you to hide or show the
5:51
clock on the home screen. That's what it does basically I think. And you can
5:55
select hide to hide it of course and show to show it. Once you're done press
6:01
next. Here you can allow the KOS to access your location data if you want
6:09
to or you can deny it of course if you want to. Press the left or right
6:15
selection button to allow or deny. I'm gonna deny it so I'm gonna press the
6:20
left one. Right here we have terms of use and we need to accept them. To do it
6:27
press the right selection button and as you can see here we have our phone. The
6:36
setup process is complete and we can use it normally. And that's how you go
6:42
through the first setup on this device. Thank you for watching. If you found this
6:46
video helpful please consider subscribing to our channel and leaving a like on the video