0:00
Welcome, here I've got Realme GT Neo 2 and let me show you how to use camera pro mode
0:11
at this device. So let's start by tapping on camera button to open it and for now we are on standard
0:17
photo mode so we have to change it by using this settings bar and just simply going to
0:21
right to more. Here we get access to more modes of this camera
0:25
One of them is pro call it also the next part so let's pick it
0:29
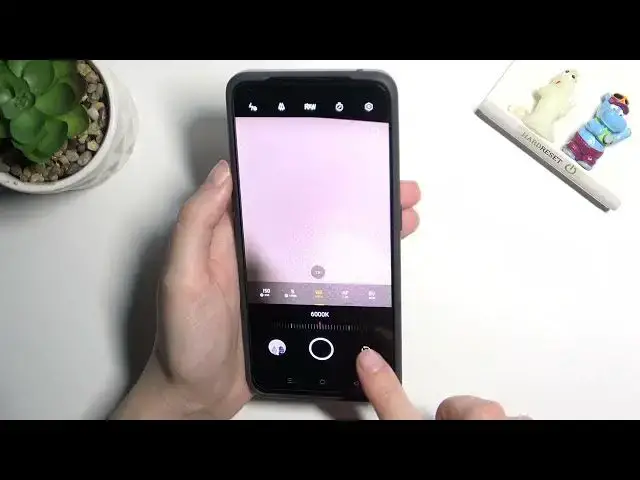
And here we are. This mode gives us possibilities to choose some shooting parameters by ourself
0:34
This is useful when we want to learn photographic skills or making experiments with photography
0:39
So let me start with this settings bar. Let's go from the right. The first one option here we can manage is exposure compensation so we can change the
0:47
light of our photo in kind of basic way by using this slider and going to the right we
0:52
can make it more bright. By going to the left we can make it more dark
0:57
We can of course go back to zero to the center to auto parameter
1:02
Now let's move to the next one option the focusing. We are on AF from autofocus by using this slider we can change it to MF from manual
1:10
one and adjust this as we need to our subject. To go back to autofocus we have to now simply tap on this A letter button from the right
1:20
Let's move to the center to white balance. Here we can change temperature of our picture in Kelvin degrees
1:27
So by going to the left we can make our photo more cold more blue
1:30
By going to the right we can make it more warm more orange
1:34
So this is kind of balance between this warm and cold tones of our photo
1:39
And to go back to auto white balance we have to tap again to A letter button from the right
1:45
The next one option here we can manage is shooter speed. So we can change the time of taking photo
1:51
We can make it shorter by going to the left from 1 and 8 thousandth of second
1:55
And this time is really really short. It should be better to objects for example in move with a good light to frozen them at
2:02
the picture. By going to the right we can go to longer times
2:07
The longest here is 32 seconds and it should be definitely better to objects that are stable
2:12
or if we want to have some blur at our picture we can go back easily to auto shooter speed
2:19
by tapping on A letter button from the right. And the last one parameter here is ISO
2:25
So we can change camera sensitivity to light now. We can make it less sensitive from 100 or more sensitive by going to right to 6 and
2:33
4 thousandth of it. So this is really wide spectrum like in pro camera
2:40
And of course to go back to auto ISO we have to tap on A letter button from the right
2:44
Now let's move up to this settings bar. I want to show you this second from the left button
2:50
Here we can manage the lenses of this camera from ultra wide to standard wide
2:57
And at the center we have also RAW format so just one tap to turn it on another tap
3:02
to turn it off. This is also really professional feature because we can save our pictures not only on JPEGs
3:09
but in RAW the format that is used by professional photographers to saving more details of the
3:15
pictures and post-producting them in graphic programs. Now let me keep it turned off and let's move to right side to this A letter button because
3:23
when we tap on it we get access to short tutorial. You can also read this and learn from it
3:30
I think this is useful. And now let me use all of these parameters to take a photo
3:34
Let me start with exposure compensation a little bit brighter. In focusing let's stay on auto
3:42
Warmer white balance. And the shooter speed maybe here. And the ISO right here
3:52
To see my photo let's move to left to the button that follows us straight to the gallery
3:56
So this is how it looks like. I suggest you making experiment with all of these settings
4:01
And just have a good fun. Thanks for watching, subscribe our channel and leave the thumbs up