0:00
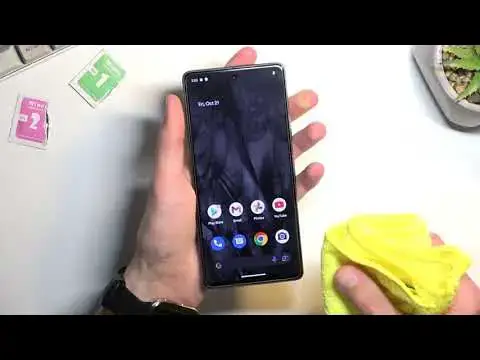
Welcome. In front of me I have the brand new Google Pixel 7 and today I'll show you how we can apply a temperate glass to this phone
0:12
Now I will be using a glass that is designed for the Huawei P 40 light but if I just kind of place it you can see that it fits perfectly
0:23
like absolutely perfectly. It's so perfect. You can see that it's so perfect. You can see that it's
0:30
just basically like for this phone the only probable difference that you that I might
0:35
have compared to your actual tempered glass is that for you it most likely will
0:41
have a cutout designed for the selfie camera kind of like for instance you have
0:46
one right here obviously as you can see there is no cutout on this kind of
0:50
glass but to be honest it won't really change that much the quality of the selfie camera so I don't really care now
0:59
anyway so apart from the glass with what you bought you will also have these
1:06
little things so wet and dry wipe now you can utilize those if you want but for
1:14
the most part they usually are garbage and they're just dry for the most part
1:18
this one is actually wet yep so this one is wet but you'll probably figure
1:24
out that using the wet pipes it creates smudges which again is not necessarily
1:29
something that you probably want on your display and additionally you can see
1:34
that the size of these wipes is just pitifully small come on like it so you
1:42
can see that the size it more mature using this rather than actual like addition Then you would have to use your little dry wipe which again is the same exact size
1:58
Now we go. Clean off your display. Then you start to see these kind of like weird smudges
2:14
visible on the camera but you can see it on the display so for this reason I do
2:20
myself prefer to use a micro fiber cloth for this so that's what I'm gonna be
2:24
just giving a quick little wipe with it if you have one then go right ahead
2:31
and use it it might be much easier to clean off your display using that rather
2:35
than these little wipes now moving on to the application of the glass itself
2:40
I'm gonna quickly describe how I apply my so hopefully this can give you a little bit of an insight on how we can do this so the way I number one start is by pinching
2:52
the display the temper glass like this and while pinching it I will then have a little bit of a feel of the bezels on the phone
3:01
So this will allow me to position it correctly from side to side so it's evenly spaced and I can then also
3:10
prepping it like or putting it down at an angle so So if I just flip the actual phone, you can see I'm doing it kind of like this
3:19
So this allows me to align it correctly at the top of the phone right here. So if you have a cutout, that's a good place to start
3:26
So align the cutout with the camera. And then make sure that it's also evenly spaced right here and right here
3:32
So on the top side of right and left And obviously pinching the screen and the actual bezels of the phone You want to start lowering it and feel the bezels
3:45
Once you feel that it's relatively in the middle, you can then drop it
3:49
and it should drop relatively like perfectly spaced out in a nice way
3:55
So if I were applying this right now, this would be just in an ideal place
4:02
So anyway, I'll lift this up. I'm gonna give the screen I pass because I did kind of smudge it up a little bit
4:12
when I was showing you this. So, I'm going to. There you. Okay
4:25
So right now it's pristine with no dust particles whatsoever. So on your temper glass you will find most likely just a one
4:34
peel that off once you peel that off that one throw it to the side and this
4:39
will leave you just with the tempered glass in your hand revealing the sticky
4:43
side on it and then all you want to do is obviously apply it
4:49
and there we go and as can see it's right now already starting to stick to the display
5:04
Perfect. Now sometimes it might happen that when you're applying it, it will create like an air bubble
5:14
Without anything under it, don't worry. If that happened to you, what you could do to solve it is either just like, kind of like smear it and push it out of the way
5:22
or if it doesn want to just kind of push out and it just disappears and then it comes back later on And just use your fingernail lift it up a little bit So just kind of showing this off I not going to fully lift it up obviously
5:36
But as I can see, you can lift it up until you uncover the bubble and then try to push it down yourself
5:43
So it just kind of gets rid of it. So kind of like this one, you could just push it out and there we go
5:54
So as I said, this one actually didn't get pushed out. You can see that it creates this weird thing under the display
6:01
So it's still there, it just smooth compressed. You can lift it up and hopefully then put it back down and it should completely remove it from there
6:13
Now if you have any kind of weirdness on the glass itself, so you see some kind of like dots on it, don't worry, this is just some kind of solution that they use when I assume they're cutting the actual tempered glass
6:23
to shape. So get some wet wipe, for instance, like the one that you got. Clean it off
6:31
using it. And once you wipe it down, it should be all just perfectly clean. This one still has
6:38
just some kind of like dots right here. Let's try to clean it a little bit more. As you can
6:47
see, it's almost gone. But yeah, obviously with a little bit wiping, you can get rid of it
6:53
So you can see, at least for this phone, it's applied perfectly, and obviously the screen
6:59
still works and everything is now nicely protected. So with that being said, if you found this very helpful, don't forget to hit like, subscribe
7:07
and thanks for watching