0:00
Here I have Sony Xperia XZ2 and let me show you how to insert here the nano-cement micro-SD card
0:11
So at the very beginning let's start by pressing the power key, choose power off and wait until
0:15
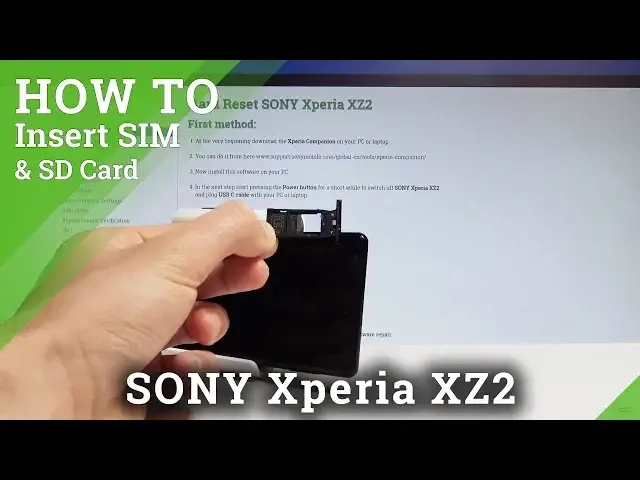
your device will be completely switched off. So afterwards let's find the slot
0:20
The slot is located at the top of the device right here. Let's open this slot by using your nail finger
0:26
Let's remove the whole tray. As you can see here you've got the tray that you can use and here you can insert the nano-SIM
0:36
and micro-SD card. In the following slot you may also use the second nano-SIM card, let me show you
0:41
Let's just put your card in that position and you can use this slot for the nano-SIM card
0:47
But if you would like to use the external storage you have to use it for the micro-SD
0:52
Here I have such a card with the characteristic edge right here
0:56
Let's put the micro-SD card in that position and let me use the second slot for the nano-SIM card
1:03
This is the nano-SIM card with the characteristic edge right here and this is the properly prepared tray
1:11
So now let's put the whole thing in that position and let's press it to the end
1:21
That's it. Now all you have to do is simply press power key to switch on the Sony Xperia XZ
1:29
The Sony Xperia XZ2 is switching on. Let me just check if both cards works properly on that device
1:40
So unlock the screen, tap apps icon, find and select the settings
1:44
Here you need to choose network and internet, let's choose dual-SIM and as you can see the
1:48
device is reading our first SIM. So now let's go back to the list of settings, scroll down, choose storage and as you can
1:56
see the phone is reading some kind of the portable storage, so our SD card
2:01
So it means that both cards works properly. Thank you for watching, please subscribe our channel, leave thumbs up under the video