0:01
In front of me is a realme GT Neo 2 and today I'll show you how to go through the setup
0:13
of this phone when you first get it. So when you boot it up you will be presented with this screen right over here where you
0:19
get to select your desired language. I'll be sticking with English but obviously you can choose any kind of other language
0:23
from here. Let's go to the next page which is choosing a region
0:28
On the next page we have realme smartphone user agreement. So just user agreement
0:34
Obviously no phone can go without those. It's quite annoying to be honest
0:38
You do have to select the box right here otherwise you literally cannot finish the setup nor
0:43
can you use the device without this. I do have some more terms of service because why the hell not
0:50
Though the only one that you actually need to select is the first one
0:54
Rest of them are optional. So that's what I'm going to stick with
0:58
And this will bring us to the WiFi connection. So in here obviously connect to WiFi if you want to
1:03
If you don't you can simply skip this. And if you also skip inserting a SIM card you will lose the ability to log into your
1:08
Google account and additionally date and time won't be set automatically. Though both of those things can be changed later on once the setup has been finished
1:16
and all you need to do is go into the settings and change it in there
1:21
Now next thing you should see is the Google services. So we have location scanning and sending user and diagnostic data
1:28
Now I'm going to just really quickly touch upon those. So location is GPS tracking
1:33
Then we have scanning allows the device to look for signals like WiFi and Bluetooth
1:38
Then below that we have send user and diagnostic data which allows Google to spy on you
1:42
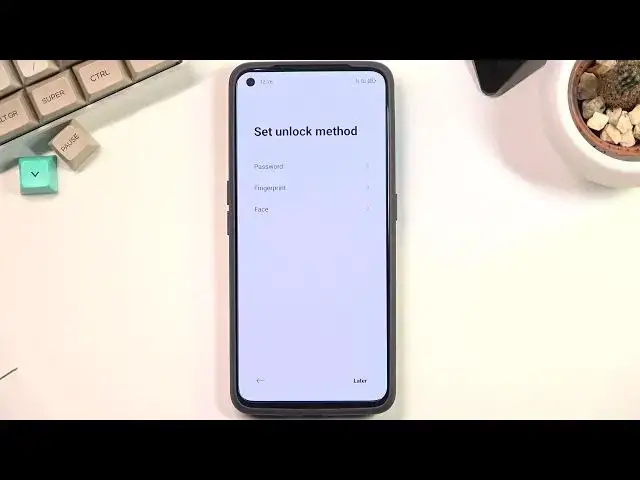
Going to the next page. This will allow us to set up a screen lock to our device
1:49
So there is multiple ways you can protect your phone. That would be between PIN, pattern, password, face recognition and fingerprint
1:56
Though real me is that apparently does not know how translation works so in both of the
2:03
cases if you tap on password it opts into a PIN because why the hell not again
2:10
Translation is basically lost here. So we also change the user different password type which just honestly bugs the living hell
2:24
out of me. I ain't a English savant here but I know enough to be basically triggered by this
2:33
So in here we have the actual pattern. Then we have a four digit PIN
2:41
Fix it for your real me. You can go and change it in your software
2:46
Then we have 4 to 16 digit PIN real me. Then we actually have the only option that does work with the word password because it's alphabetical
2:59
And yeah. So choose whichever one you want. I'll be going with the pattern right here
3:04
I'm going to draw the pattern and repeat it and this will now set it up automatically
3:09
Now because I only chose the screen lock right here it didn't prompt me to set up any kind
3:14
of other things like fingerprint or face recognition but if you chose to go with one
3:19
of those like fingerprint or face recognition it will automatically prompt you to set up
3:23
a screen lock and then it will allow you to set up the fingerprint or face recognition
3:30
Now here we have some recommended. Auto update overnight. If you want it enable it
3:35
If you don't then just go to the next page import data and this will allow you to move
3:40
over all your data from an older device to this one. This does use their application which you will need to download on the older device
3:47
and there simply follow the instructions that will be displayed in that app
3:54
And from here you basically finish up the setup. So let's select get started and there is our home screen
4:00
So anyway this is how you could go through the setup of this phone and if you found this
4:05
video helpful don't forget to hit like, subscribe and thanks for watching