0:00
Hi, in front of me I have Samsung Galaxy Tab A7 and I'm gonna show you how to enable the
0:11
Do Not Disturb mode on this device. First let's open the quick panel
0:15
To do it, swipe down from the top of the screen twice, like this, and here we have Do Not
0:20
Disturb mode icon and to enable the mode simply tap on the icon, right here, and to disable
0:27
it, tap on the icon again. You can also press and hold on this icon to go to the Do Not Disturb mode settings
0:34
Here we have Turn On Now option and if you enable it by tapping the slider, you basically
0:39
turn on the Do Not Disturb mode and if you disable it, you turn off the Do Not Disturb mode
0:46
Below we have Turn On As Scheduled option, you can tap on it and here we can set up schedules
0:51
for our Do Not Disturb mode. As you can see, there is a pre-existing one
0:56
We can enable it by tapping the slider, like this, or disable it
1:01
We can also tap on the schedule itself to edit it. Here we can tap to change the name
1:11
Below we can select the days on which it's gonna be active, like this, or unselect them
1:18
Then we can tap on Start Time to set the time on which it's gonna be turning on and here
1:23
we can set hours, then minutes, and at the end, PM and AM
1:29
Then tap Done. Let's do the same for End Time, basically the hour on which it's gonna be turning off
1:37
So set hours, minutes, AM and PM, then tap Done. And once you're done your editing, tap Save to save your settings
1:50
You can also add your own schedule. To do it, simply tap the plus button and here edit the settings as we did before
2:00
So let's enter the name, select the days or unselect them, then tap Start Time, set the
2:09
time, end time, then tap Save to save it
2:21
And of course you can enable it and disable it right here
2:26
You can also remove the schedules from this list. To do it, tap on the More Options icon right here, in the top right corner, select Remove
2:38
Select the schedule you want to remove and then tap Remove button right here
2:41
Okay, let's go back to the Do Not Disturb Mode settings. And below Schedules we have Duration
2:48
Let's tap on it. And here we can select the duration for our Do Not Disturb Mode
2:55
First option is Until I turn it off. Below we have 1 hour and if you select 1 hour, you can tap on plus button to add more hours
3:03
or minus button to subtract them. And then at the bottom we have Ask Every Time option
3:10
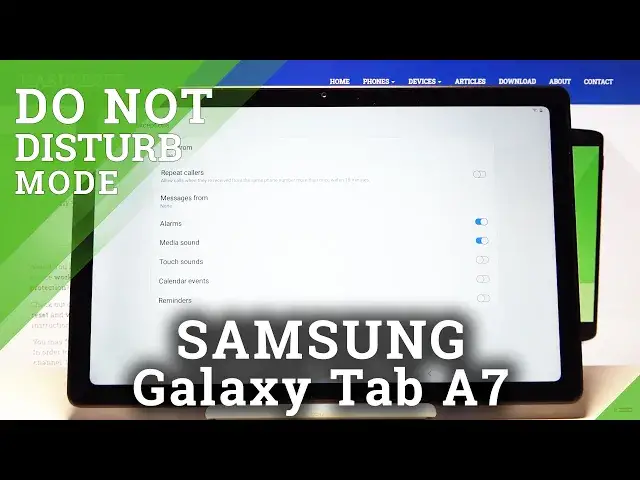
Okay, select what you like and tap OK. Below we have Hide Notifications and here you can choose which notifications are going
3:22
to be enabled or disabled when the Do Not Disturb Mode is turned on
3:26
You can enable them separately like that or you can just tap on Hide All to enable it
3:33
or disable it like that. Okay, and at the bottom we have Allow Exceptions
3:40
Here we can tap on Calls and select from whom we're going to get the notification when the
3:47
Do Not Disturb Mode is turned on and you can select All Contacts Only, Favorite Contacts
3:53
Only or None. Below we have Repeat Callers option. This option, basically what it does is if somebody calls you more than once within a
4:02
15 minutes period, some notification will go through when the Do Not Disturb Mode is enabled
4:08
And you can enable it or disable it right here. Below we have Messages and it's the same option as for Calls
4:18
And right here we have Alarms, Media Sounds, Touch Sounds, Calendar Events and Reminders
4:22
and you can enable or disable them all. Okay, and that's how you enable the Do Not Disturb Mode on this device
4:32
Thank you for watching. If you found this video helpful, please consider subscribing to our channel and leaving a like