0:00
Welcome, I'm Filomena Zaidagi S80 and today I'll show you how to go through the setup
0:10
process of this device. So when you buy it for the first time, you'll be presented with the language setup or settings
0:18
so choose your desired language. Now I'll be sticking with English, so here we go
0:23
And from there select start. Now on the next page you can insert a SIM card
0:28
Now this step is completely optional and you don't actually have to do it. The reason why it asks you to insert one is because you can connect or later on connect
0:37
to your Google account, assuming you're connected to some kind of mobile network or WiFi, so
0:43
just a general internet access. But assuming you don't have any kind of access you can skip both of them if you don't want
0:52
to and the downside is also your date and time won't be set automatically, so you might
0:57
need to fix it up later on. So I'm going to skip both of those and there we go, there's the date and time, which actually
1:06
is correct for me. So I'm just going to select next, which brings me to the name
1:11
Now this field right here can be filled in whatever way you want. You can type in anything here and you can also leave it empty
1:17
If you do so, the device will basically name itself by the name of itself, so that would
1:22
be Dodgy S80 or something along those lines. And if you write your name or whatever name, something in here, this will substitute basically
1:32
every field where, for instance, you try to connect your device through Bluetooth or something
1:38
like it, when the other Bluetooth device can't see yours, usually you see some kind of name
1:44
like Dodgy S80 in this case. If you write something like Smith in here, instead of the Dodgy, you will see Smith
1:54
Same goes for hotspot. The hotspot will be named whatever is here
2:00
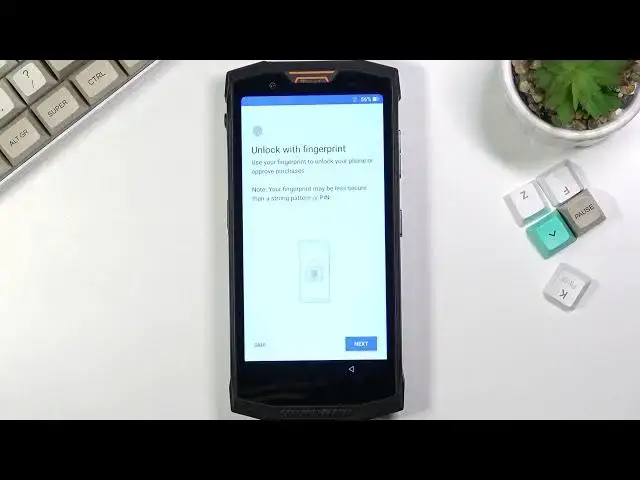
So let's go to next page, which brings us to fingerprint setup
2:04
Now you can set it up if you want to or you can skip it. If you also want to just set up, as an example, screen lock, so pin pattern or password, but
2:11
not the fingerprint, what you can do is select next and choose, as an example, pattern
2:18
Right here, before we can actually add one, it asks us if we want to use secure startup
2:21
meaning that when you're turning on the device, before the device boots up fully, it will
2:27
be locked and you need to put your pin pattern or password
2:31
Once you do so, the device will fully boot into Android and then you need to basically
2:36
do the pin pattern or password once more to actually unlock the device
2:41
I will be setting this to no because I just don't like it
2:46
From here, we can draw our pattern. Next, redraw the same pattern and confirm
2:51
That sets up our pattern. Here we can simply select skip if you don't want to set up a fingerprint, which I don't
3:01
Here we have Google services. So we have location, scanning and sending user and diagnostic data
3:08
We can tap on this arrow right here to expand the list of explanations of what this function
3:13
actually does. At the end of the day, if you don't like it, disable it like so and scroll all the way
3:19
down and select agree. Anything else, control info and lock screen, so I'm just going to select no thanks
3:29
Which brings me to wireless updates. I have read the privacy policy and I have read the consent form, so we do have to select
3:37
both of them. And this finishes up the setup. So if you found this very helpful, don't forget to hit like, subscribe and thanks for watching