Up next in 10

Learn more about the VIVO T1 Pro 5G: https://www.hardreset.info/devices/vivo/vivo-t1-pro-5g/tutorials/
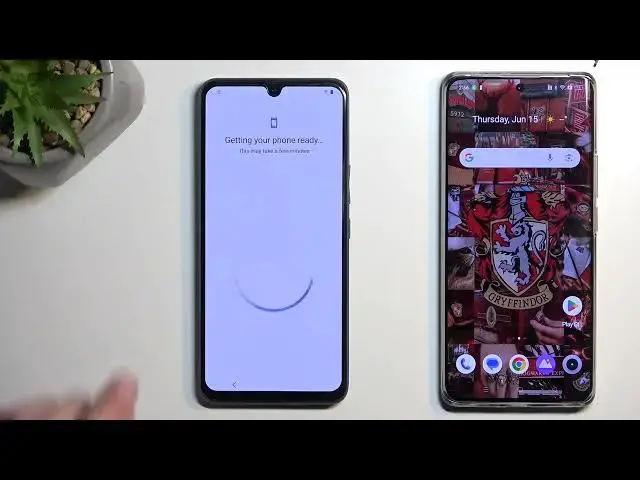
In this insanely comprehensive step by step video tutorial, we are going to demonstrate how you can turn off and bypass the built int Google factory reset protection on a VIVO T1 Pro 5G smartphone. Therefore, if you have encountered Google verification while trying to perform an initial system setup of a VIVO T1 Pro 5G mobile device, we are gladly encouraging you to view this video tutorial. Thanks for watching and please enjoy!
How to bypass the factory reset protection on a VIVO T1 Pro 5G? How to turn off the Google verification during setup on a VIVO T1 Pro 5G? How to disable the Google FRP protection on VIVO T1 Pro 5G?
#VIVOT1Pro5G #FRP #VIVOSecurity
Follow us on Instagram ► https://www.instagram.com/hardreset.info
Like us on Facebook ►
https://www.facebook.com/hardresetinfo/
Tweet us on Twitter ► https://twitter.com/HardResetI
Support us on TikTok ► https://www.tiktok.com/@hardreset.info
Use Reset Guides for many popular Apps ► https://www.hardreset.info/apps/apps/
Show More Show Less View Video Transcript
0:00
Welcome. Infoomone is a Vivo T1 Pro
0:05
And today I will show you how can bypass the Google verification on this phone
0:13
Now to get started, I'm just going to quickly mention that you can see that this phone right here is locked
0:17
So I could use the pattern to unlock it or the Google account, but obviously we're assuming that we don't know either of those
0:24
So for this, we will need another device, unfortunately. that's kind of how the bypass will go
0:30
so we just need another Android device that is not locked so one that we can
0:35
actually use it needs to have a play store and that's it
0:39
and another thing that we'll need as a SIM card that will have
0:44
some kind of pin set on it and now if you have a
0:48
SIM card without a pin just put it into for instance this device
0:53
whatever is your unlocked device and go to the settings and set up a pin
0:59
And obviously if you have one already, then that's great. And the last thing that we'll need is internet connection
1:05
So just to show you, I am already connected right over here
1:09
So there we go. So from here we can now start. So what we're going to do is going to insert our SIM card
1:24
There we go. Give it a second and there we go
1:35
So instead of putting the pin for our SIM card, what we will do now is simply remove it
1:43
There we go. So you can see when it's removed it stays on the lock screen
1:51
And what you want to do right now is there is barely visible, there we go, we can now see it
1:58
dialer option so you want to grab it drag it to the top and it opens up our
2:04
dialer in here just type in any kind of random numbers and then select send message
2:13
keep in mind we don't have a SIM card even in the device now in the text message you
2:18
want to type in www. youtube.com now crucial part make sure
2:27
you add the extension WWW. If you don't, then this will kind of
2:32
break the process and you'll need to reset the device and start from the beginning
2:39
Now the reason that happens is when you don't add the extension at the beginning on WWW
2:44
it opens up YouTube in a pop-up view. So in this kind of like a small little window
2:49
which won't give us access to all the settings that we need
2:54
But with this extension, it will open up YouTube in a fully
2:58
application view. So anyway, we're going to now select send. This will then give you this pop-up right here
3:04
top to load preview, so tap on it. And then click on the YouTube image
3:09
As you can see, it opens up YouTube in its own application. Now in here, we're going to select our account icon
3:19
settings, about, Google Privacy Policy, accept and continue use without an account I guess
3:34
whatever that was that was a new thing that I never seen but anyway so as you can see you can use without account
3:40
now in here we're going to click on the search bar and we're going to navigate too hard reset that info
3:45
slash bypass So like this if you need a moment I do pause the video I going to select consent and we going to scroll down to settings
4:09
Click on it. Navigate all the way down to, I believe it was system, yep, system, and then select phone clone
4:22
check the box right here and select agree and then select that this is new the new phone
4:30
then the other one is an android I'm gonna select got it while using the app
4:39
so we do need to agree to basically everything and from there you can see it opens up our camera
4:46
and we're gonna now move over to our other device One thing to keep in mind, make sure obviously that you're logged into a Google account in here
4:58
just to kind of showcase this. I go to user and accounts and Google
5:03
And I have two different Google accounts in here, as you can see, this one and this one
5:07
So just to kind of point this out, this will matter later on
5:12
because we will be signing in with one of these Google accounts
5:17
I believe I'm going to be using this one. You will see the other setup process
5:21
but obviously you need a Google account also to use the Google Play Store
5:26
So now let's open it up. And in the search bar, you're looking for Activity Launcher
5:36
So there we go. It shows up as a suggested one. We're going to click on it. And we're going to..
5:42
Oh, it's already installed. So I don't need to do anything. But obviously we want to select the install button that will be visible right here
5:48
Once you install it, we can move over to the next application, which is easy share
5:55
Easy share, there we go. Which I also have that installed. When you're looking for this, just make sure that you download the one from Vivo
6:05
Once you do, select Open. Now, I will do one thing, actually
6:10
I'm going to click on it and uninstall it. I want to do this just so you can see all the different pop-ups that we will get
6:18
when accessing this application because it is a data transfer application so it needs access to
6:26
a lot of different things so let's do this right now again we're going to agree right here
6:31
I'm going to swipe to the left and select start select phone clone
6:39
old phone start now can I toggle that on go back again old phone
6:49
got it and then agree to everything that it pops up with
6:53
it will then bring up the QR code for us to scan so we're going to
6:57
grab our locked device and we're just going to point this at the QR code
7:02
like this and the two devices will now begin connecting once they do
7:11
it will give us a couple more things to agree to so set now here we're looking forward
7:17
the easy share application as you can see it's right here and click on it toggle it on go back and go back once more got it allow allow allow now as
7:34
can see it will select everyone of this field so what you want to do is
7:39
deselect all of them then click on the apps but not the checkmark just the
7:45
apps itself so right here and then you want to check only one application which is the Activity Launcher
7:51
Select OK and then start phone clone As you can see this goes really quickly so here we can select done
8:03
and we'll finish with this device or well actually not yet I mean actually keep it in here because we'll need it for one last thing
8:13
so here we're going to select start using your new phone then we're going to click on this icon right here in a corner
8:20
and like a clock icon I'm going to select apps and select open
8:26
the activity launcher okay now here we're looking for Android
8:38
setup so it is right here you want to click on it
8:43
as we'll drop down every activity that is associated with the Android setup and you're looking for
8:48
one that has no gear icon next to it so this one right over here click on it and here
9:01
and here we will now select I'm quickly check so yeah we're gonna select
9:20
right here skip then we'll have this thing so let's copy your data it will be copying from i presume this
9:36
device but whatever we're going to select next and then we're going to select next again no cable
9:50
and select next again
10:00
Use my Google account instead
10:11
It tells us to open the Google app on your phone but it will pop up with this thing, so interact
10:15
with it. in a moment. As you can see, it just shows us if these things match, so we're going to select
10:24
next. Copy your new device. Select copy. And as you can see, it tells us to sign in or verify that
10:37
it's you, which tells us to verify this for test only one, which was one of the Google accounts
10:46
that was present on this device. So it basically moved this account over. to here. What it wants me to do, just to clarify this, is it's basically trying to verify that
10:57
this device is mine and I need to basically affirm this by signing into the account that is on
11:06
this device because I'm copying data from this phone to this one, which will also include
11:10
the said account that is listed right here, which we need because that will replace the old
11:17
account and allow us to finish up the setup. So I'm just going to quickly sign in
11:22
with this email or with this password right here. Okay, let's select next
11:41
Now I only want one, I don't even know what the password for this one is, so I'm going to
11:46
select skip hopefully that will work now we have the don copy option right here but I just going to wait for it
12:10
I'm going to select don't copy. Don't copy. As you can see, it closed the Google thing on my other device
12:20
I'm going to lock it, move it out. It gives me couldn't copy, which is fine because I selected to not copy anything
12:27
So I'm going to select Next. And as you can see, it gives me the Google Services for test only one
12:37
which is the account that I have signed in to. You're going to select Skip
12:42
Now there might be a little bit wonkiness. So last time I did this, it brought me back to the beginning of the setup, which is fine
12:48
I'm going to select skip, skip, skip. and no thanks technically we are past the verification process and as you can see
12:58
it brings us back to the first page of the setup that's fine it's still the
13:03
process still worked so we're gonna see it right now so we're gonna select start next next I'm gonna select don't copy account added so it kept the account
13:18
that we have signed into on the device. So you can now select next
13:22
It will stay logged in, and we won't need to verify anything because it's now considering this account
13:27
as a legitimate account of this device. So it already thinks as though we have logged into our Google account
13:35
in a more typical manner. So from here we can finish up the setup
13:42
Now, at this moment, I recommend skipping most of these options. They don't really matter
13:48
right now because there is one last step that we will need to take once you finish up the
13:56
setup and you see your home screen you want to navigate into the settings
14:07
scroll all the way down to system reset options erase all data factory reset and as you can see this
14:15
tells us that it will erase everything that is listed right here which also includes the Google account
14:21
Now what it doesn't mention is that it's going to also remove things like the screen locks and other Google
14:26
accounts that aren't visible right here that were previously locking us, which
14:30
could still be present on this device somewhere like the files that you just don't have access to
14:36
So I recommend selecting the Erase All Data and going through the factory use of this device. As
14:42
I last measure, you don't really have anything on this device right now for this
14:46
to really matter, but it's the last step that will give you this piece of mind that everything from the old account
14:53
and screen locks is completely removed so it will fully unlock the device at that point
14:59
So that's where I recommend doing this as the last step. And just to kind of point out one little thing, when you finish up the setup with this or
15:07
set up with bypass like I did right now, you can see that we don't actually have the recent
15:11
end back button yet. So that's also another reason to do the reset
15:17
So then obviously finish up the factory reset when you go to the setup, everything will function normally
15:24
Like it's right now. Right now if I want to go back to home screen, I just need to start spamming the back button until I get there
15:31
But anyway, with that being said, this is how you'd go through the bypass of this device
15:38
And if you found this very helpful, then if you forget to hit that like button, subscribe, and thanks for watching
15:47
Thank you