Up next in 10

How to Bypass Google Verification on SAMSUNG Galaxy A52 - Skip Google Sign-in | Unlock FRP in 2021
Jul 14, 2024
Remove FRP on SAMSUNG Galaxy A52: https://www.hardreset.info/devices/samsung/samsung-galaxy-a52-5g/faq/bypass-google-verification/
In this video, you can find out the simple way to remove factory reset protection on SAMSUNG Galaxy A52. Let's find a way to bypass Google account verification on SAMSUNG Galaxy A52. This method works with Samsung smartphone with the newest 2021 security patch level. Let's unlock SAMSUNG Galaxy A52.
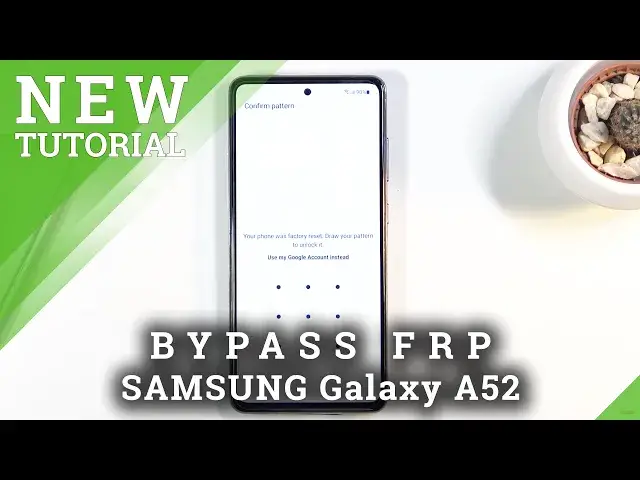
How to remove factory reset protection on SAMSUNG Galaxy A52? How to bypass Google lock on SAMSUNG Galaxy A52? How to skip Google lock on SAMSUNG Galaxy A52?
Follow us on Instagram ► https://www.instagram.com/hardreset.info/
Like us on Facebook ► https://www.facebook.com/hardresetinfo/
Tweet us on Twitter ► https://twitter.com/HardresetI/
Show More Show Less View Video Transcript
0:00
Welcome, and from me as a Samsung Galaxy A52
0:10
and today I'll show you how to bypass the Google verification on this phone
0:16
Now, before we get started with the process, I will mention several things that we will need
0:21
Most importantly, the thing that we'll need is another Samsung device. So without that, you don't really have any
0:29
purpose to start this you are literally required to have one for this to actually
0:35
work the reason we need a Samsung device is because Samsung comes with a app
0:39
called smart switch mobile and this allows us to virtually copy for instance
0:49
our own Google account to the lacked device overriding the old one and this
0:55
application is only accessible on Samsung devices so that's the reason for it
0:59
Now apart from that we'll also need things like our computer, we'll also need a cable, so type A to type C, preferably, probably, depending on your computer
1:10
I have a normal USB ports on my laptop, so that's why I'm going to use a type A to type C
1:16
And lastly, something that isn't actually required, but if you have it, it might just make the process a little bit quicker
1:22
It is a type C to type C port. So as you can see, that's usually newer Samsung devices come with this for choice
1:29
charger, charging cable. So you can use this one. Basically, we're going to use this to connect the two devices together
1:38
So, once we have all of that, we can actually begin the process
1:43
And we're going to start off by going into the computer. And from there, I need to do a couple things, which I'll show you on the computer side
1:50
So let's move over to the PC. Okay, so continuing the process now from the computer
1:57
and there are several things that we'll need. Now, I would advise you just to simply start on your phone, connect to Wi-Fi on your phone
2:05
and then leave it to the side. And on the computer side, go to the link that is provided in the description
2:13
And it should take you right over here. So there's a couple things that you need from this side here
2:19
So you need the Samsung drivers, as you can see. That is so when you plug in your device, a computer will actually see it
2:25
and then Samsung by FRP bypass tool you also need that for the actual process of bypass
2:34
so once you have that I already downloaded it and extracted it right over here so let's run it now I have already done this
2:46
let me just close this this is just some trash that opens up every time you
2:50
actually open up this application so just close off your browser ads are the cancer here
2:58
But yeah. So once you open it up and close the browser that it automatically opens
3:03
what you want to do is start off by tapping on a disabled driver signature. It will then pop you up with a message that you do need to reboot your device
3:11
So simply do so. I already have done it. As you can see, once your computer boots back up
3:19
you should see that your Windows is in test mode. As you can see for me, test mode, Windows 10 Pro
3:24
So yeah, I am right now in the test mode, which is what this program does
3:30
It basically boots your device or your computer to test mode. And from here, all you need to do is reopen the program again
3:37
And it's plug in our phone. So it's just satisfying click. There we go
3:46
And once it's plugged in, all you really need to do is make sure that you connected to that Wi-Fi on your phone
3:53
and press bypass FRP. Before start, you must connect your device to Wi-Fi
3:58
It's already connected, so that's redundant. And as can see, we'll start the process, and..
4:03
There we go It finished So from here all you really need to do is well well you kind of done with the computer side almost before actually progress any further i will just add this little info right here
4:20
so it's going to be relevant later on but at this moment we're done with the computer side so we can
4:28
kind of well not use it anymore but at one moment throughout the bypass on the phone side we will need to
4:35
re-plug it in and once you re-plug it just simply top again the bypass
4:38
FRP just to get the window to pop up again on your phone
4:43
which basically is the necessary window that we need to actually get access to things like
4:49
the web browser so that being said let's now switch back to the
4:54
overhead camera and continue the process from there okay and now we're
5:01
completely done with the computer side So I did mention that we might need to go back to a computer later on
5:10
but from what I've already seen before when I try this a couple times
5:15
it looks like the newer update of Android, I guess. At least that's what I'm guessing
5:21
doesn't actually back us out all the way to the setup screen once we update the Galaxy Store
5:26
So it looks like we might not need to go back to the computer again
5:31
Now, anyway, let's continue the process, so as you can see right now, you should see this easy firmware pop-up
5:37
So let's stop on view. This will open up our web browser. Accept and continue, no thanks
5:43
And once you're in Chrome, simply top right at the top and type in hard reset
5:47
Info slash bypass. There we go
5:58
If you need a moment to write it down, pause the video. I'm just kind of going to go forward
6:04
So from here, as you can see, we have different apps. We're interested only in the Galaxy Store application
6:10
so simply click on it. This will take us to Samsung website
6:16
And from here, all you need to do is the top on the Try Now shortcut, which will open up the actual Galaxy Store
6:22
So from here, select this thing that you agree and continue. And now we're forced to update our stores
6:29
so let's select update. you'll automatically go through the update. And from here, let's top on it again
6:40
Now, like I mentioned before, this usually would take us back to the setup screen
6:44
If that is the case for you, if you're back in the actual setup, then you need to reconnect your device
6:49
assuming you unplugged it, and then launch the easy Samsung FRP tool
6:56
and then simply click on the bypass FRP to get the pop-up again to select view and go back to where we are right now
7:03
so you can click on the try now. Now if it didn't take you back anywhere further than what we had right here
7:09
then simply, just like me, click on the try now. And from here, top on the search bar
7:15
and top on the Smart Switch mobile. Now this is suggested, so if you can see it and click on it
7:23
If you don't see it in the list right there, then simply type in Smart Switch
7:27
and it should show you the results here. It's basically a Play Store but from Samsung. So once you find the
7:34
Smart Switch mobile application, click on the download link. We'll start downloading it
7:43
And once it's done downloading, then launch it. So launch it now. Let's continue and
7:51
allow. Also I'm going to unplug the phone from my computer. So from here
7:59
Once you are in the application, you want to select that this phone, one will receive data
8:05
And it's going to receive the data from Galaxy Android, and then we're going to receive them via a cable
8:12
At least I'm going to be using cable. And like I said previously, if you don't have a cable, don't worry
8:17
Just connect to the same Wi on both of the devices and select the Wi option instead of a cable And that about it But because I do have a cable and it going to be a little bit quicker with it that what I going to be using for this
8:31
So I'm just going to plug it in. So I'm going to move all of this to the side
8:36
And you'll see in a second why. It picked the most conventional Samsung device for this, a plus-size tablet
8:46
because why not? So from here, on the unlocked device from Samsung device
8:58
which for me it's the tablet, what you want to do is make sure that you're logged into Google account
9:04
So to do that, simply go to the settings and then scroll to accounts and backup
9:09
and then manage accounts. And then if you see an account there, you can see right here
9:15
then you're fine if you can't then just add an account and there we go now once you
9:21
have that account you can quit the settings and from here go to the galaxy store and
9:26
download again smart switch from here same way as we did right there so you can either
9:30
tap on a search right here and choose it from smart switch right here or simply
9:36
type it in like so smart switch mobile there we go and I already did download it
9:42
so I don't need to but basically you're gonna download it right here and then again I'll launch it the same way we did on the phone
9:48
Let's open it up. And now I'm gonna grab the cable. I'm gonna also move this a little bit further to accommodate for
9:58
and this. There we go. Actually, I can do it better. Let me just flip the device over
10:07
Should have done the from the beginning. There we go. So, as you can see now both of them are connected with the same cable
10:13
cable, which is kind of like... So you can see I'm kind of..
10:18
There we go. It is connected right here and... There we go. So you can see that they're basically connected right now
10:27
So anyway, continuing the process, you want to select right here that this device
10:32
the unlocked one with your Google account, will send data. And for some reason it just closed
10:38
Anyway, now on here it's going to tell us to allow access to all this kind of
10:43
storages, place and all that stuff so yeah let's allow it and here same thing allow
10:50
give it a moment it's gonna start calculating the data that is on this device right here
10:56
and once it's finished you should see it on the locked device so right here what you want to
11:01
select as or let's start up by unselecting everything like so and then choose only
11:08
google account home screen and settings only those three different things and then scroll down, top on transfer
11:18
And what will happen here is this device wants to know if you want to transfer this device's Google account
11:26
to the lacked one. So we're going to top on copy. And this will force us to actually log into the Google account
11:31
on here. There we go. So let's log in. Now, once more, before I progress any further
11:40
so there is no confusion. This account is one that I know. It's my own account that is on this device
11:47
And it wants me to basically verify it here. So that's what I'm going to be doing
11:51
Let me put in the password. And there we go
12:03
I'm going to skip the other one. I only need one account
12:08
There is two different accounts logged in, so I just skipped the second one. And from here, it's going to start copying all the data that we have selected
12:15
And primarily, we only, primarily are interested in the Google account. There we go. So it's finished here, so let's just close this
12:27
And here let stop on go to the home screen Now it won actually go to the home screen but it doesn matter You can also plug the cable and get rid of the device
12:39
And stick with now for the rest of the video with just this locked device
12:46
So let me move it straight to the middle. And also zoom in. There we go
12:54
Get a little plant. There we go. Good plant. So, again, we're going to go through the setup right here, so just breeze through this
13:07
And you should see right here, there we go. This is previously the screen that was telling us that we need to verify our account
13:12
either using a pattern that was previously set here, or using the Google account
13:17
And now it's gracefully telling us that account was added. Now, this account is, like I said, the account that I have logged in on the tablet
13:26
So this is my account and what I did is basically overwrite the old account
13:30
So let's just tap on next and completely skip logging in and verify in basically
13:36
So let's continue. Now this popped up once more. Disregarded, I don't know why it's popping up twice, but it should finish up anyway
13:45
So here we have some restore options. I'm just going to not restore it
13:50
It doesn't matter at this moment, honestly, because we still need to perform a factory data reset off
13:56
this phone. That is because the old account that was actually blocking us from finishing
14:02
it up the setup before is actually still on this phone. So we're right now skipping through most
14:08
of this simply to get access to the home screen and more precisely to the settings
14:26
Okay, so now we should have access to the home screen. Any moment
14:34
Okay, so now we're at the home screen, finally
14:46
So from here, let's pull up the apps tray and go to the settings, scroll all the way down
14:52
to general management, select reset, and then. And then factory data reset
14:59
This process basically removes Google account. It provides us with the one that we have added, but it also removes the one that was previously
15:05
on this device. Well, it's still on here, but it's just not showing up here
15:10
And this will begin, well, the factory data reset, so it's going to take a couple minutes
15:14
but once it's finished, well, we should be them in this setup screen
15:18
But at that point, the device will be fully unlocked, so you can connect to Wi-Fi from there
15:23
or skip it if you want to. Basically, you're free to do whatever you want. The device will be fully unlocked
15:29
So let this run through. I'm going to be back once the reset is actually finished
15:49
And as you can see, reset has finished. So let's go through the setup process once
15:55
and for the last time. So at this moment in time you can basically set it up as however
16:01
you like. I'm going to be skipping almost everything just to save a little bit on time
16:05
but if you want to you can choose to connect to Wi-Fi or log into Google accounts, all that stuff
16:11
And there we go. As you can see we're on the home screen. There's no need to
16:25
verify anything and yeah the device is fully unlocked now so if you found this very
16:30
helpful don't forget to hit like subscribe and thanks for watching
#Mobile Phones