Up next in 10

Find out more about bypassing FRP on Oppo Find X3 Pro:
https://www.hardreset.info/devices/oppo/oppo-find-x3-pro/faq/bypass-google-verification/
Hey there, everyone! In today's lesson, we'll show you how to get past the factory reset protection on your Oppo Find X3 Pro. We'll give you easy-to-follow steps to help you skip the Google account verification on your device. Just stick with our instructions, and you'll be able to do this procedure with success. Thanks for joining us, and good luck! If you want to know more about your Oppo Find X3 Pro, visit our YouTube channel.
How to bypass Google account verification on Oppo Find X3 Pro? How to get past factory reset protection on Oppo Find X3 Pro? How to skip FRP on Oppo Find X3 Pro?
#BypassGoogleVerification #RemoveFRP #OppoFindX3Pro
Follow us on Instagram ► https://www.instagram.com/hardreset.info
Like us on Facebook ► https://www.facebook.com/hardresetinfo/
Tweet us on Twitter ► https://twitter.com/HardResetI
Support us on TikTok ► https://www.tiktok.com/@hardreset.info
Use Reset Guides for many popular Apps ► https://www.hardreset.info/apps/apps/
Show More Show Less View Video Transcript
0:00
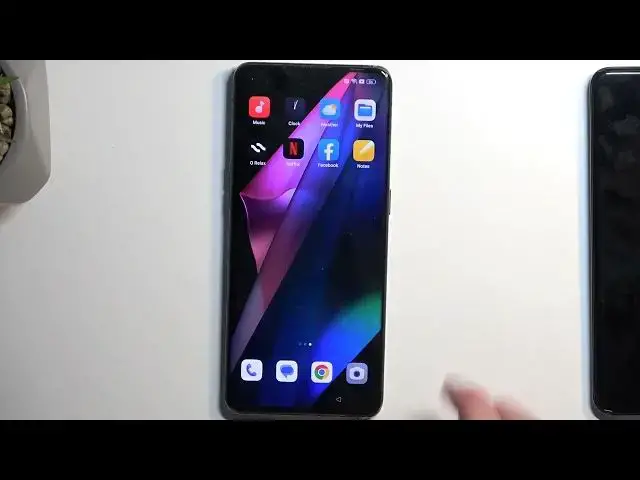
Welcome. In front of me is an Oppo Find X3 Pro
0:03
And today I will show you how you can bypass the Google verification on this phone
0:13
Now before I get started I'm going to quickly touch upon the state of this device and also
0:18
what we will need for this. So most importantly what we will need is another device. Now that
0:23
sounds like a bad joke but we just need another secondary device. It can be Android. It possibly
0:31
although I haven't tried, could be an iPhone if you have one. And the reason we will need this
0:37
device is so we can move over a single application to our locked device which is basically part of
0:44
the process which allows us to unlock it. So that's why we need this kind of secondary device
0:52
I'll be using some kind of Honor for this but like I said it can be any kind of Android as long as
0:57
it has access to Play Store. And technically these apps also work on iOS so should work with iPhone
1:04
though I haven't tried it so I cannot vouch for its validity how the bypass would actually work
1:10
with an iPhone. I know for a fact it works with Android. So that's what I'm going to be using in
1:15
anyway. Now when it comes onto the device you can obviously see that it is locked. It's telling me
1:21
to draw the verification pattern to unlock it and if I close it it's going to tell me to draw the
1:26
oh not draw, verify the Google account. So there we go. As you can see obviously it has locked
1:33
Now with that being said we can now begin the bypass. So first of all you want to navigate to
1:38
the connect to Wi-Fi page exactly like this one. If you are at the beginning of the setup just
1:42
progress forward and you will eventually get to this page. And if you already see the verification
1:50
page then just back out till you see this page. Next connect to your Wi-Fi network. I have already
1:57
done so as you can clearly see right here. So select your network that you have and sign into it
2:05
Once you've done so click on this eye icon right here. This will give us a couple options. So we are
2:12
interested in the share option. Now before I press on it I am going to cover the display because this
2:18
is a QR code that is going to be shown. Which technically I believe could basically could get a
2:23
password out of it. So I kind of want to avoid that. So anyway I'm going to cover up part of it. Press it
2:30
There it is. As you can see there's a QR code. It also shows me the password a little bit above. So
2:35
yeah I'm gonna just keep my hand here. But what we're looking for is this option below here
2:40
nearby. Click on it and this will then give you this window right here. Which you want to just
2:47
select this blue button right here. Turn on and select need help sharing. The blue text
2:54
And then once it shows you the page right here. I click on the three dots and the select share
3:00
article. Choose messages. There we go. And select new message. In the field two
3:12
type in any kind of number. It doesn't need to be real. In the message field I'm gonna select the text right here. You can select cut or just delete it
3:24
by holding the back button. And then you want to type in www.youtube.com. Now what is important
3:32
you add the www extension. Now the reason that extension is important is because without it
3:44
if you send this message and you open up the link it will open up YouTube in a little pop-up
3:49
view window. Which will not work for our bypass obviously. But when you add the extension
3:57
it opens up YouTube in its full application format on a full screen. Which at that point
4:03
gives us all the options that we all need. Now once you send the message I want to also my
4:10
oh not my bad. I want to add that I haven't actually sent this message to anyone. I don't
4:15
have a sim card in here. So I did send the message to or attempt to send it to this number which
4:20
doesn't exist. And the message never even left my device because I am not connected to any kind of
4:25
network or any kind of a cell tower. So this is just strictly on the phone itself. Now anyway this
4:32
will show you this little message bubble. And it has this top to load preview. So you want to tap
4:38
on it. It shows you the image of YouTube of a logo. Click on it and as you can see it opens up
4:44
YouTube in its full windowed view. Now in here we're going to click on the account icon. Then
4:53
you want to select settings, about and google privacy policy. In here we're going to select
5:03
use without an account. And no thanks. And in the search bar at the top you want to type in
5:14
hard reset that info slash bypass. So I'm going to type it in myself and if you need a moment
5:20
to write it once you see it pause the video. So now would be the time to pause
5:38
Once you're on the site it probably will give you this pop-up. So we're going to select consent and
5:42
then we're going to scroll down to settings. Select this one. Click on it. Then select home
5:49
screen and lock screen. Home screen layout. And it opens up our home screen. Now before you go
5:58
clicking off thinking that this is done we are not even close to being done yet or maybe halfway
6:04
So next thing we're going to do is open up tools. And open up clone phone. Now if your tools folder isn't on the first page you can swipe to the left
6:15
and this will show you a second page for instance. So anyway I'm going to open up the phone clone or
6:20
clone phone and in here we're going to select that this is a new device. I'm going to select allow
6:28
With every kind of pop-up that it asks for some kind of permission you want to select allow
6:33
all while or either while using the app. Now in here migrate data from so we have a couple
6:40
options. We have realme app for one plus as the first option. So if your unlocked device so the
6:47
second one that you will be using for this is any of this listed ones right here then just select
6:52
that and you're basically good to go. Now mine is an honor so I'm going to be selecting the second
6:58
one because it's still an android device. And as you can see it opens up this QR code
7:04
Now if you're using an iPhone and attempting this with an iPhone which like I mentioned I'm not
7:08
exactly sure if this will work. Should but I'm not betting on it. And then you can select obviously
7:14
the iOS and once you have the QR code open you can just move this device to the side and we're
7:19
going to now focus on our second device which is unlocked. And in here if you're using one of the
7:25
first three listed devices the Oppo, Realme or OnePlus then just like we did here you want to
7:31
navigate to your home screen and on the home screen you will just open up the tools folder and
7:37
and in there you will in the tools folder you'll open up the clone phone application and you're
7:42
good to go because Realme, Oppo and OnePlus are basically one big company and this application
7:49
is put on each one of these brands because they're basically acting as one big brand and
7:55
you don't really need to download anything. But if you're using any other device like I am for
7:59
instance Honor I will need to download it because this device does not come with such an application
8:06
pre-installed. So we're going to navigate into the Play Store or App Store if you're using
8:11
iPhone and you want to search for clone phone so once you type it in you will have probably
8:16
three different results Oppo, OnePlus and this one is probably from Realme
8:22
In all truth you can install either one of those three and they should all work just fine but for
8:27
the sake of this video I'll be sticking with the official one which is designed for specifically
8:32
this device which is Oppo. So I'm going to select it and then I'm going to select install
8:38
Now for people wondering why I uninstalled the application when I opened the store it's just
8:44
simply so we can we can have the same experience because the application will want a lot of
8:50
different accesses to different things like folders, media, contacts and so on. So I want
8:56
to show this how that looks like and what you're supposed to do. Once it's downloaded you can open
9:02
it up. I'm going to select agree and continue and then it will give you the setting pop-up so we're
9:08
going to select the settings toggle this on and go back and again new field again settings toggle on
9:15
go back then we're going to select start migrating much more stuff will pop out settings. When you
9:22
have a list of different applications all you're looking for is the clone phone app so select it and then toggle on and then go back twice obviously and select ok settings and again
9:35
when you have the allow access to something you can select while using the app if you don't have
9:41
such an option then just select allow. Okay while using the app and as you can see once we go through
9:53
all of that it opens up our camera and allows us to scan the QR code. So just hover the device over
10:01
this QR code the camera specifically there we go and this device is now connecting to this device
10:12
so I'm going to give it a moment okay let's give it a second for to load there we go so it loaded
10:20
all the data on this device so what you want to do here is simply deselect everything by pressing
10:26
or right up there and then scroll down to apps which is the last option click on the text itself
10:33
this will show you all the applications that you have installed on your device and from here choose
10:38
a single application it does not matter which one you select just select any kind of application
10:43
now recommendation for app would be just look at the size and pick one that takes the least
10:50
amount of space which will basically increase the speed at which this is being transferred
10:56
so the more size for instance like if you try to transfer over something like google play store as
11:02
you can see it's 130 megabytes while netflix for instance is only five megabytes so I'm going to
11:10
be selecting netflix which you could probably do as well if you have it accessible if not just
11:18
choose any other applications that application that has the smallest size or relatively small
11:25
from there I'm going to click on the check mark right here and we're going to select start migrating
11:35
as you can see on this device it's already done transferring over it over and it's done
11:41
installing well technically didn't install it so just to kind of point this out other devices
11:48
from apple which I did to the find x2 neo and find x2 light this worked fine here it tried to
11:59
transfer over the application but as you can see it gave us failed one successful zero
12:05
and even though it failed transferring over the application I believe it will still work because
12:11
the process that the process of transferring messes up with the phone so when we click on done
12:19
indeed it worked so it now allowed us to progress further throughout the setup completely skipping
12:26
over the verification portion of the device so it's automatically asking us it for our
12:31
desired navigation system so I'm going to select gestures just out of preference
12:38
unlock method skip this part so I'm going to select later recommended just ignore
12:45
get started and this will give us access to the home screen so we can now focus fully on our
12:52
locked device and what you want to do here even though we have already access to our home screen
12:57
there is one last step that we need to take and that is navigating into the settings scrolling
13:04
all the way down and selecting additional settings and then choosing backup and reset
13:10
in here select reset phone and erase all data and choose erase all data or erase data and
13:19
remove eSIM profile and then confirm it by selecting this text once more which will begin
13:25
factory resetting your device now just to explain why I'm telling you to do this even
13:32
though we have access to the home screen already as because what we have done so far
13:38
as we just simply tricked the device to allow us to finish up the setup the protection that was
13:45
put on this device meaning the screen lock and the google account are still present somewhere
13:51
deep in the device as a as a protective measure so as an example if I were to do a reset of this
13:59
device through recovery mode instead of settings this device would go back to being locked but when
14:05
it's being done through settings the way android works it considers that when doing a reset through
14:11
settings you obviously are the legitimate user of it and it allows you to reset the device
14:19
without necessarily providing anything because you would typically need to already have the device
14:24
unlocked and once you start the reset through settings the device just automatically goes over
14:32
and removes everything protective so google accounts screen locks and so on so that's why
14:41
I'm recommending you to do this right now because it will just fully unlock the device now that
14:47
being said I'm not going to go over this on the video the reset itself I mean because it is a
14:52
fully automatic process once you confirm it it just gives you a black screen a little bit of
14:56
off-po logo once it's completed you are then taken to the setup screen of your device again
15:03
but at that point the setup that you will be seeing is just a typical setup that you are
15:08
probably accustomed with no verification needed set up your device however you like so here we go
15:16
now with that being said hopefully you found this very helpful if you did don't forget to hit like
15:20
subscribe and thanks for watching
#Computer Security
#Networking
#Software
#Web Services