Up next in 10

How to Bypass Google Verifcation on TECNO Spark 10 - Unlock FRP / Remove Google Lock 2023
Aug 4, 2024
TECNO Spark 10 Unlock FRP:
https://www.hardreset.info/devices/tecno/tecno-spark-10-5g/faq/bypass-google-verification/
If lock TECNO Spark 10 with a hard reset and forgotten Google password you should follow our instructions. Here we present a free and easy way to unlock FRP in TECNO Spark 10. By using simple tricks you can activate TECNO Spark 10 without Google account. Let's remove factory reset protections in TECNO Spark 10. This bypass Google verification method works with every TECNO with Android 13 and newest security patch level.
How to unlock FRP in TECNO Spark 10? How to remove factory reset protection in TECNO Spark 10? How to reset FRP in TECNO Spark 10? How to bypass Google account verification in TECNO Spark 10? How to skip Google lock on TECNO Spark 10?
#TecnoSpark10 #BypassGoogle #UnlockFRP
Follow us on Instagram ► https://www.instagram.com/hardreset.info
Like us on Facebook ► https://www.facebook.com/hardresetinfo/
Tweet us on Twitter ► https://twitter.com/HardResetI
Support us on TikTok ► https://www.tiktok.com/@hardreset.info
Use Reset Guides for many popular Apps ► https://www.hardreset.info/apps/apps/
Show More Show Less View Video Transcript
0:00
Welcome. Infronomy is a techno Spark10 and today I will show you how you can bypass the Google verification on this device
0:13
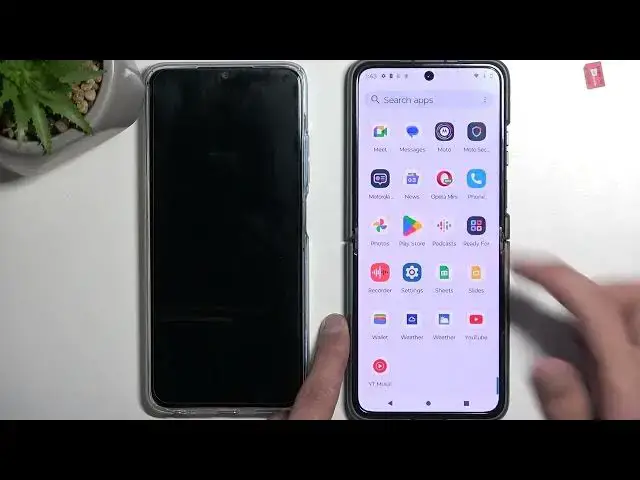
Now for this we will need a couple different things. Most importantly and the thing that I'll start off with that we will need is another device. It is required for this. It needs to have access to Google Play Store and that's about it
0:29
And another thing that we'll need is a SIM card. Now the reason we need a SIM card that the SIM card will also need to have mobile network
0:37
is because, as you can see, I am connected right now to my network
0:43
but I don't have the option to go to the next page and the device isn't doing that on its own
0:48
This is a bug in the device, which for some reason, once you connect to network and then go back
0:56
without a SIM card we can go forward. So inserting a SIM card will give us an option to set it up using mobile network instead
1:04
which therefore allows it to put a next page. Now when it comes onto the phone, I'm going to go grab one because I didn't actually get one
1:13
so I'll be back in a moment. Okay, so I got a phone
1:40
This one obviously has PlayStores, so I'm good to go. Now, let's touch upon the device right here
1:46
I would typically show you that the device is locked, but because I did already back out of there
1:50
I kind of can't show you the verification method. But what I can touch upon is the fact that I can see this little lock icon
1:57
in a corner, which signifies the device. is right now locked and I would need to verify it providing the previously used screen lock
2:04
or using the previously logged in Google account. Now, to get started, we will stick with this page where we have connect to Wi-Fi
2:15
If you are at the beginning of the setup, just progress forward until you get to this page
2:19
and when it goes to the next one, because you connect it for the first time, back out back to it
2:24
and then select the share option, which I am going to kind of like block it with my hands
2:28
because it does provide us with a password of the remote not here but once we
2:34
select nearby or it doesn't never mind it does not here so and here
2:44
we're going to select turn on so gonna cover it up just oh there we go there's
2:48
the password so turn on and you can see right here we have the option I need
2:54
help sharing so we're gonna click on that give it a second
3:01
and we're going to select under three dots and then select share article
3:06
and this will give us couple options what we're going to select is X share many
3:10
data free it will bring us a window with permissions we will need to allow all of them
3:17
and once we do so it will show us our QR code for scanning
3:24
so this device is right now ready so we can just lock it for the time being
3:28
and move over to our other device. So here we going to start off by going into our browser and then navigating to
3:49
well, connecting to Wi-Fi would be probably the best first step. Can I quickly connect to it
4:01
Okay. So here we're going to navigate to hard reset that info and
4:12
and I want to put the slash and then add download which we can actually see it right here
4:25
Apparently there was a search. Anyway, it still opens it up through search
4:33
And then in the download field right here, make sure that it does say download right here
4:38
If you don't see it, you can also tap right here on these three bars and navigate it to download, and this will then redirect you right here
4:45
Anyway, in here, we're going to now type Android 11. I want to search for it, there will be only one result
4:58
as can see right here, bypass, FRP bypass Android 11, so we're going to select download
5:04
and then you want to scroll down, and select download once more. Download anyway
5:09
And we're going to go back the search, and we're going to now search for FRP
5:17
not RFP, what am I saying, FRP bypass login. There we go
5:29
And again, there is only one result. And once more, we're going to select download, scroll down, download
5:37
Download anyway. Now when we download these two things, we don't actually need to install them
5:42
You will see why in a second. Now from here, we're going to navigate to our Play Store
5:48
And you want to search for the X share
5:58
it's right over here. We're going to install it. And I want to select open
6:15
And here we all have a bunch of different permissions that we need to agree to
6:20
So just start spamming agree while using app. And then I click right
6:27
I'm going to click right here on this kind of like a square with a cross around over it
6:32
And there is our list of different things that we need to agree to. So it's going to start opening them up, checking them on, going back
6:54
Yeah, so everything is enabled. And as can see, our camera is now open. So, as I got it. So now we can scan this QR code using the camera
7:07
There we go It starts to connect these two devices together And from here we want to select send, send more, APKs
7:30
and we're going to check the two applications that we have downloaded from the website
7:34
For me, those are the only two that I have downloaded, but if you have more, you will need to just look to the list
7:41
Make sure you're just looking for the Android 11 FRP something and the FRP login bypass or whatever it was called
7:48
You can also check it by going into your browser and seeing what were the two last file names that you have downloaded
7:54
Now, from there, all we need to do is select send. As you can see, it already sent these two devices or these two applications, and we can go to Received
8:02
and it automatically installed both of them. We briefly saw that the second one was being installed
8:08
when I navigated to it. So this device is not needed anymore. We can get rid of it and now we can stick with this one alone
8:17
So from these two applications that were automatically installed, we are interested in opening up the first one
8:24
which is the FRP bypass something browser. So click on open. And in here you're going to select three dots and select browser sign in
8:32
and okay. This will open up a Google login page where you can simply log in
8:38
to any kind of Google account that you have access to. I'll be using
8:42
my own. Obviously, if you don't feel comfortable logging with your own Google
8:46
account for some reasons, you could create some kind of temp email for this
8:53
just like a spam mail, login, and then just get rid of it if you
8:58
want to. Anyway, I'm going to sign in with my email. I will put in the password right now
9:32
Once it signs in, it automatically closes this off. So that's basically signed in
9:43
You can select quit right here. And we're just going to go back
9:52
And now we will need to go back once more in here
9:57
And we're going to insert our SIM card. as a as you can see, once you enter the SIM card, it automatically goes to the next page
10:27
and give us this new option. Use mobile network for setup. So we will select that
10:32
And we can now go to the next page and next page
10:40
And what you will see in a second is that the device gives us a window that we have signed into a Google account We don need to verify anything anymore because the device at least at the setup can only like consider one Google account
10:54
because it's the only account that should be. You should technically be only able to have one account at this point
11:00
So when we logged in with the previous one from that application
11:05
it now kind of went stupid and allows us to finish up the setup without verifying the device's previous Google account
11:13
I guess we need to give it a moment for it to actually realize this
11:43
it could be due to the poor internet connection right now that it might take a little bit longer
11:56
And right now there we go. So we have the account added. And as you can see, this is the account that I have signed in throughout the process
12:03
So from here we can go to the next page. And we are now able to finish up the setup
12:07
Now keep in mind the device is still locked. As you can see, the lock
12:12
It might disappear in a second, but that's... still won't change the fact that the device at this moment is still technically locked
12:19
I'll show you once we have access to the home screen how we can fully unlock it
12:24
So just hopefully go through this quicker than we have been going through it right now
12:29
Okay, so let's go through this. took a little bit longer than I would like
12:45
But once we have access to our home screen, our last thing that we want to do is navigate into our settings
12:56
And we're going to now go all the way down to system
13:04
reset phone, erase all data, and get blocked by the battery limit
13:10
So you just want to go through a factory reset of this device. Now, the reason for this, being in the last step
13:18
might seem a little bit counterintuitive, so let me explain. When performing a factory reset of the device through settings
13:24
when the device is actually set up like we have right now, what will happen is the device is forced
13:30
based on how it is designed, to remove the Google accounts and screen locks
13:35
and basically all the data. When you're doing this through recovery mode
13:40
then the device will become FRP-Lacked. When you're doing this through settings, it fully removes everything including those accounts
13:46
that were previously blocking us from finishing up the setup so that's why this is the last step you want to go through it
13:52
reset the device and from there you can then set it up however you want
13:57
it will be fully unlocked so it's you can log into your own Google accounts
14:02
and do anything like that it's just normal unlocked device at that point
14:07
so anyway with that being said if you found this very helpful
14:11
Don't forget to hit like, subscribe and thanks for watching