live_tv
Livestream Starting Soon
00
Hours
:
00
Minutes
:
00
Seconds
Up next in 10

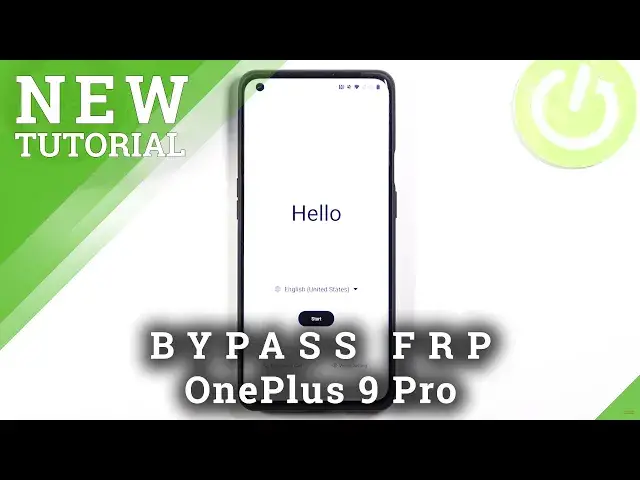
How to Bypass Google Account on OnePlus 9 Pro - Unlock FRP / Skip Google Verification
Jul 13, 2024
The Unlock FRP Tutorial for OnePlus 9 Pro:
https://www.hardreset.info/devices/oneplus/oneplus-9-pro/faq/bypass-google-verification/frp-oneplus-android-11-2021/
In this tutorial you can find out the simple way to remove factory reset protection from OnePlus 9 Pro. Let's follow our steps and unlock OnePlus 9 Pro. If you forgot the Google password and email you should find the way to skip Google verification. With our instructions you can easily activate OnePlus 9 Pro without Google account.
How to remove factory reset protection on OnePlus 9 Pro? How to bypass Google verification on OnePlus 9 Pro? How to unlock OnePlus 9 Pro?
How to bypass Google Account protection in OnePlus 9 Pro with Android 11 and 03.2021 security patch?
Follow us on Instagram ► https://www.instagram.com/hardreset.info
Like us on Facebook ► https://www.facebook.com/hardresetinfo/
Tweet us on Twitter ► https://twitter.com/HardResetI
Show More Show Less View Video Transcript
0:00
Welcome, In front of me is a One Plus 9 Pro and today I'll show you how to bypass the Google verification on this phone
0:12
So before we get started, I'm going to basically touch upon two different things
0:17
So number one, the fact that you can see phone right here is locked
0:21
So I can allocate either using a pattern or Google account. And number two, which is rather the most important part is the need for a
0:29
another Android device. So for me, it's just going to be some kind of ACESRG phone right here
0:35
But it can be basically any device that has access to Play Store
0:40
So, from there, let's begin by going to the first page right over here, tapping on emergency call
0:48
then emergency rescue, twice, and then out contact, allow this time, stop on it again, go to settings
0:58
and this will bring up this little page right here so what you want to do is stop on the search bar right at the top
1:03
and search for one plus switch which will come up as a suggested right here and the utility
1:12
so let's stop on it we'll highlight it right here so let's stop on it again
1:16
I agree and there we go so from here you want to select that
1:20
on a new phone and then select all the device so for me it's just going to be other
1:26
meaning Android, then it gives us some kind of like basically a visual guide on what we will need to do, but let's press next
1:34
and only this time, only this time, allow, allow, allow, allow, allow, allow, allow
1:40
Okay, there we go. So once we have allowed everything and we can actually see the QR code right here
1:44
you can set the device to the side, which is what I'm going to do, go
1:48
and bring the other phone, and from here, let's unlock it, And what we're going to do is go into our Play Store
2:05
And download the One Plus Switch. So there we go
2:15
One Plus switch. Double install. And from here I'm just going to quit
2:26
So you can see it did download. So now what we need to do is quickly check
2:35
Oh, I know what I'm going to go into the Chrome browser
2:39
And from here what we're going to do is stop on a search bar right at the top and navigate
2:44
to Hardropeset.info. info. Then top on a three bars and go to the download category and in a download search bar
3:00
you want to type Android 7.1.2. Okay, so you can see there is only one result right here
3:17
So what you want to do is stop on the download. Scroll down and again click on download
3:22
Okay, this will begin the download. And once it's finished, it will give us the option to open
3:29
Now, if you haven't ever changed this on your phone that you can install from unknown sources
3:34
you will need to go to the settings like I do, check this allow from this source, go back
3:39
and you can now install it. Okay, so from here, once we have installed this app, you want to go to the Oneplus switch
3:58
press on start, and again, and here we're just going to allow everything, so
4:04
spamming allow on everything. From here we need to go into the settings
4:10
Again, let's allow modifications. Go back, open, again check this on, go back, start and from here
4:18
guess you use location. Now, as you can see, we have this kind of weird page
4:33
display over other apps gives us basically no information what we need to do
4:39
So let me explain that what we need to do is allow OnePlus to go over other apps
4:44
So let's just find one plus switch from the list of apps
4:49
Check this on again let's go back. Go back once more and again press start
4:54
And this time around, you should see the QR scanner. If you see it, that means that everything is good to go
5:01
So now let's bring our other device right here. Okay, there we go
5:09
So as you can see, it generated the QR code. It did it for the second time. I'm not exactly sure why
5:15
But anyway, so once it's the QR code, simply get the other phone
5:19
Scan it, and it should now connect one phone to another. So once you see this page right over here
5:32
It basically asks us what we want to copy from this device over to the new one
5:37
So what we're going to do is disable everything, because it's just going to be a quicker way
5:43
Like so. And from there, you want to go into the applications and find the application that we have installed
5:49
which is right at the top. So bypass frpvrom.com. Check this on
5:53
Go back. And let's press start. Don't close the app. Okay. So from here, we can disregard this, we can close this
6:15
And on here, actually, just completely get rid of this phone because we are done with it
6:22
Rest of the process is done on the One Plus. So from here, once we have finished the data transfer
6:32
Now let me quickly make sure that I'm doing this correctly, so give me a second
6:39
Okay, so let's stop on the close button and then we're going to tap on the backup and restore option right at the bottom
6:58
And from here we're going to choose a new backup. agree and continue and then backup now we start the backup click on done and now we going to go to make sure Okay so let do it this way
7:38
So what you want to do is go into the apps and notifications and it looks like it didn't really bring us
7:45
No, there we go. See all 43. Toponet 3 dots go to show system
7:51
And now we're going to scroll down until we see Google Play Services
7:55
So let's see DG, there we go. So Google Assistance Place Tour services
8:06
There we go. So Google Play Services. As you can see, it's open right now
8:09
So what we want to do is simply force stop it. and disable, disable app, there we go
8:19
Okay, so once you have done two of those things, see, we need to now go back
8:29
And let's progress with this setup. Actually, I forgot one more thing, it won't work right now because of that
9:08
So I'm gonna try to go back to where I was. So, apart from that, we also want to search for account
9:21
Not this one. There we go. So in here we're going to top on add account and go to Google option
9:32
Let's continue, it's going to launch the application, I guess. Yep, there we go
9:38
Now this will start popping up, disregard it. The app actually allowed us to add Google account
9:43
Google account. So, just to recap what I did, because I did get lost for a moment there, once you have
9:54
disabled the Play Store or Play Services, what you want to do is simply while you're in
9:59
the search right here, which was this page right over here where you can tap on the search after
10:04
pressing the emergency rescue, which you want to do is search for account, and scroll down
10:12
to VC accounts. accounts section and then add account choose Google and log in with a Google
10:19
account now here you don't need to verify anything what you want to do is just login with a Google account that can be a newly created one an old one
10:26
it really doesn't matter because what will happen is this Google account will
10:30
override the one that is blocking us and basically it will give us an information that account was added and can simply just finish up the setup so
10:39
let's start right now I'm gonna put in my password so I'm done off the screen
10:58
Okay, and it's logged in
11:12
So let's stop on Agree. And there we go, we can see my account right over here
11:19
So from here, see if I need to, I'm not exactly sure if I need to reboot the device or not for this to work
11:25
So I'm going to try first progressing through it. It might also, I might also need to go back and equate Google Play services, which is a possibility
11:36
But I'm going to try to get through it. We'll see if this works
11:41
So yeah, even though I can, I do believe we should actually turn it on
12:03
So again, I'm going to go to emergency call, rescue account. and we're missing the..
12:39
Okay, so apparently I cannot get the search button to pop up anymore, so let's just go
12:47
through this and hope for the best. So obviously you did see right here I count added and provided me the account of the one
13:00
that I have logged in with. But I'm pretty sure I should be, should have enabled the play services back, so we'll see if
13:09
this will pose any problems. Oh, so it looks like this is a hell
13:30
Oh, goddam it. Welcome. Involume is a one plus 9 Pro, and today I'll show you how to bypass the Google verification
13:44
So, you can see that, you just quickly get to it, the device right here is locked, so I can unlock it either using the previously set pattern or using the Google account
13:55
And assuming we don't know either of those, what we will need for this bypass is
14:00
another Android device that is a requirement without it we can't really do anything
14:06
So I'm just going to be using some kind of ROG phone, but it can be any device that just has access to Play Store
14:14
So from there, let's begin right over here, so I'm going to go back to the first page right over here
14:21
Tap on emergency call, then emergency rescue, top on that twice, and then select add contact, allow, and
14:30
and only this time I guess. Tap on it again and go to the settings
14:36
And in here you should see a search icon So you want to tap on it and from here you want to search for one plus or just type in one and we bring it up as suggested so what we
14:47
exactly looking for is the one plus switch once you top on it it will
14:51
highlight it right in the settings so stop on it again agree and in the
14:56
one plus switch you want to select that this is a new phone and the old device is
15:02
other select next and then basically agree to anything that it wants access to
15:09
So, it's going to start spamming it, and there we go. Once you see the QR code
15:15
you're all set on this device. So I'm going to lock it and set it for now to decide
15:24
and also bring the other device to the screen now. So, on here
15:34
we're going to start off by going into the Play Store, and from here, you want to again look for the one plus switch application simply search for it and then
15:41
install it and while that is downloading and installing you want to go to the
15:47
web browser and in here type in a hard reset that info there we go and tap on the three bars go to download and then a download search bar
16:01
type in android 7.1.2 now for you it will not come up as a suggestion
16:07
as I did for me. That's because I already searched for it, but as a minute you haven't searched for it yet
16:13
I will not see it. And from here, scroll down, tap on download. Again, scroll down, download it once more
16:18
and download, wait for it to install, or well, download in this case, and then select open
16:27
Now, when you're going to open it up, if you haven't ever done something like that before
16:31
it will tell you that you need to allow from this source. So simply tap on the settings that will be
16:36
that will pop up. I check the box to allow from this source, meaning Chrome, and then go back
16:42
and you should see this pop up right here. And simply select install. And you will be all set
16:49
Now we can open it up. It will crash, so it doesn't really matter. So we can quit
16:55
Now, also, the One Plus Switch has finished installing, so that's great
17:01
So what we want to do now is go to the One Plus switch. I agree here. Tap on Start. And I
17:06
Again, agree to everything that it wants. And we're going to go into settings
17:12
Again, agree to whatever this is. Go back, open. Check this on again
17:16
Go back, start. Now, this screen right here basically gives us almost no information what it wants
17:22
display over other apps. And as you can see, you have basically all apps visible here
17:28
So basically what it wants is a one-plus switch application wants to have access to it
17:33
So find that application in the list right here. and then check this on and go back
17:40
And when you press start now, you should see the QR scanner, which is what we need
17:46
So let's go back to our locked Oneplus. So I'm going to maybe move to this side
17:54
There we go. As you can see, it will reload the QR code, which is completely fine
17:59
Once it's loaded up, get the unlocked device, scan the code. and it will connect to it
18:08
Now you scan the code by simply using that box to position it where the QR code is
18:15
So once it connects to the locked Oneplus, it will give us all the things that we can transfer over
18:24
So, in all honesty, we just want one single app. So disable everything
18:32
So make sure everything is checked off. And from there, go to the applications, so simply tap on it and then find the bypass FRPVROM.net
18:45
Check this box, go back and press start. Okay. Give it a second
18:52
We'll start transferring it over. And there we go
19:01
So once you see that it has completed the task, we can get rid of this phone because it's not needed anymore
19:08
And we can solely focus on the Oneplus. So on here, top on that square or X right here, then choose backup and restore
19:19
And new backup. Agree and continue. Back up now. And let's press on Done
19:28
So once you have created the backup, I want to go back. back once more back once more
19:34
and when you have the search options again right here make sure you don't
19:40
pass it if you do then again top on the little magnifying glass that was
19:46
right here after we pressed the emergency rescue button we should have that
19:51
this is basically the same page but with the search right now so once you see this what you want to do
19:57
is search for apps and notifications. Looks like it's written just notifications or starts with notifications
20:22
Okay, so there we go. We're looking for the apps and notifications category specifically
20:28
Let's see if it's somewhere visible right here. Okay, there we go
20:40
So type in apps and it will bring it up as a suggested. So you can see right here, apps, notifications, and the same thing as above
20:49
So once you tap on it, you want to tap on the C-all 43 apps, or however many it shows you
20:56
Then you want to tap on the tree. Go-to show, and scroll down to G. So we're looking specifically for Google Play Services
21:09
Google Play Services right over here. So top on it and choose disable, disable
21:17
Once you have disabled, you want to again go back. Just make sure you don't go back too far again
21:22
So we're going back to the search options right here. And now you want to search for accounts
21:27
accounts. So there we go. First one on the top. Accounts in the accounts
21:38
category. And now let's stop on add account. Choose Google. Continue. That's the
21:44
application that we have installed. It will crash. It's completely fine. And from
21:50
here I have one single problem which is that I didn't connect apparently to Wi-Fi
21:57
But I pretty sure I did because I did show you that the device is locked so let try that again Okay let go back I guess
22:12
Okay, so that is connected. Let me just try that again
22:29
hopefully I can. Okay, there we go
22:49
So that looked to be just a glitch that shouldn't normally happen
22:54
Hopefully it didn't happen for you. The device decided to just kind of disconnect from Wi-Fi for some odd reason
23:01
Normally that shouldn't happen. So once I reconnected I could now add the Google account
23:07
So in here you can log in with a Google account whichever one you want. You can create one specifically for this purpose if you want to
23:15
You can use your existing one if you want to. I'm going to be using my existing one
23:20
So let me start off. And I'm going to put in a password, so just moving out of the shot
23:43
There we go. So as you can see, I have logged in right now. Stop on Agree
23:49
And yep, there we go. So we are logged in. So from here, we need to re-enable the Google Play server
23:57
So let's go back. It looks like we only need to go back once. And let's again search for apps. So apps and notifications. See all 43 show system
24:12
Scroll down 2G. Now we go. Google Play services. Let's tap on it. Enable
24:24
And from here, okay and cool. I'm going to go back again
24:28
I'm going to quickly check if I need to do anything else. Oh, actually, it looks like that's it
24:33
So once you have enabled the Google Play services, what you want to do is hold the par key
24:37
Select restart. And let's wait for the device to boot back up
24:43
up. So at this moment the process is almost complete. We still need to go to the setup of the
25:03
device and perform a factory reset but this is just a piece of cake. You don't need to do any kind of weird trickery. It should go
25:10
smoothly now. So yeah, I'm going to progress through the setup as quick as I can, but
25:17
you should probably do the same once the actual factory reset is completed, which I'll
25:23
show you how to do. From there, once you're back in the setup screen you will be able to set up your device as however you like. So let's get through it
25:40
So right here it should show us that account was added and it's, as you can see, the account
25:47
that I have used. And also you will see this pop up probably several more times, completely disregarded, it has basically
25:54
no meaning right now. That app allowed us to actually add the Google account without it
26:00
Google account wouldn't have been an option in the account sections and the settings, so that's
26:06
basically what we needed it for. This job is done and it doesn't matter that it's crushing
26:38
Okay, so once you have access to the home screen, what you want to do is go into the settings
26:50
From here, scroll all the way down to system, reset options, erase all data, factory reset
27:02
all data and we'll give you a message that this will remove everything. Now what it
27:06
doesn't really give us is the fact that it will remove the Google account that was previously blocking us which is actually still on this device. So let's
27:14
confirm it, erase all data and the process will now begin. Now at this point you
27:19
can basically finish watching it's completely done but if you still want to see
27:24
how this plays out. What will happen right now is the device will go through the
27:28
factory reset. It will bring us back to the setup screen but
27:32
at that point once we're back in the setup screen it will be fully unlocked so we can from
27:37
there set it up as however we like at google accounts connect or skip a wi-fi connections and do all
27:44
that stuff basically as the brand new device would be um you can do whatever you want throughout
27:49
the setup so i'm going to let it run and come back once it's finished
28:02
And there we go
28:15
As we can see the reset has now been completed
28:31
So now we can go through the setup of our phone. Now once more I'm going to skip to most of the things and mention just the most important one
28:41
As you can see, setup offline is now an option. If the device would still be locked and that option would not be visible at all, we would be required to connect to our Wi-Fi
28:52
So let's just skip most of this. And like I said before, you can set it up as hard if you like, so do whatever you want throughout the setup and add whatever you want as you would normally do
29:07
And there we go, as you can see, now the device is fully unlocked, ready to use
29:11
And if you found this very helpful, don't forget to add like, subscribe, and thanks for watching