live_tv
Livestream Starting Soon
00
Hours
:
00
Minutes
:
00
Seconds
Up next in 10

Bypass Google Verification Tecno Camon 18 Premier – Unlock FRP – Skip Google Lock
Mar 10, 2024
Learn more information about Tecno Camon 18 Premier on our page:
https://www.hardreset.info/devices/tecno/tecno-camon-18-premier/tutorials/
Hi there! Have you ever been wondering how you can bypass google verification on your Tecno Camon 18 Premier? If you've been, then you should check out our new video! In today's video we're going to show you can bypass Google Verification on your Tecno Camon 18 Premier. This video might be useful in case if you performed a hard reset operation on your Tecno Camon 18 Premier, forgot to log out of google account on it and forgot password to this account. So if you wish to learn how you can skip frp on your Tecno Camon 18 Premier, all you need to do is just watch this short video to the end, follow the instructions provided by our specialist and try to perform this operation yourself on your Tecno Camon 18 Premier. If you find this tutorial useful, don’t forget to hit that like button, leave a comment and subscribe to our channel. Thanks for watching our video!
How to unlock FRP in Tecno Camon 18 Premier? How to bypass Google verification on Tecno Camon 18 Premier? How to remove factory reset protection in Tecno Camon 18 Premier? How to skip Google lock on Tecno Camon 18 Premier? How to unlock Tecno Camon 18 Premier?
#BypassGoogle #bypassfrp #TecnoCamon18Premier
Follow us on Instagram ► https://www.instagram.com/hardreset.info
Like us on Facebook ► https://www.facebook.com/hardresetinfo/
Tweet us on Twitter ► https://twitter.com/HardResetI
Support us on TikTok ► https://www.tiktok.com/@hardreset.info
Use Reset Guides for many popular Apps ► https://www.hardreset.info/apps/apps/
Show More Show Less View Video Transcript
0:00
Welcome. In front of me is a Tecno Kmon 18 Prime. I think that's how you pronounce it
0:08
And today I'll show you how you can bypass the Google verification and then completely remove
0:14
it altogether. Now before I get started I'm going to quickly mention a couple important things
0:18
Number one we will need another phone for this. Now it doesn't matter what kind of device it
0:24
just needs to be an Android that has access to Google Play Store. I will be using some another
0:28
Tecno device but like I said you can use any other Android that you have laying around with Google
0:34
Play accessible. That's one. And number two we'll need a SIM card that actually functions
0:42
So with that being said I am connected to network right now through basically a hotspot. That
0:47
doesn't really matter I could connect to the normal one but I just kind of want to make this
0:51
easier so I don't have to later on blur out the passwords and stuff like that. Now that being said
0:58
when you're doing this the first time around when you connect to a network it automatically
1:02
goes to the next page where it tells you that you have to verify the previously used screen lock and
1:08
also the or either the Google account. But for some reason it doesn't want to now go back. I
1:13
already attempted this the first time around. That's kind of a hands-off why I'm using hotspot
1:18
because I already figured out that it shows passwords and stuff like that. So this is
1:23
basically a second attempt but for some reason I can no longer go further into the setup to show
1:28
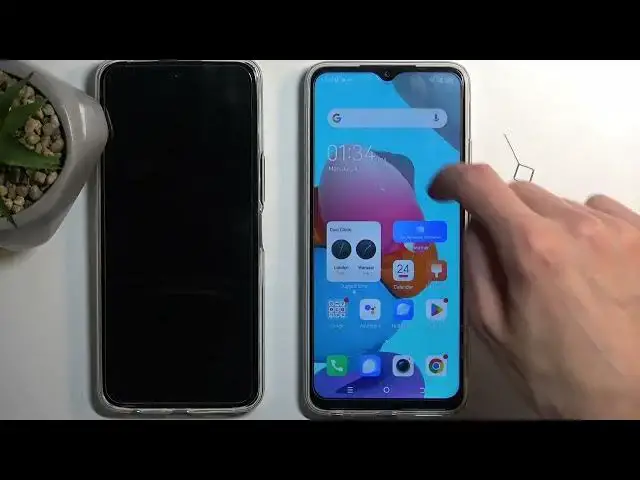
you that the device is locked. The only thing that indicates that it is locked is obviously this
1:32
little lock icon and even if I reset the device presumably at that point it will allow me to go
1:38
forward like it did the first time around. But for the purpose that I needed it doesn't really
1:44
matter if we can see it or not. So we can get started. Now number one you will need to progress
1:50
through the setup till you get to the wi-fi connection page just like this one and you want
1:54
to connect to your wi-fi network. You don't need to use hotspot like I am you can just connect to
1:58
normal network so I could connect to any of these and it will work the same. So from here we're
2:04
going to now click on this share icon and then we're going to select nearby. You do have a button
2:11
select turn on right here so that's what you want to press. It doesn't show up for me anymore but
2:16
once you select turn on it will then give you this text right here need help sharing. You want
2:20
to click on it. Give it a second and from here we're gonna select search which I presume it's
2:34
going to be here or the three dots and we're going to select share article. It will give us
2:40
several options. What we're looking for is the last one the xshare mini data free. So once you see this
2:52
open it up. Now it will ask us for a bunch of different accesses so access location we're all
3:01
going to select allow. Now we can select while using the app it doesn't really matter which one
3:05
you choose but once this is selected we will still need to go through a couple more but that will be
3:11
in the next part. So this phone right now is prepared at the moment so we can lock it move
3:19
it to the side and then we're going to bring the other device which I do need to actually sign
3:24
into google on here because I haven't done so. So I'm going to quickly go through that
3:28
Number one I need to connect to wi-fi. Okay so I have connected to wi-fi now let's go to play store and here I can
3:53
log into it. So again I'm going to just quickly do that. So I recommend skipping like a couple minutes into the video if this is not
4:14
fast forwarded because this device is apparently relatively slow. Just give me the login page come on doesn't take that much processing power
4:28
So today there we go. Okay so I am almost logged into it
5:18
Okay so we're good to go now. So we're going to start off by opening up our browser
5:32
and navigating to the hardreset.info slash bypass website. Actually not slash bypass a slash download my bad. So
5:44
keyboard
6:03
okay and from here we're going to be searching for android 11. So just click on the field right
6:11
here and then type android 11
6:27
Like I said this phone is absolutely slow. So there we go it's type 10. You can now search for it
6:37
There should be I believe only one one result. Yep there we go. So frp bypass android 11. We're going to select download
6:50
Now scroll down and click right here on the download
7:00
So download anyway and as you can see it's downloading and it's done. So now we're going to go back
7:13
and we're going to search for I'm going to search for frp
7:23
bypass login. And again there should be only one result. So I'm going to click on download
7:44
And again download here. Download anyway. Okay so it's downloaded. We can close our browser and now we're going to navigate to
7:57
the play store and in here you want to search for xshare
8:12
And it shows up right over here. So I'm going to click on it to install it obviously
8:45
I guess we're going to need to give the device a couple minutes to verify and pending. Not
9:03
really sure what's pending. All I'm asking it to do is to install the application but
9:09
apparently it's struggling with it
9:31
Now this is a techno device. I'm going to quickly check if there isn't. What was that
9:37
If there isn't xshare already on it maybe that's why it's just doing some weird stuff
9:51
There we go it's actually here. Now I'm not exactly sure if this one will work the same
9:55
way but I guess we'll find out in a second. It looks about the same
10:17
This one's still pending. So I'm going to progress with the one that comes
10:22
already pre-installed with this device. These are two of the same brands so technically I
10:27
shouldn't need to download this. The difference is this one is called xshare mini while the
10:33
one from play store is just xshare transfer and share files. I believe this one might have a little
10:39
bit more options but in general it should be about the same thing. So by default I'm pretty sure if
10:48
you open up the one downloaded which is just not downloading at all for some stupid reason
10:54
That's why I wouldn't do what I wanted to do. You will have a bunch of these pop-ups to allow
10:59
access to all kinds of different stuff. Once you do you will I believe be located in a different tab
11:05
so just make sure you go to home and then try to find this little QR scanner. Once you click on it
11:12
it will ask for more access to a couple different things so we're gonna allow all of these
11:21
and it's already scanning it. Now on the one that you would download from play store there will
11:28
be significantly more things to do. So I really hope for it to freaking download
11:38
Would be nice this year. Okay now after this I guess I'm just gonna progress with this one
11:50
Go figure. Google doing its best. So I just want to point out I believe on the normal one you
12:00
will have couple different hoops to go through to find this QR scanner. Here it's right at the top
12:05
so that's where you need it. On the default one that you download I believe it's going to be
12:09
somewhere like right here. I'm actually gonna download it on my phone considering I will
12:13
probably do this significantly quicker than this garbage is doing it. Just so we can see how that
12:19
looks like. So give me a second while I search for it. So here we go. I just want to give you
12:29
a look on how this supposed to look like and what we need to do. There we go. So voila it's already
12:36
done. Let's say agree. Allow. Allow. Yeah so it looks kind of different. We have our little button
12:44
right here so we're gonna click on it and it gives you the list of different things that you need to
12:48
allow. So we're gonna select open. Find it from the list. So it's gonna be right at the bottom
12:56
somewhere. I mean it's an X. Yeah literally the last thing in my list. So tap on the enable then
13:02
go to next one. Open. Allow. Open. Allow. Open. Again find the X so right at the bottom. Next
13:12
What do we need here? Turn off hotspot. I'm not going to be doing that. I am giving hotspots to
13:17
this device so yeah I'm not turning it off. But obviously if your hotspot is already off most
13:22
likely you won't even see this. Hopefully. Whatever shows up just allow there. Next one
13:28
I'm gonna again find the X right here at the bottom. Boom. Enable. And once all of this is
13:33
enabled you can go to the next page and from there you should be able to launch EQR scanner
13:38
That being said I want to see if this has finally downloaded. No it's still pending. Awesome. So yeah I'm gonna just progress with this one
13:50
because outside of that it should be about the same kind of experience. So I'm gonna now wake
13:57
up this display. Still this is open as you can see. So we're gonna grab our little phone and
14:02
scan the QR code. Like this. Just point it. Okay apparently that was already good enough
14:22
And as you can see it now connects these two devices. It gives us
14:28
gives us I'm gonna select receive here. Send here. I think that's how it's supposed to be selected
14:48
Okay I guess disconnect considering it just decided to off itself. Exit. Yeah you didn't import anything so let's try it again
15:22
So okay So I'm
15:41
gonna select send more APKs. I'm gonna select all of them which is the two that I have. You can also manually select them
15:52
by just tapping on them. I don't have anything else here. These are the two applications that
15:57
we have downloaded from Hard Reset Info website and that's what we're going to be sending. So
16:02
from here I'm going to select I guess receive. Although I don't think it really makes much of
16:09
a difference. So I'm just gonna select send now. And as you can see it's automatically installing them and it's already finished
16:22
So next I'm gonna get rid of this device because that's the only reason it was needed
16:29
And we're gonna focus now strictly on the locked device. So let me quickly just make sure what we're gonna be starting off with
16:44
So we're gonna start off with this one. I'm gonna select open. And here you want to log in with whatever. Let me just quickly
16:57
close this. No I can't. So here we're gonna select the browser sign-in option and we're
17:02
gonna select OK. Just make sure something. Hello? Hello
17:21
Can you like open this one please? Oh right I'm trying to open this. One thing that I'll mention this is already installed
17:30
so I don't really need to open it up. I'm kind of making a little mess right here. But anyway I'm
17:35
gonna select open. Select browser sign-in. OK and here sign in with your Google account of your
17:40
choice. This will be completely whatever the device whatever the account you have you can
17:45
use it right here. And what this will do is replace the old account that is as a
17:50
used as a verification method right now on the device. Therefore once we put that in and we get
17:56
back to the setup it will tell us to verify the device using the this account or not even
18:01
verified. It's gonna tell us that we have verified using this account. So anyway I'm
18:05
gonna log in with my account that I have used here previously. So
18:10
I'm gonna put in the password for it by now. So
18:27
I'm gonna put in the password for it by now. OK so I think it logged in. Not exactly sure but I would assume that we did log in
18:54
So what we're gonna do now is back out of here. Are you kidding me? You're not gonna let me back out because it has a freaking pop-up
19:04
Absolutely stupid. Anyway so we're backing out to the very beginning. So we're backing out to the very beginning as much as we can I guess
19:19
Which this is as far as I can go to language selection. From here we're now gonna insert our sim card
19:26
I'm gonna quickly lock the device just so I don't press anything. Take off the cover
19:36
There we go. OK so nothing is holding these cards in place. I'm gonna flip the phone over. Insert it
19:57
I just pressed something. No different language. Oh no it changed the language to the sim card
20:01
language. OK I'm gonna switch back to English and let's see what else do we need to do
20:13
OK so I know why we need a sim card and this one actually will not do
20:31
So I will need this one. So it will need to be an active sim card because we need to have a mobile network on it
20:43
So and we have connection so there we go. We're gonna start progressing through it
21:02
I'm also gonna turn off the hotspot right here on my device
21:06
OK from here we should have option there we go to use mobile network for setup
21:18
So we're gonna click on that and select next
21:29
Don't copy. And as you can see it gives us a pop-up right here. Account added. This is the
21:38
account that I have signed in to the browser sign-in option from the application that we
21:43
have installed on this device. So from here we can just select next. I didn't verify anything
21:48
This is just simply replacing the old account and the device now kind of went stupid and
21:55
the things that we have basically logged in as a verification method and kept the
22:02
account which allows us to finish up the setup. Now one important thing the device is still
22:09
technically locked so if we were to perform a factory reset of the device through setting
22:16
on a settings to recovery mode the device will go to being or back to being locked
22:22
So there is one last thing that we need to do to fully unlock it. I'll go through it once we finish up the setup
23:22
So as you can see we still have this little lock right here in the corner
23:35
that signifies that the device is still FRP locked. I do want to point that out because this is pretty important
24:07
So now there is a chance that this lock will disappear once we have access to home screen
24:35
and yep that's just what happened. So at the moment it's gone but the device is still locked
24:41
Give me a sec. So one last thing that we need to do is navigate into the settings
24:53
Navigate into the settings. From here we're gonna select system, reset phone and then erase all data
25:07
Select erase all data once more and when you press on this it will begin a factory reset
25:13
of the device. Now the reason you need to do this as a last step is because performing a
25:17
factory reset of the device through settings forces the device to remove all the protection
25:22
metadata that were previously used on this device which would include a google account
25:26
along with a pin pattern or password that was previously set on this device and then used as
25:31
a verification for the FRP. So this is the last thing that I want to do. Now I'm not going to go
25:36
over it on the video just because it's a lot of nothingness and once it's finished we're just back
25:41
in the setup screen at which point the device is fully unlocked and you can set it up in whatever
25:45
way you want to. So with that being said if you found this very helpful don't forget to hit like
25:51
subscribe and thanks for watching
#Consumer Electronics
#Software
#Crafts
#Mobile & Wireless