Up next in 10


Read unlock FRP tutorial ALCATEL 3X 2019:
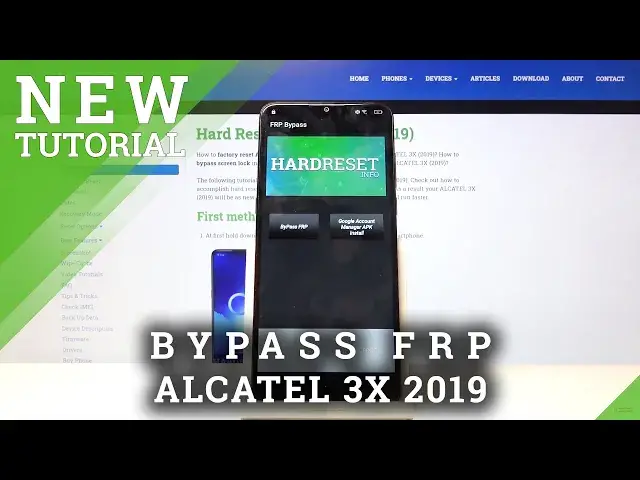
https://www.hardreset.info/devices/alcatel/alcatel-3x-2019/faq/bypass-google-verification/frp-umidigi-android-8/ In this video you can check out the simple way of unlock FRP on ALCATEL 3X 2019. If your ALCATEL 3X 2019 has Google lock you should find the method of bypassing Google verification. Follow our steps and remove factory reset protection. This method works with Android 9 and March Security Patch Level.
How to bypass FRP on ALCATEL 3X 2019? How to remove FRP in ALCATEL 3X 2019? How to remove factory reset protection on ALCATEL 3X 2019? How bypass Google protection on ALCATEL 3X 2019?
Follow us on Instagram ► https://www.instagram.com/hardreset.info
Like us on Facebook ► https://www.facebook.com/hardresetinfo/
Tweet us on Twitter ► https://twitter.com/HardResetI
Show More Show Less View Video Transcript
0:00
Welcome. In front of me is an Alcatel 3X from 2019 and today I'll show you how to bypass the Google verification screen
0:14
So I'm going to quickly progress through the setup just so you can see that the device is locked
0:19
And in the meantime, while I'm doing that, you want to connect to Wi-Fi, which is also achieved by just going through the setup process
0:26
you will just encounter a page where it tells you to log in or connect to Wi-Fi and once
0:32
you do you just want to go back to the first page so you can see right there's a pattern and
0:39
also there is a verification for the account so it's locked now let's go back I can see that
0:48
I am connected to Wi-Fi right there and also right here and basically from here once you connect
0:56
tap on emergency call and for this you will need a SIM card that doesn't really
1:02
matter what the SIM card is if it really works or it doesn't I just needs to have some contact on it and once you have the SIM card you just want to
1:11
insert it into the device and from there again just stop on the emergency call
1:15
emergency information top on that once more and then edit by tapping on a
1:20
pencil and you want to add a contact and in here you'll see all the contacts that
1:26
located on the SIM card. Now if you tap on this and it doesn't actually show
1:32
anything, give it a moment for it to load. It sometimes takes a little bit time to
1:36
load the contacts and if that still doesn't really help after like a minute or so
1:40
just we put the device, power it off and then back on and go back in here and you
1:46
should see your contact then. So from here choose your contact just by simply
1:52
tapping on it and tap on the contact once more once it's in the emergency contacts
1:56
here and this will open up the contact itself and from here can tap on three dots
2:00
and go into share this will pop up several options for you to share with and you
2:06
want to hold a Gmail option now make sure you hold it this will give you
2:11
different options if compared comparing it to if you just tap up on it so once you hold it you will get this window right here and you want to go into App Info then go into App Notifications additional settings in the app
2:27
Again three dots right here, open feedback, and from here you want to type in Morse code
2:35
So the first option right here, use Morse code. So tap on that
2:42
Top on the video, it will load up. and you can then tap on three dots right here and choose watch later and this will
2:49
open up the browser. There we go. So from here, accept and continue
2:56
We don't want to log in so no thanks. Tap on the search bar up there and now you want to navigate into hard reset that info
3:10
Like so. Then tap on the three bars. for the categories and choose download
3:21
Now in a download field you will type in Android 8. Android 8 and let's search for it
3:33
Scroll down, top on download right here. And scroll down again and you will find this download button
3:41
Now instead of tapping on it you want to hold it and choose open an incognito tab this will make or remove some possibility of it
3:51
not downloading correctly continue allow just confirm whatever it tells you so
3:56
okay here and open now let's go into the settings once it prompts you and
4:03
check this on right here go back and tap on install and once it's installed and
4:12
Once it's installed, let's open it up. And start off by choosing Google Account Manager APK install for version 6.0
4:22
And again, let's go into the settings, check that on, go back, and now we can install
4:32
And once this is installed, tap on done, this will take us back to the app
4:35
And now tap on bypass FRP choose browser sign in and tap on it to read that and again go into browser sign in And you should see the Google login page
4:50
So in here you can log in with any kind of account that you own
4:55
If you don't have one you can always create one although even though you can do it on here
4:59
I would advise it to do it on a computer and once you have it ready you can then use it to log in
5:05
So I already have my account, that's what I'm going to use here. and I'm going to put in a password
5:14
then tap on sign in and once it's signed in I go straight back to the app
5:27
so from here old power key and select to restart or reboot and confirm it
5:38
Let's put in a pin for the SIM card. And now we can go through the setup process
5:52
So you'll see a key difference now that once we approach the verification page or previously
5:57
a verification page, now it will tell us that account has been added and will provide
6:02
us with the account that we have added right before the reboot. So let's just simply get there
6:07
Hopefully this won't take long. Don't copy. And while you're going through this
6:13
don't bother setting it up in any kind of special way. We're going to reset the device anyway
6:18
So as you can see, I can't add it. Hard reset info. Stop on next
6:22
Now for you, this email address will be different than it was for me. So, just skip this next
6:37
and we should now be on the home screen
6:49
Just allow whatever it asking Now finish Okay so once we on a home screen what you want to do is go into the settings and from settings we going to
7:15
scroll down to system reset factory data reset and you can see it provides us
7:25
with all the information of like what will remove and at the bottom you have your
7:29
email address because it removes your Google account Now this will only right here show the account that will remove that we have added, but it will also include the account that was previously blocking us
7:40
So once we tap on reset phone and erase everything, we will be now blocked by it because I don't have 30%
7:47
But once you, when you are about 30%, you can tap on this
7:52
I'll also try to maybe plug it into charge and see if that will help
8:01
Just quickly try to get this close enough so I can plug it in
8:11
Let's try that now. Nope, it doesn't seem to work. So yeah, the device actually needs to be above 30%
8:22
Charging it doesn't actually seem to change that. So once it's about 30 I will be able to reset it
8:28
But basically to finish this off, It'll only erase everything, the device goes to another reset and basically by doing so it will unlock itself
8:38
And once you're back in the Android setup screen, you can then progress with the setup as however you like
8:44
The device at that point will be fully unlocked and you don't have to connect to Wi-Fi or anything, you won't have to provide any verification
8:52
It will be just fully unlocked as a brand new, basically, a brand new device. Now unfortunately, like I said, I'm not about 30% so I can't really perform this
9:00
but in normal circumstances I will just stop here and go through it as I just said
9:07
So that is how you would reset the device or bypass it
9:11
And if you found this very helpful, don't forget to hit like, subscribe and thanks for watching
#Science