Up next in 10

Find out more info about HUAWEI Mate 40 Pro: https://www.hardreset.info/devices/huawei/huawei-mate-40-pro-5g/
We are coming to present the video guide, where we show you top tricks for HUAWEI Mate 40 Pro. If you want to discover the best apps that your Huawei smartphone has, follow the attached instructions and get access to the super features to make the cooperation with HUAWEI Mate 40 Pro easier and comfier. Let’s use the uploaded tutorial and enable hidden options in your Huawei smartphone. Visit our HardReset.info YT channel and get access to useful tutorials for HUAWEI Mate 40 Pro.
How to use secret options in HUAWEI Mate 40 Pro? How to enable hidden options in HUAWEI Mate 40 Pro? How to activate super feature in HUAWEI Mate 40 Pro? Where to find the best apps in HUAWEI Mate 40 Pro? How to locate cool features in HUAWEI Mate 40 Pro?
Follow us on Instagram ► https://www.instagram.com/hardreset.info
Like us on Facebook ► https://www.facebook.com/hardresetinfo/
Tweet us on Twitter ► https://twitter.com/HardResetI
Show More Show Less View Video Transcript
0:00
Welcome
0:02
I'm from me as a Huawei Made 40 Pro and today I'll share a couple tweaks and tricks you can do on this device
0:15
So we're going to begin with the side panel which can be accessed by simply swiping from a side
0:22
As you can see it brings up this grid kind of thing instead of a back gesture and from here you have this panel
0:28
Now you can add more apps to it by simply tapping on a plus and adding more to it as you can see
0:34
Top and I'm done and voila we have more. But the benefit of this panel is actual once you open up and up
0:42
you will be able to have this pop-up view of and up
0:46
Now this is also resizeable. There we go. So you can resize it, you can also move it to the side
0:55
If you go home it brings up this kind of a little bit. up this kind of almost an uphead like view. I can also open up more of it. No, I already
1:06
have one of these. So let's open up more. And there we go. As you can see we have a
1:17
bunch of them open right now and they are all accessible through here. So they can
1:23
quickly access each one of them, interact with them. resize them if you want to
1:33
As you can see. Now this will also work with YouTube if you manage to actually get the YouTube application
1:41
But, well, I don't actually have YouTube here, so I can't really demonstrate it
1:47
And yeah, so let's close it now. I'm going to get rid of all of these and go to the next one
1:54
which will also work with what I just showed you, but it's going to be the the split screen. Now split screen can be also accessed through the side panel right here, but
2:02
what you do is hold the icon and then you drag it over. Now when you drag it over, it will
2:07
open it up in full screen, right? But if you again bring up the panel, grab another app, you
2:14
can choose where to drop it and this will open up a split screen. And again, it allows you to
2:20
open up another app on top of that one as well. So there we go. I can also. You know, I'll
2:26
minimize it right there and as you can see we can use three different apps at the same
2:32
time if you wanted to so it a neat feature now this will work better if you have something like YouTube open on your web browser and listen to music Although I advise you to open up YouTube and web browser on this tiny little window
2:49
because you can make it small and kind of move it out of the way
2:53
I am uncertain if it will continue to play if it's in this mode. So that's something that you have to test out
3:03
There we go. And then moving on to the next option, it's going to be the refresh rate of the device
3:10
Now, if we go to the settings and display and brightness, you will have refresh rate, or screen refresh rate
3:19
And as you can see, we have two different ones. We have 60 and 90. Kind of sad that for something that claims to be a pro model
3:28
The max refresh rate here is 90. Makes you feel like you overpay for a device that isn't really worth that much
3:34
much, but that's neither here or there. So as you can see, Max is 90, and this would make everything look smoother, although this
3:46
90 kind of looks iffy, I would say. It would have been still better to have 120
3:54
But if high refresh rate is something that you don't want, I can drop it to 60, and this will..
4:02
for some reason this looks very... Okay, so this is 60 right now
4:09
Let me quickly check something because it looks... Okay, so this is 90
4:17
Okay, so high refresh rate is not something that you are interested in
4:23
You can drop it down to 60 and you also gain a little bit of battery because of this
4:28
Now, higher refresh rate, if you're not even sure what it means, it basically increases the amount of frames you see each second of your display
4:39
So by default, 60 refresh rate of 60 hertz gives you 60 frames per single second
4:47
while 90, well, gives you 90 instead of 60. And the easiest way to imagine this is with a slideshow
4:57
So imagine a slideshow, a moving image. And that moving image goes instead of, has 60 different frames of it to make that motion look semi-smooth
5:12
And if you add additional 30 frames to it it will look even smoother because you have additional content that I can display And that is basically what the refresh rate does It makes everything look smoother because there more frames in between
5:28
in between. So it makes the experience a little bit better, I would say
5:33
But that is something that you have to check out. Now, the best way for you to see it in like a clear way is just kind of move up and down
5:40
with the mini, like right here I am doing. and then enable the 90 hertz and try that, disable it and try it again
5:51
You will see that when you drop it from 90 to 60, it will look like it's really choppy
5:57
and won't look as good. But unfortunately this will not be visible on the camera because the camera is recording only at 60 frames
6:05
So anything above that is lost. Now moving on to the next option is going to be the good old
6:14
dark mode which you can quickly access to the notification panel by tapping
6:18
somewhere where is it there we go dark mode right over here and as you can see
6:23
it turns dark that also will include default apps and it looks like it actually
6:29
also changes the background let quickly check that yeah that does looks like it
6:36
changes the background as well so it looks like they borrowed from Apple and there
6:41
wallpaper shifts so kind of a nice feature right here and like I said it does include default
6:51
apps and also because this is an Amolet display any kind of background that is
6:56
fully black like this one right over here it's actually not being lit up
7:00
so anything that is in the full blackness is not lit up this for instance
7:04
buttons like this or stuff like here will be but because everything
7:10
majority of the content of the display is just pure darkness and because of the Amalek display and the pixels here
7:17
being self-lit they won't need to light up and that means that the battery
7:22
won't need to be used to light up content that isn't needed and in terms of
7:26
that it will save you a little bit of the battery. Now it won't be anything
7:30
significant, it might be like an additional hour or so out of for instance
7:36
30 or 40 hours that you would have gotten out of this device so it's not much
7:40
but it's still there if that is something that you're interested in. And then moving on to the last option which will be contrary to saving battery
7:49
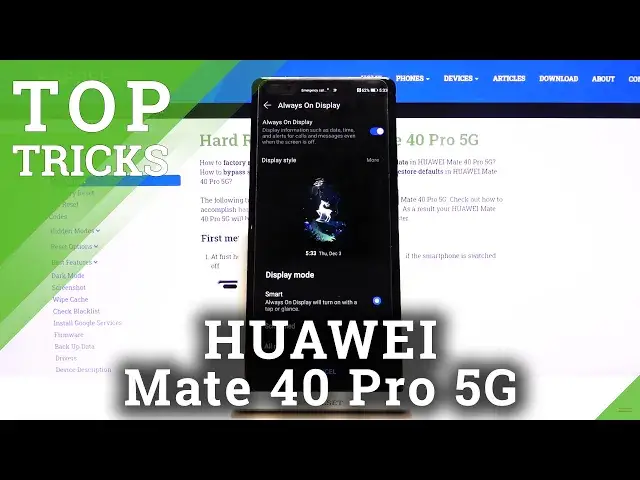
is going to be the always on display. And on Huawei on at least this version of
7:56
UI we too have under the disk not here my bad under our home screen and wallpaper we all have always on display which you can enable and you can customize it even further
8:10
So display mode. We can set it to be scheduled so it will turn on at a given day, or not day, but given time
8:20
So you can set it to be only a night thing or only during your work hours, whichever one you want
8:25
you also have the old day which will be just kind of like it being turned on all the time anyway
8:31
and here we have the customization so we have images which we can choose from the ones that already
8:40
are loaded up here we can also add our own if that is something that you want you can basically
8:46
go to your images and simply select an image as they always on display which is really nice
8:53
now the image that I have chosen might not be the best one but it is a option if that is something that you're looking for
8:59
and then we'll also have some graphics which you can display on always on display
9:05
um make it possible so it gives you a quite nice array of different things that it can do here
9:17
compared to what was before and it's really nice I really like this
9:23
So as you can see, there is, this one looks interesting, so we have some impossible shapes right here
9:32
So those are always interesting. But yeah, so can top and apply
9:38
Also have some clocks below and just a more simple graphics. And now, as you can see, it's enabled
9:47
So if I lock the device now, it will show up this always on display
9:52
I'm going to turn off the light just so you can see it a little bit better. It does fade a little bit, but it's going to be visible all the time
10:04
And you can always get view if you've got some kind of notification, see what time it is
10:09
and have this always on display. Now, like I said, also at the beginning of this, this will use a little bit more battery
10:16
So if that is something that you are concerned about, I would advise you to not use it in this case
10:22
But in anyways, this would conclude all the tweaks and tricks that I wanted to share and if you found this very helpful
10:29
Don't forget to hit like subscribe and thanks for watching
#Online Video
#Consumer Electronics
#Other