Up next in 10

In this tutorial video, we'll share valuable tips and tricks to help you make the most of your HUAWEI P60 Pro. Discover a variety of useful features and hidden gems that can enhance your user experience and productivity.
Check our website: https://www.hardreset.info/devices/huawei/huawei-p60-pro/tutorials/
How to enable and use the split-screen feature on HUAWEI P60 Pro
Tips for maximizing battery life on HUAWEI P60 Pro
How to customize the home screen and app layout on HUAWEI P60 Pro
How to take professional-quality photos with the camera of HUAWEI P60 Pro
huaweip60pro #p60pro #huawei
Follow us on Instagram ► https://www.instagram.com/hardreset.info
Like us on Facebook ► https://www.facebook.com/hardresetinfo/
Tweet us on Twitter ► https://twitter.com/HardResetI
Support us on TikTok ► https://www.tiktok.com/@hardreset.info
Use Reset Guides for many popular Apps ► https://www.hardreset.info/apps/apps/
Show More Show Less View Video Transcript
0:00
Welcome. Infoomi is a Huawei P60 Pro and today I'll show you a couple of
0:05
tweaks and tricks you can do on this device. So we're gonna start off by going
0:11
into the settings and the home screen and here we will find home screen style which I
0:18
personally like to change it to the drawer mode which is the what I would consider
0:23
as a standard for Android devices which this is but for some reason they call
0:28
standard what Apple uses by default. I understand that they're trying to copy Apple, but it's Android
0:35
So I'm going to select the drawer mode, which will remove some of the apps from your home screen
0:39
because it would usually be more of them. And now you can access all your apps by swiping down
0:45
and you can add specific ones to your home screen. And obviously, if you have a lot of applications
0:51
it shows suggested ones, which are, I think, most commonly used by you. And under that
0:56
you'll have basically all the apps alphabetically organized, so you can just kind of swap between the letters
1:02
You can see it shows you the letter right here and select each of the apps in that letter
1:08
So it allows you to quickly enough to do all the apps
1:12
and find them a little bit easier. Moving on to the next option
1:16
it's going to be what Huawei refers to us super device. I hope this is lost in translation
1:24
because it doesn't sound anything like it just sounds like some kind of child named it, to be honest
1:30
But the actual functionality of this is not that bad. So when you have more than one device from Huawei specifically
1:41
they will work in conjunction with each other So that can be earbuds laptops tablets phones all that stuff And for instance one of the options that they give you is a multi gallery and as an example
1:55
cross-device clipboard. This one was actually going to be one of the more interesting, at this in my
2:00
opinion, because for instance you could copy some kind of link on your laptop and then it would
2:05
automatically be a pasteable on your phone, which obviously that's pretty good
2:12
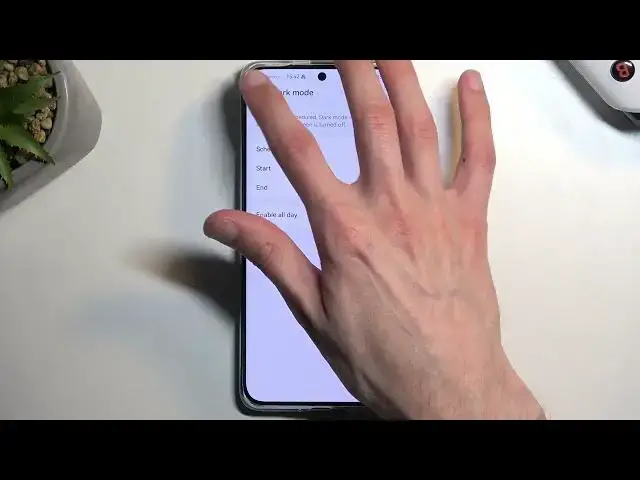
So there we go. Moving on to the next option is the dark mode, which you can find under the display and brightness
2:19
and it's right over here at the top. Now, in here, you can either turn it on permanently by flipping this switch right here, enable all day
2:28
or as a schedule, which will turn on dark mode at 10 p.m
2:33
and turn it back off at 7 a.m. giving you what I would consider best of both worlds light mode during the daytime
2:39
and dark mode during the night time. Moving on to next option, which is going to be also under the display and brightness
2:49
it's the screen refresh rate, which is right over here. Now, Huawei tends to hide their screen refresh rate, or not screen refresh rate, but frame rates
2:57
option and developer options, so they are not present there at all. At least they weren't in Nova 11i
3:03
So I assume it's not going to be here. Now, the reason I mention this is because typically I would check out what the actual refresh rate is going down to
3:10
but I am unable to do this right here. And the only thing I can go by in terms of refresh rates
3:17
is a balanced smooth display and battery life with maximum refresh rate of 120
3:23
That's the dynamic one. Now just to point out why I like to check this is because dynamic on other devices
3:28
can go all the way up to one frame per second from 120 And as you probably imagine one frame per second when the display is on will significantly decrease the strain on the device battery compared to for instance 60 which is
3:47
60 times more refresh rate per second so uh i have no way of actually checking it out unless from
3:54
maybe like spec look and what the technology is used here and just checking what that is but and that's a
4:00
little bit too much work for a casual user that just wants to know what the lowest refresh rate
4:06
of the display is. So I will just go for the negative here and
4:12
say that it's probably 60. I don't care if it's correct or not, considering
4:16
Huawei is doing a little bit too much to kind of make it difficult to figure
4:20
it out. But the reason I'm pointing this out is because the 120 to 60
4:26
is a pretty decent option for most of the people. But there will be people that might actually have a better use of the standard option
4:34
which will be running the display permanently at 60 as a maximum refresh rate
4:40
And because of that, you might experience a better battery life. So if that is your primary focus on your device for your battery to last as long as it's possible
4:48
you can change it to standard and this will obviously be achieving that
4:53
but it's only limited to screen on time. Obviously, once you turn off the screen, meaning lock the device like this
4:58
this will have well zero impact but when you're using the device it does make a difference
5:06
now moving on to the next option at the screen color mode which have here color mode and
5:13
temperature and we have normal or vivid I believe vivid is enabled by default which personally I am not the biggest fan of vivid modes on well almost any display because they are typically a little bit too vibrant a little bit too blue and a little bit
5:31
too harsh as a color itself so I like to change it to normal which as you can see it does
5:38
kind of vary I don't think the camera is picking it up all that well but just kind of looking
5:45
at it the main difference will be that the white background anything that is white
5:49
With Vivid, it's a little bit bluish. It has a tint to it
5:53
While normal changes white to more of a warm color, kind of like a yellowish-orangeish mixture
5:59
which again, it's still trying to be white. Don't forget that. But you can see this kind of like change in temperatures
6:06
depending on which one you choose. And also, it looks like the normal one is SRGB-P3 calibrated
6:16
automatically apply the standard color space as RGB best suited for types of content being displayed
6:24
so it tries to represent the colors as they were supposed to look like so if you're watching a movie
6:32
as an example typically that would be something close to what the creators of the movie in the vision that the movie
6:40
to actually look like which is obviously not the thing when you enable vivid mode and it just crank
6:45
up the saturation, the contrast and all that stuff to a little bit too high of a level
6:52
So there we go. Now this being said, this were all the tweaks and tricks are on to show you
6:56
so if you found this very helpful, don't forget to hit like, subscribe and thanks for watching
#Camera & Photo Equipment