0:00
Welcome. In front of me, I have Opo A54. 5G, and today I will show you a couple camera tricks and best features that you can find in this smartphone
0:16
So let's open the camera and we are going to start from the settings
0:20
So tap on the right upper corner and here we can find a couple of the very useful options
0:24
The first one, the watermark. You can mark your photos. You can enable phone model
0:29
You can also enable date and a time and also location. So let's activate all of them
0:35
And then if you want to customize this watermark, you can, for example, add here your name
0:44
Just like that. And when you go back and take a photo, when you open this photo in the gallery
0:53
on the left bottom corner, you can spot when the photo was taken
0:58
So if there you get to place, with a smartphone model and the mark
1:03
it was taken by hard reset as you can see and also
1:08
the date and time of the photo when you go back to the settings
1:16
we can also find the volume button functions so as you can see currently it's up as a shutter
1:19
but I can recommend you to use it as zoom because right now when you grab your phone
1:24
and press volume up or volume down button you can very smooth
1:28
use zoom feature so take a look when I press the volume up button and volume down I can zoom in
1:36
and zoom out by using only one finger and also we can switch between the lenses as you can see right now
1:42
when I hold this volume down button I just simply move to the ultra wide lens so take a look For example I going to take this card I going to put it here
1:56
And let's zoom in. So as you can see, we can go very close and very smooth to the object
2:08
Okay, let's go for the settings at our time. And here we can also enable the fingerprint shotting
2:14
So, in this smartphone you can find finger pin sensor on the right edge, it's linked with the power key
2:19
And when you enable this option, finger pin shoting, you can put your finger here, simply tap once
2:25
You don't have to press it, you just simply tap, and the photo was taken
2:29
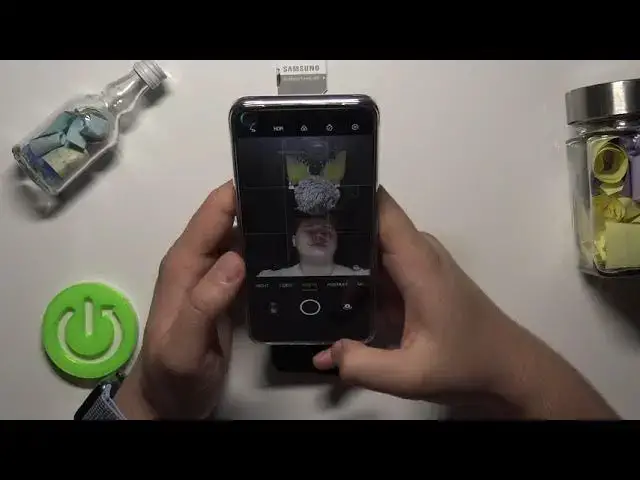
So when you hold your smartphone in one hand and you cannot reach for the shutter, like in my case, as you can see, you can use this simple option
2:37
What you can find here also the composition, very common and very useful feature
2:49
So for example, we can add grid lines to our photos. And right now we are able to make better composition
2:56
So if you want to get this card in the middle of the photo, you can just simply move it and
3:00
set it up. Here we got the grid lines on the screen. Of course, when we take a photo, it will be not shown here
3:07
as you can see. Okay, and I think it will be all
3:16
Let's find, oh, we got also the flip selfie, so take a look. When I try to take selfie, I'm going to show you on the front camera
3:26
So when I take photo, just like that, and then go for the gallery, it looks like that, but you can flip it
3:32
You can simply open the settings go for advanced settings and click to flip selfie and just take a look There the difference as you can see
3:48
Okay, I'm going to delete these photos. And right now we are going to focus on the modes that we have right here
3:56
So I'm not going to talk about night video or photo or portrait because you know that
4:00
Everybody knows that it's on a very smartphone. But when you are on the photo mode, you can add filters to your photo
4:06
So when you tap right here, as you can see, we can quickly change the temperature and the colors on our photo
4:17
So we don't have to use any external apps, we can take maybe photo with city and maybe with foot
4:28
And right now without it, with original. and there is other different between the photos
4:38
Right now, when you go for more settings, we can find very useful text scanner feature
4:45
So, for example, you want to scan some kind of the text
4:50
and I will show you on this one, so you can put it right here
4:55
Just like that, you have to press shutter, and smartphone will be automatically
5:01
edit the photo and we'll only focus on the text. Let's turn it off and when we go also for more modes we can find extra HD
5:15
So when we choose this mode and take photo with extra HD, take a look
5:21
We can take this coin take photo with extra HD and then without extra HD wait a minute and take a look on the difference
5:39
so this one is without extra HD and it looks like that
5:44
and when we got extra HD turn it on it looks like that and as you can see we can
5:51
go much closer to our object we can spot more details And basically this ATRO HD mode Itu use 48 megapixel less
6:01
and we can get better quality of the photo and more details
6:06
And as I said before, we can zoom in much much closer than on the normal mode
6:13
And I think that's all because those other modes like slow motion, time-lapse or pro expert mode you know that
6:21
It's the same like video or photo. There's nothing that we can talk about
6:26
Maybe we can also test the macro mode, but those macro lenses are not that good, to be honest
6:34
So we have to be four centimeters away. Okay, let's try to make it like that
6:45
And it looks... I think it disappoint me because when you use 48 megapixel
6:52
well, definitely we can go, oh come on, we can go much closer and we get more details than on the macro mode
7:00
So for me it's useful feature. And basically that's all. If you find this video helpful, remember to love a like, comment
7:08
and of course subscribe to our channel