0:00
Welcome. Infronomy is a Black Shark 5 Pro and today I'll show you how we can bypass the Google verification on this phone
0:12
Now, before I get started, I'm just going to quickly go over the state of this phone right here so you can obviously see it is locked and the phone is prompting me right now to verify the previously set up pattern
0:23
So I need to confirm that to actually finish up the setup or I could use a previously logged in Google account to verify it
0:29
that way. Now assuming we don't know either of those, what we will want to do is
0:35
number one connect to Wi-Fi network which when I back up you can see that I have
0:38
already done so. So progress through the setup till you get to this page, choose your
0:42
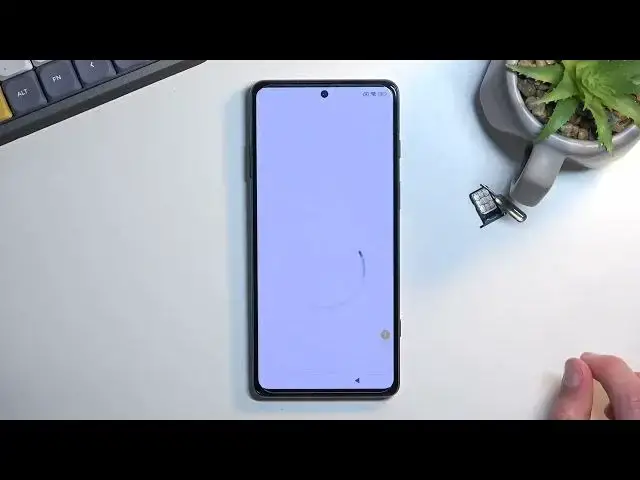
Wi-Fi network, connect to it and from there you want to grab a SIM card which
0:47
will be required for this. So let's take off the case. Now the tray is located at the
0:58
bottom of the phone so just pop it out there we go insert the card into your phone and we should get sim pen I do I believe
1:20
this is a requirement I quickly make sure Actually, no, it's not a requirement so we don't even need the SIM pin
1:32
So anyway, once you pop it in, you want to then take it out
1:39
It should lock the device. So let's press Power key and you will be on the lock screen
1:46
So pull this down, you'll get this little bell icon and you want to press on it
1:52
I will fully take out the SIM card. So there we go
1:58
So once you press on that bell icon, it will take you to the notification center And from here we will want to navigate to up notifications scroll all the way down there we go select YouTube then you want to select
2:16
additional settings in the app how about help and in the help search bar you
2:27
want to type in delete or disable Okay, it shows up as a suggested one
2:38
Delete or disable apps on Android. Second option for me. Just want to press on it
2:45
From here, top on the step one. As you can see, top to go to application settings
2:50
Then you want to select more. Show system. Scroll just a little bit down and you'll find Android setup
3:03
I'm going to click on it, select ForStop and OK. Then go back
3:15
Make sure that there isn't any other Android setup running, but it looks like it is the only one
3:22
So from here, I'm going to scroll down to Google Play Services
3:26
Okay, right over here. And select disable, disable up
3:38
Once you disable it, it looks like it closes it out, so let's find it again, go-play
3:43
services, and then also select for stop and okay. From here, go back and scroll all the way down, actually a little bit up
3:56
looking for settings It looks like we have two different ones So I gonna check the first one right here And it looks like this is the one that we need to access
4:19
Now as you can see, the one that I opened has the app option right here called open
4:24
If I open up the second settings, you can see it does not have this option
4:29
So make sure you open up the correct one. Select open. And from here we'll scroll down to additional settings, accessibility
4:47
From here I believe we need to Navgate 2 Vision. See, no, there it is, my bad
4:57
So we're looking for accessibility menu. So toggle it on, select allow
5:03
Okay. And once you have toggled the accessibility menu, simply just back out to the beginning of the setup
5:11
which I think I already come in. So, progress through the setup
5:22
Until you get to, I believe, this page or, nope, next one. So select don't copy and you should be stuck right here
5:29
The reason for that is because we have disabled Google Play services, so, the phone cannot connect to any kind of Google services to validate if the device is locked
5:39
or not. So we're just going to kind of stay here. So from here what you want to do is select
5:44
this accessibility mini button, select Google Assistant, and then select settings, which
5:51
should show up right here. And from here that will open up Google Play Services page
5:59
where you want to select enable. MOYE MOYE MOY MAK MAK MAK MAK MAK There we go
6:29
As you can see, it takes a couple tries to get it enabled
6:32
That's completely normal. So just keep on repeating this combination of button machine until you manage to enable it
6:41
right over here. Once you do, press on the back. button once
6:47
Tap somewhere on the screen to get rid of the Google Assistant and as you can see it just
6:52
kind of skipped through the verification process of the phone so from here we can just finish up the setup and I will mention this right now that once you have access to the
7:02
home screen the device is still not unlocked so there is one last thing we need to do to
7:06
finish this off which is factory reset the device through settings to open up settings
7:11
scroll all the way down, actually not all the way down, the first option about phone
7:17
And in here we have factory reset, erase all data, factory reset, and select next, after the 10 seconds
7:28
passes, and then select okay once the another 10 seconds passes. I'm not going to go over this on the video just because this is a simple factory reset all the device
7:41
which we need to do as a last step, but the reason I don't want to do this is it just wastes time for you as a viewer
7:49
It will not show you anything new, anything extra. It's just a lot of black screen, and once it's finished
7:56
you are presented with the setup screen, at which point you can set up your phone however you want
8:00
It is fully unlocked at that point, so do whatever you want. So anyway, with that being said
8:07
that is basically how you bypass the Google verification on this phone, and if you found this very helpful, don't forget to add like, subscribe and thanks for watching