live_tv
Livestream Starting Soon
00
Hours
:
00
Minutes
:
00
Seconds
Up next in 10

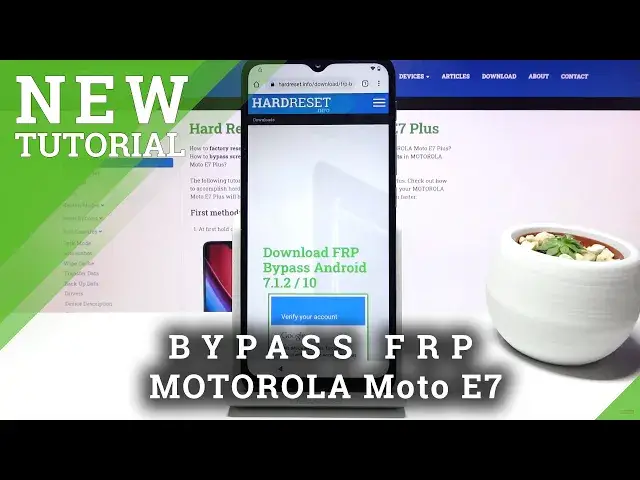
Find out more info about MOTOROLA Moto E7:
https://www.hardreset.info/devices/motorola/motorola-moto-e7/
Come along with the uploaded tutorial, where we show you how to successfully unlock FRP in MOTOROLA Moto E7. If you can’t log in to your old Google account, because you forgot your Google login details, follow the presented instructions and learn how to bypass Google verification in MOTOROLA Moto E7. Let’s use the presented video guide and in few easy steps skip Google verification on your Motorola smartphone. Visit our HardReset.info YT channel and discover many useful tutorials for MOTOROLA Moto E7.
How to unlock FRP in MOTOROLA Moto E7? How to bypass Google verification in MOTOROLA Moto E7? How to remove Google protection in MOTOROLA Moto E7? How to skip Google verification in MOTOROLA Moto E7? How to unlock MOTOROLA Moto E7? How to activate MOTOROLA Moto E7 without Google Account?
Follow us on Instagram ► https://www.instagram.com/hardreset.info
Like us on Facebook ► https://www.facebook.com/hardresetinfo/
Tweet us on Twitter ► https://twitter.com/HardResetI
Show More Show Less View Video Transcript
0:00
Welcome
0:06
Infront me is a Motorola Moto E7 Plus and today I'll show you how to bypass the Google
0:11
verification on this device. Now before we get started I will mention that we will need a Wi-Fi connection so start
0:18
off with that and once you connect I can begin. So as you can see the phone in front of me is locked and I can unlock it either using a
0:27
pattern or using the Google account. Now, assuming we don't know either of those, we're going to begin the process by going
0:34
back to the first page and changing the language to any kind of other language that has
0:38
a different keyboard. So Greek, Russian will work just fine enough, so let's scroll down
0:44
Basically any of these languages right here will also work. So I'm going to choose here in Greek
0:53
And you basically want to skip through this again and get back to the Google verification page
0:58
Okay, so from here, tap on a field, it will bring up a keyboard and as you can see, there is a globe
1:22
Hold the globe, this will bring up the menu right here. And I want to start up by tapping on the bottom. This is the language select right here
1:28
and it will take us to this page so let's go right over here at the bottom and choose any kind
1:33
option that is lacking an arrow so as you can see there is several of them
1:39
start with the first one once you top on it you want to add it which is this blue button right
1:43
over here and then let's add one more and it should be good enough so once you have added it
1:51
go back and change back to your language it's for me it's going to be english and again
1:58
we're going to progress through this back to the google page and again top on the field hold the
2:16
globe icon again and this same around start off by changing it to query so the second option at
2:22
least for me and this will change the alpha there right here to query and hold the globe again
2:26
and go to again language settings at keyboard and this time around you're looking for
2:32
option with an arrow so for me it's the Albanian right here once upon it will give you a couple
2:38
different keyboards that doesn't really matter what matters is the 3 that option in there
2:42
which allows us to go to help and feedback so and you describe your issue
2:49
type in morse or m o and we'll bring up the suggested use morse code so select it
2:56
There we go. Top on a video. And it will reload and give us again 3DAR option
3:10
That took a little bit long So top on just 3 dots and choose Watch later which will in turn open up our browser accept and continue and we don want to log in so no thanks now top on a bar
3:24
right there and you want to type in hard reset that info
3:41
Top on three bars, go to the download category. And in the download search field, you want to type in Android 7.1.2
3:56
Like so. And choose download
4:11
And this time around you actually want to hold the download link
4:15
This will bring up this window, so from here choose open an incognito tab. This will solve any kind of problem of the download
4:24
never finishing or it sometimes happens and it's just completely random. And from here tap on okay
4:31
As you can see it's downloading at the bottom
4:41
Once it's done, downloading, choose open
4:51
And before we can install it, we need to go to settings
4:55
Allow from this source, so enable it, go back and tap install
5:09
Now that it's done installing, choose open, continue at the bottom and okay
5:16
And we're basically done now. From now on this message will be popping up throughout the process
5:23
Disregarded, it already, even though we barely did anything, it already has served its
5:29
purpose which you will see soon enough. So whenever that pops up, just either close up or top of the screen anywhere where that pop-up
5:38
isn't and this will just make it disappear and from here let's go back go back once more
5:47
and go back once more and again we're in the download card search section of this page so
5:54
erase the android 712 and then i'll type in settings and same thing download
6:08
and hold the download link and choose to open in incognito and open it up
6:21
install open it confirm whatever pops up and there we go so we should be in settings now I mention before we progress further if throughout the setup you go back too far so if you go out of the settings page
6:40
you will have to reinstall this app. So basically go back to how you got into here
6:46
by downloading the settings up and installing it and then opening it up
6:51
And that is only if you go back too far. It will basically take you back to the browser
6:55
So once you're on the settings page, let's go to apps and notifications
7:02
CL39, tap on the 3 dots, and go to show system, and scroll down to G
7:09
There we go. So right now on the G. And you're looking for Google Play Services and Google Play Store
7:17
So let's choose either one of those. Choose disable, disable app. Go back, disregard
7:25
crashing as you can see play services is disabled now go play store
7:32
disable disable app go back and again play store is disabled now so from
7:40
here back out to the main settings page and you want to go to accounts upon our
7:48
account and choose Google and that is what the app that is crashing allowed us
7:54
to do. Select Google, which if you would not install this app, Google option would not be visible
8:02
So from here, let's log in using our Google account. Now, if you don't have a Google account
8:07
you can always create it. I would advise you to do it on the computer, it's going to be simpler. You can basically create some kind of trash account specifically for this purpose. One time use
8:18
It doesn't really matter. So I already have my account, so that's what I'm going to use
8:24
and now I'm going to put in a password for it
8:40
Let's go to next and as can see it logged in. So from here, let's agree to terms of service
8:50
Give it a second and there we go. So, once you have added account, go back once, yep, the main settings page and go back
9:00
to the apps and notifications. CL39 system, scroll down to G, Google, Google Play Services and Google Play Store, and
9:20
choose to enable. Again, this crashed, so click off the screen doesn't matter
9:27
And Google Play Store, enable. And there we go. As you can see now, both of them are enabled
9:33
Once you have done it, hold the power button and select restart
9:53
Thank you So from here you want to proceed to the setup of the device and at this time around I advise it just to skip majority of this It doesn really matter what you choose right here
10:07
And you can also see this is previously the screen that was telling us to verify the Google
10:14
account and now it's telling us that account was that it and it's the one that i have used to log in so let's
10:21
stop on next And there we have so we're done with this setup
11:04
So once you see the home screen, let's go into the settings
11:10
So you can do that by pulling down the notification panel and you have this key icon right over here
11:14
scroll all the way down to system, advanced, reset options, erase all data, factory reset
11:22
And as you can see, it will remove the Google account that we have added, but also will remove the previous account that was blocking us
11:28
So let's stop erase all data, erase all data, and the process will begin
11:33
Now this will take about a minute or so, and once it's finished, we should be back in the setup screen
11:38
So I'll be back once that is visible. So as you can see now the process is finished and we can now set up the device as how we will like
12:14
At this moment in time the device is basically fully unlocked. So we can skip things like connecting to Wi-Fi
12:23
And once more I'm going to go to the setup process really quickly skipping most of this
12:27
but by all means set it up as however you like. We're done with the setup
12:46
And as you see, there was no need to verify anything. The device is now fully unlocked
12:50
And if you found this very helpful, don't forget to hit like, subscribe, and thanks for watching
12:56
Thank you