0:00
Welcome. In front of me is a Vivo Y33s and today I'll show you how to go through the
0:12
setup process of this phone. So when you get started you will be presented with
0:16
the hello screen and from here simply choose your desired language and then
0:22
proceed by going further to choosing your region. Now once you choose your
0:28
region then you need to obviously agree to the user agreement because no phone
0:33
can go without those. We have some additional privacy terms. It's kind of
0:40
misleading name for privacy on your phone but whatever. Then we have
0:45
e-warranty card privacy. Again privacy terms but for e-warranty. I mean obviously you can read what the heck this is but as you can see you do have
0:56
to agree to it if you like it or you don't. Too bad. Now next page we have
1:01
send user and diagnostic information. Now I believe this is from Vivo not Google
1:08
and you don't actually have to agree to this one so we can skip this. This will
1:12
bring us to Wi-Fi connection so here you can connect to Wi-Fi if you have one. If
1:16
you don't you can simply skip it. You also have the option to use your mobile
1:20
network by inserting a SIM card if that is something that you wanted to do and if you don't want to connect to any network that's fine too. You can simply
1:27
skip both of them though you will lose the ability to log into your Google account throughout the setup process and additionally date and time won't be set
1:34
automatically which both of those things can be changed later on after the setup
1:38
has been finished. So there is the date and time which I'll skip and then we
1:49
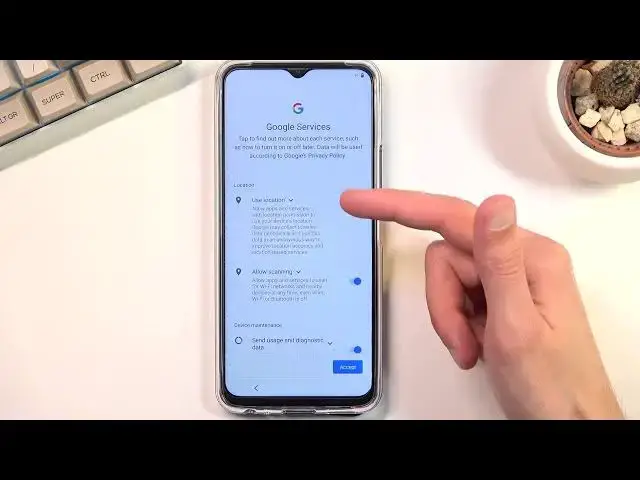
have Google services. So like I mentioned before the ones that we've seen there
1:53
were simply from Vivo so here we have another location, scanning and sending
1:58
user and diagnostic data in which this one is repeated now. So from here we can
2:04
choose if we want our GPS tracking, if we want to device to look for signals like
2:10
Wi-Fi and Bluetooth and lastly if we want Google to spy on us. We have set
2:17
unlocking method we have a couple different ways of doing so. We have the
2:21
fingerprint face recognition and also just a normal screen lock meaning pin
2:25
pattern or password. Now if you want to use any of the two below ones so
2:32
fingerprint or face recognition one of them or both you will be required to set
2:37
up a physical way of unlocking the device anyway. So that is if something
2:42
happens to your face your finger you still have some kind of way of unlocking
2:46
the device. I'll be setting up only a screen lock by default it opts into a
2:52
pin so you can tap right over here and then select pattern as an example
2:57
destroy it, repeat it, confirm it and now it's set. And as you can see it tells us
3:04
that it's set right here and we can also add the two additional ones if we want to but I just want to stick with this one. Keep your system up to date so this
3:11
is what update go to settings system. Okay so we can either click on next to
3:22
select to be in manual update or not manual but automatic or we can select
3:27
right here to basically have them manually installed meaning that you have
3:31
to go into settings and look for them. And this brings us to the end of the
3:37
setup. There we go show us our home screen. So that is how you can go through the
3:43
setup of this phone and if you found this very helpful don't forget to hit like, subscribe and thanks for watching