Up next in 10

We invite you to visit our website and find more about MIBAO D100: https://www.hardreset.info/devices/mibao/mibao-d100
Embark on your surveillance journey! Watch our video guide on setting up and initializing the MIBAO D100 IP camera. Follow the step-by-step instructions to connect it to your phone via the dedicated IPC360 app seamlessly. Watch now and ensure a smooth start to your security setup with the MIBAO D100.
How to start and configure the MIBAO D100 security camera? How to initialize a MIBAO D100 camera? How to connect the MIBAO D100 camera to my phone? How to prepare the MIBAO D100 IP camera for use?
#MIBAOD100 #IPC360 #SetUp
Follow us on Instagram ► https://www.instagram.com/hardreset.info
Like us on Facebook ► https://www.facebook.com/hardresetinfo/
Tweet us on Twitter ► https://twitter.com/HardResetI
Support us on TikTok ► https://www.tiktok.com/@hardreset.info
Use Reset Guides for many popular Apps ► https://www.hardreset.info/apps/apps/
Show More Show Less View Video Transcript
0:00
We are glad to welcome you in a hard reset YouTube channel
0:03
In today's video, I will show how you can set this Mybeo D100 IP camera up
0:10
link it with your phone and pretty much prepare this camera for use
0:21
So to start, you will need to take the power cord, the charging wire
0:27
and supply your camera with power since it doesn't run on batteries, it runs on the direct
0:33
electricity. So put the charger brick into your socket. Well, not your, but just some socket
0:46
Then this micro USB goes into the slot on the back of the camera here. So insert it
0:54
So now the camera gets booted up. And it usually requires about 15 to 20 seconds to wake itself up, configure itself
1:05
you know, look at its surroundings and et cetera. So let's allow some time for this camera to perform all those necessary stuff to wake itself up
1:17
to move around. And you know that this process is finished and you can continue when you see that this
1:24
red status light blinks slowly. That means that we can proceed now. What you need to do
1:32
I would actually recommend if you got this camera secondhand or it's been used before you bought it
1:41
It's not like brand new. You can also, before setting it up, you can hard reset the camera
1:47
In order to do that, take some kind of needle or injection tool, find the SD card slot
1:54
right at the bottom of this bowl or sphere and on top of it, well, on top of it, above it, rather
2:04
you'll find a very, very tiny hole, here it is. So put your needle or injection tool inside
2:11
press until you hear a click, and now wait for the camera to be reset, which you'll know
2:16
it happened by these two blinking sounds we just heard. So, now, to do you know, to be
2:24
take your phone, in my case that's an iPhone, but it doesn't matter whether yours is iPhone or
2:32
Android. The process will be somewhat identical. Now, first, that first step that you got to do
2:40
is to connect your phone to a Wi network and it crucially important that you connect yourself to a 2 gigahertz Wi since if the Wi network will have 5 frequency this setup will not work
2:56
This camera does not support the 5-GHz Wi-Fi. So make sure that whatever Wi-Fi network you're connected to is 2.4G
3:07
Mine is 5G, so I will need to reconnect myself to another network. So that's what I'm going to do now
3:12
Once this step is out of the way, open the IPC 360 app
3:17
By the way, we have a whole separate video about how you can download and install this app
3:23
as well as create an account. So if you have problems with, well, app or account, make sure to check those videos out
3:31
Now, once the app is launched, open the Devices section. Next step at this plus button here
3:39
Your location is pollen, that's correct, or you can change your region. if your location is incorrect
3:45
Now grant this app with all the permission it requires, since if it will not have some permissions
3:51
it will not be able to successfully set up the camera. So here, it also reminds you that your Wi-Fi network has to be 2.4G
4:02
or 2.4 gigahertz frequency. Here, tap at the camera. Now there are two setup modes you can use either smart or wireless mode
4:11
mode as it is called in the manual or wired mode 99% of you will probably go with the
4:20
Wi-Fi setup so will I since the wired setup is way easier and requires less things to be
4:26
completed anyway so here is the smart mode now it says that you need to plug in the camera
4:32
and confirm that the camera indicator light is flashing red slowly or blinking red slowly check
4:41
experiencing any issues at this stage you can get yourself acquainted with those instructions
4:49
here. So let's tap at the next button. Now input the password of the Wi-Fi network you will
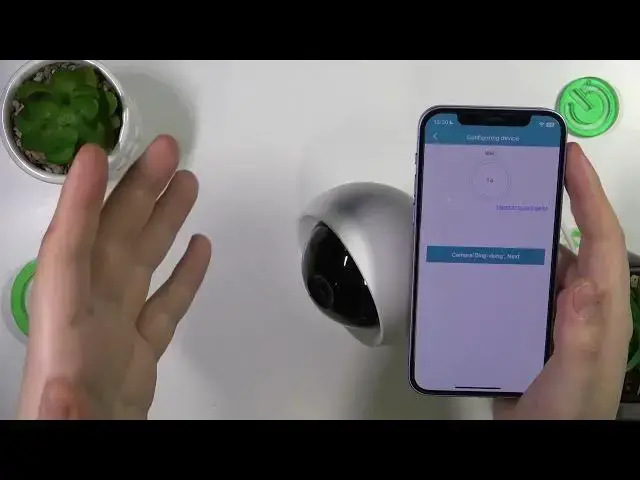
4:57
connect this IP camera through. So input the password. And now wait until the device configuration
5:06
is finished. It can take anywhere between like 20, 30 seconds, up to a minute
5:11
minute. Make sure that your sound is enabled also. Because as you can see, it will produce those
5:20
beeps that are going to help you to set everything up. So make sure to unmute the app sound here
5:33
So as you could have heard the doorbell ring the doorbell sound rank the doorbell sound rank So now we can tap over here
5:45
And within a few seconds, I would assume, the setup should be finished
5:54
So let's wait now. Maybe it has some remaining integrations to make
6:03
So sometimes you just gotta be patient and wait for this process to finish
6:16
So let me do that myself. And simply wait
6:27
So as we can see, the setup failed for some reason. But that's completely normal
6:37
While I was testing this IP camera yesterday, I've gotten a bunch of those failed configurations
6:44
So, well, just restart the process. Do the same. Actually, let me check if my Wi-Fi password is correct
6:55
Well, it should be. Let's just repeat this procedure. Oh, yeah
7:05
I'm sorry. Oh, that's all right for you. Oh, yeah
7:30
Oh, yep, so it says that the Wi-Fi password is wrong, so I've probably gotten, I mean, inputted the wrong password
7:41
So let me quickly fix this issue and get back to you guys
7:52
Oh, I see my mistake now, so, well, I have accidentally entered the first AHS cabinet
8:00
but the password requires the smaller version of it. So let's do everything once again
8:11
And this time the setup should succeed. So... So the status light is once again So the status light is once again green The camera ready
8:34
As you could have heard, the camera is ready. The connection and setup both were successful
8:40
So now you've got to choose a name for your camera. I'll just name it
8:46
I'm a ID camera. Now select the, or you can choose one of the suggestions
8:53
names, we'll go with tiny room, whatever. Now you need to create the navigation picture
9:00
so the camera will make the 180 degrees turn around the room
9:06
to check its surroundings and remember them. And in the future, you'll have this reference image
9:12
and you can tap anywhere at this image. Let's see, this is your room
9:16
And the camera will focus and point its lens towards the zone you have tapped on
9:24
So if you want to see this side of your room, you can tap over here, and the camera will move towards the zone that you've chosen
9:32
So let's allow the camera to create the navigation picture. So let's wait, I guess
9:43
So as you can clearly see, those navigation reference pictures are getting created
9:48
I've even gotten my jacket. into the frame, so let's wait for this process to finish
9:59
It will take the grand total of 21 screenshots or images. As I can see it continues still
10:21
how the real navigation picture looks like. I mean it's not perfect but it will do. And well
10:28
at this point the camera has been set up successfully as you can see. So I guess that will do it for
10:38
this video or actually before I go let me quickly show how this navigation picture
10:42
actually works. So if I want to see this part of the room I'll just step over here and the
10:46
camera will turn towards it as I've already said. Or if you're a
10:51
if I want to point camera at me, I can do that. And as you can see, hello
11:00
It will. Anyway, that will be it for this video, guys. So thanks for watching
11:05
Thanks for your attention. And bye-bye
#Camera & Photo Equipment
#Home Safety & Security
#Science
#Home Alarm & Security Systems