Up next in 10

How to Set Up Huawei 5G CPE Pro2 – Full Configuration from Box to Fully Functional Router
Jul 16, 2024
Find out more: https://www.hardreset.info/devices/huawei/huawei-5g-cpe-pro2/set-sim-card/ In this video I will show you how to set up, configure and use HUAWEI 5G CPE Pro2 router. It is complete video tutorial how to unbox router, add HUAWEI 5G CPE Pro2 to mobile app, set up secure Wi-Fi password and finally connect to the internet using HUAWEI 5G CPE Pro2 router. I will how to install SIM card in a designated SIM card slot and configure 5G GSM connection. Thanks to this video you will be able to set up your home network with ease and without any issues.
How to set up HUAWEI 5G CPE Pro2? How to configure HUAWEI 5G CPE Pro2? How install SIM Card in HUAWEI 5G CPE Pro2? How to connect with HUAWEI 5G CPE Pro2 Wi-Fi? How to install HUAWEI 5G CPE Pro2? How to establish 5G connection using HUAWEI 5G CPE Pro2? What’s in the HUAWEI 5G CPE Pro2 box? How to change Wi-Fi password on HUAWEI 5G CPE Pro2?
Follow us on Instagram ► https://www.instagram.com/hardreset.info/
Like us on Facebook ► https://www.facebook.com/hardresetinfo/
Tweet us on Twitter ► https://twitter.com/HardresetI/
Show More Show Less View Video Transcript
0:00
Welcome. So today I'm going to show you how to connect your, well, network to this
0:11
Huawei 5G router. So there is one thing that I will need, and it's an app on our phone
0:18
and this is going to be the easiest way you can do it. There is probably different ways
0:25
which will require you to connect it to your Wi-Fi router, and then
0:29
to basically from the router itself to your computer on a cable and then you can go
0:36
through the IP and change it but the way I'm gonna show you is just a little bit
0:40
simpler and I would say more convenient so let's just pop it open and get the
0:45
experience as you would do basically starting off with this so open that open
0:50
right here we get the router itself obviously just take it out set it right over
0:58
here and then we also will need the charting table so I don't want to do this
1:06
so I'm just gonna drop this out and there's our cable so I'm gonna obviously
1:14
plug it in quickly I have a cable or outlet right next to me so I can just
1:20
simply pop it in here and now before actually plug it in I'm gonna go over
1:25
what's on the underside of it Hopefully it is good enough in the focus
1:32
But basically we have the QR code which you can scan to connect to your Wi-Fi quickly
1:38
That is for people that just wouldn't really want... If you don't want to give someone your password or something like that, you can just get
1:46
their phone, turn on a QR code and quickly demonstrate how this would look like
1:51
So at least for me, I open up camera and get it out of the line
1:57
get out of the light. And I have this button right over here so I can press this, go to
2:01
code scanner and when I try to scan this, there we go. As can see it automatically tries to
2:11
connect, it knows the name of it and basically every info that you need to have about this. So
2:17
Wi-Fi network name and also password and then just press connect. Now because this is turned
2:22
off it won't really connect right now. So, now apart from that we also have a
2:27
We have things like our Wi password which is going to be right over here below It a Wi password you can see for me it the B or 4BYF whatever then we have the IP and below that we have a password this is
2:40
administrator password so if you want to change some kind of settings on this device you will
2:45
need to look at here for the password and if you're doing it's through the computer like I said
2:52
when you plug it in using a cable you will use the IP right here hopefully like I said it's visible
2:58
but basically have an IP and this IP I believe is the same for every router of this brand
3:04
so it's going to be 192.168.8.8.1. And when you put that in there in your web browser it's going to
3:13
pop up with the password. So what I need to do is provide the password that is below here. And from there
3:20
you can change settings. Now I'm going to show it through the app. So let's plug it in and
3:28
Wait for a second, you should see some lights pop up here
3:33
So you're looking and waiting for the lights to actually light up, that's going to mean that
3:37
they're booted. Now I did already insert a SIM card into this device, so if you haven't done so you can't
3:46
do it and all you need to do is just pop it right below here
3:49
So all you do is just... I'll go, you lift that up
3:56
And as can see there's my SIM card right up here. So you insert it with the cut out on the top left side
4:03
As you can see, I'm just going to slide it down. And you need to kind of push it in there deeply, deep, so it clicks in
4:10
Otherwise it will be sticking out. You don't want that. It needs to be basically all the way in
4:16
So just close that off and hope that the lights, yep, there we go
4:20
So you can see the lights are already on and the rotor is ready to go
4:24
So we're basically done with the rotor itself. itself for now we can set it to decide and not really think about it anymore and go
4:32
to our phone so on an Android or probably able to open either the Play Store or your
4:43
play store or App Store and go to your App Store right there and search for the
4:51
Huawei AI Life which is this up right over here as you can see I already have a
4:56
download it all you need to open it up and I did add one thing in here disregard it it completely irrelevant to what we need to do here So once you in the app top on the plus it actually pops it up with it right now
5:15
So I'm going to configure rather Huawei, blah, blah, blah. I'm going to show that for later
5:21
I'm going to go about it as though no pop-up has appeared because this could be completely a
5:28
Huawei related thing where it just recognizes that there is another Huawei device kind of
5:32
like it does it with earbuds. I'm not really sure, so I'm gonna go about it manually
5:36
So you're top on the plus, it's gonna start scanning. Now it automatically detects it
5:42
The first time around when I tried it, it couldn't find it. And if that is the case, all you really need to do
5:46
is tap on add manually. And for me, router, you have 5G routers
5:51
and it's a 5G CPE Pro selected, and it brings up that you need to scan the code
5:59
So all you do is just scan. Flip it over, and you scan the code
6:14
And there we go. As you can see, I didn't press anything. It automatically scanned it
6:19
And I believe if I go back, go back there it is
6:25
So you can see it's showing up right over here. So let me put it back up
6:30
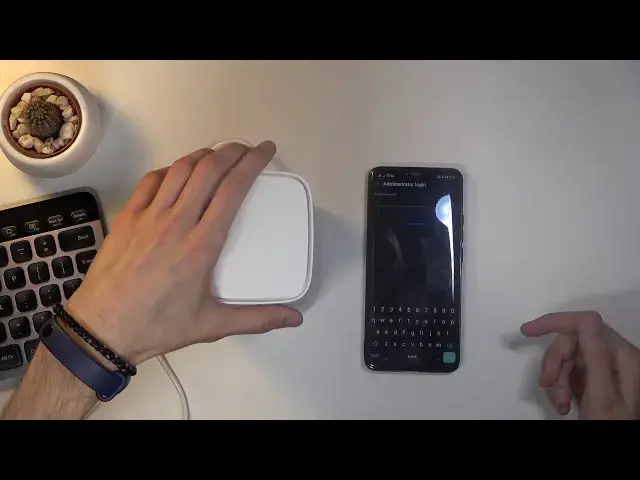
From here you can go to it, login, so we will log in with the administrator password or login
6:38
So again, it's on the underside of the router. It is the password right below the IP
6:45
So I'm going to quickly insert it. Y F Q T2 M E
7:02
there we go let's check it if that's correct so JYF right
7:10
sorry for the shaky camera so let's just login and there we go and there we go
7:19
So you can see it gives me the model of it right now and get started
7:26
However, wireless, let's just go to next and agree. Obviously we do need to agree to everything
7:32
Overnight updates you can enable it or skip it It completely up to you Let go to next Internal Access Wizard So in here we already have a bunch of settings So number one we have the Wi name so you can change it if you want to
7:47
Right over here. I hope. I can get it a little bit better
7:52
Hopefully, this is a bit more visible. Also move the light. Maybe that will help
7:59
So here we can change the Wi-Fi name. We can also change the password
8:03
this password right here, where you can see it's strong, it's going to be the password that
8:08
used to manually log into your router so you get internet. And this is also provided on the underside of the device itself
8:17
And then we can also set device login password, so this will allow us to change the admin password
8:24
Now, this is completely up to you if you want to change it or not
8:29
Actually, I think I might be forced to. Wi-Fi password as the router password I guess I can quickly try to go to next
8:39
yeah I need to have one let's see poor doesn't really matter
8:46
restarting Wi-Fi and 3-2-1 connect to Wi-Fi
8:56
that's kind of neat it gives you an icon. So I believe if you press this
9:06
I can connect to it without actually pressing anything, or putting anything
9:14
So you would just kind of select it, top on it, connect
9:18
And you can see I connected without providing any password, even though it's locked
9:23
So all the need to do is just simply press that big button, the same one that is displayed right over here
9:28
And from there, you kind of select the password, Wi-Fi and connect to it without any kind of hustle
9:33
Now you can still use a password if you forget it. For instance, you can then insert it the one that you have set
9:40
and everything should work. So that is kind of how you would go through the setup of this device
9:47
And as you can see, there it is. Now you do need to provide password every time to log into it
9:53
and change any kind of settings. But apart from that, you can just use it normally
9:57
So that is how you would set it up. And if you found this very helpful, don't forget
10:01
hit like, subscribe, and thanks for watching
#Consumer Electronics
#Mobile & Wireless
#Networking Equipment