0:07
Infraimanii is an iPhone 8 and today I'll show you how to jailbreak this device
0:13
So, to get started, there are several things that we will need
0:18
The most important one will be an Apple device or, well, I mean computer
0:25
so any kind of Apple computer will suffice. I have a MacBook Pro, but like I said, anyone will work
0:33
And depending on what kind of computer you have, you might need a different table, so my device only has type C ports on it, so I need this type C to type or to lightning port cable
0:46
As I see right here, let me unplug it. So as you can see, those are the two ends, type C to lightning port, and that is strictly for me
0:58
that I need because like I said I only have type C ports on this laptop but if you
1:04
have another device may only need for instance something like this so type A to the
1:09
lightning port that will work as well assuming you have port on your device for this
1:16
and obviously you need an iPhone and from there we can get started with additional
1:22
software that we'll need so on the computer side to download the software either it's going to be
1:27
provide in the description or we can also get it from our website at least all that where the link is so I going to go to Let me quickly look for it
1:43
Now I'm going to be looking at iPhone 7, but that's just kind of a quickest way for me to find it
1:54
So let's go to jailbreak, and from here choose the version for 12x
2:01
and up to 13.7. Now this process also works for iOS 14, if you're wondering
2:09
Just there is need, you just need to add additional single step to the process for it to actually work
2:17
So once you're here you can top on the page download link for the program that we'll need
2:25
Like I said, hopefully it will be added in the description so you can get it also from there
2:29
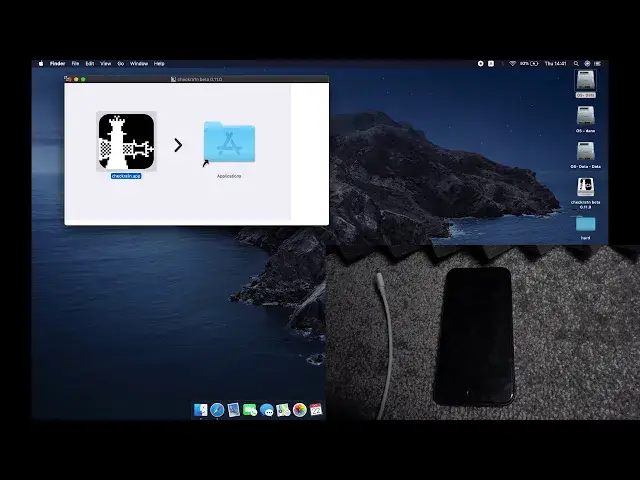
there. Once you download the DMG file, simply click on it to open it up and it will
2:35
start scanning it and skip it or just disregard it and there we go. It will open up a window
2:41
From here obviously drag the application to the apps folder, drop it and there we go as
2:45
you can see it's now in there. And additionally from here we're going to top on the
2:51
application folder. Now if you don't have an app folder right here you can simply go to the
2:58
the hard drive right here and then go to the applications either from here or just by navigating
3:05
through user And obviously open it up Now if you try to open it up right now it will block it As you can see a Mac just kind of blocks it so click on Cancel And go to System Preferences
3:20
From here, go to security and privacy. Make sure that you're on the general tab, right over here
3:28
and simply tap on Open anyway. And open. And there we go. There is our application now open
3:37
So, to get started, all you really need to do is take that cable and plug it in
3:46
So let me quickly do that. Here we go, you can see now it's plugged in and obviously it automatically changes on the
3:54
computer side. The store button is now clickable. So this is, if you're using iOS from, what was it, 12.x, basically any kind of 12 version
4:06
up to 13.7. And if you're using iOS 14, all you need to do additionally stop on the options
4:12
right here and simply check the first box right over here and go back and you should be good
4:18
to go. So now to get started, let's obviously click on start next and give it a moment. It will
4:26
put the device into recovery mode, from which point we will then have to manually put it into the
4:32
DfU mode. Yeah, so there we go. So now we can put it into the DfU mode
4:42
Now it gives you a quick guide on how to do it so you will have to hold power key and or actually no my bad volume down and side
4:57
Yeah, so basically the power, I believe, and volume down right over here for about four seconds, and then release the side button, which is the power key, and keep holding volume down
5:14
for about 10 seconds. So let's do it right now. So volume down, power
5:20
Let me also click the start right here. So 1, 2, 3, 4
5:28
Actually there is a countdown so I don't have to count it down
5:32
6, 5, 4. And it looks like it already entered it. Okay
5:38
As you can see it automatically changes it and starts, well, doing the gel break
5:43
Now this is a fairly quick process. As you can see, it's almost finished
5:52
And also as you can see, on your phone there are some dialogue boxes right there and basically
5:58
disappears once it's finished. So the device is now booting back up into iOS and as you can see on the computer side, we're
6:05
all done. So click on done and you're finished. And that is basically how you gel-break your iPhone
6:10
If you found this very helpful, don't forget to hit like. subscribe and thanks for watching