Up next in 10

Find out more: https://www.hardreset.info/devices/tecno/tecno-pova-5-pro/tutorials/
Unlock the Possibilities: Tecno Pova 5 Pro Google Verification Bypass! 🚀🔓 Your guide to seamlessly navigate through the verification process and unleash the full potential of your device. No more roadblocks, just pure tech freedom!
How to Bypass Google Block on Tecno Pova 5 Pro?
How to Skip Google Veryfication on Tecno Pova 5 Pro?
How to Bypass Google Veryfication on Tecno Pova 5 Pro?
#skipfrp #bypass #tecnopova
Follow us on Instagram ► https://www.instagram.com/hardreset.info
Like us on Facebook ► https://www.facebook.com/hardresetinfo/
Tweet us on Twitter ► https://twitter.com/HardResetI
Support us on TikTok ► https://www.tiktok.com/@hardreset.info
Use Reset Guides for many popular Apps ► https://www.hardreset.info/apps/apps/
Show More Show Less View Video Transcript
0:00
Welcome. In front of me is a TechnoPova 5 Pro, and today I'll show you how we can bypass the Google verification on this device
0:12
So to get started, I'm going to quickly touch upon the state of this device so you can see clearly it is locked, so let me to draw the verification pattern to unlock it
0:23
And I could also use a Google account instead, assuming I don't know the pattern
0:28
Now to get started with the bypass, we're going to back out to the Wi-Fi connection page
0:39
There we go. So right over here. And obviously you want to be, actually
0:47
probably need to be connected to Wi-Fi. Let me quickly check just to be certain
0:53
Oh yeah, we do actually, because we do need the sharing code. So anyway, I am connected
0:58
connect it to my network right here. And next we're going to click on this QR code
1:02
I am going to kind of hover my hand over because it's going to..
1:05
Let's go out of this screen just to see how it looks like. I'm checking for passwords, but okay, it's not there
1:14
So we're going to click on the QR code. Like I said, I'm going to kind of hover over it
1:18
There we go. And here, you have the nearby button. You want to click on it and then select
1:25
turn on. and then at the bottom you have Need Help sharing text so you want to click on that
1:32
and this will then redirect us to an article in here now we will now
1:41
select the three button at the top or three dots more specifically and then select share
1:48
article and this will give us a couple different ways we can share it we're interested in the
1:54
gmail option though keep in mind we're not going to be actually pressing it we're
1:58
going to be holding it. This will then take us to the apps or this kind of view right
2:04
here where it allows us to do things with the app. So in here we now want to go into
2:12
notifications right over here. I'm going to turn it on. I'm going to select notification style
2:28
Additional settings in the app, I believe. I'm not exactly certain about this window
2:32
So let's quickly check. Yeah, it is that. So yeah, additional settings in the app
2:40
And in here we're looking at the three dots, and then we're going to select help and feedback
2:47
And we're going to now search, I believe, for delete. Okay, not this
2:54
Oh boy, I did mess up. Just try that again Notifications notification style additional settings in the app and we going to search for delete
3:15
Delete. Delete or disable apps on Android now
3:25
We click on it, will it open up what we need? does not. How about this
3:31
There we go. It literally gives you a suggestion to an article that you were searching for
3:39
Google, come on. Anyway, here we want to select to right here, the blue text
3:46
at top to go to application settings. Give it a moment, it will load all the apps that
3:50
are running right now on the device and also all the ones that are installed
3:54
And we're looking for Android Auto. So it's the second one right here
4:00
And you want to click on it. And then we're going to select disable
4:04
So it's right at the bottom. Disable. Disable up. And first stop
4:10
Okay. Then we're going to go back once. And next thing we're looking for is the Android setup
4:17
So the next one below. I'm going to select for a stop. We're going to go back again
4:23
And now we're looking for Google Play Services. So right up here
4:29
And again, I'm going to select disable, disable up, and force stop
4:36
There we go. So we have disabled three different things and also for stop them
4:41
So the Android Auto, Android setup, and Google Play Services. Once that is done
4:48
next we want to do is navigating back to, actually right here
4:53
And we're looking for settings, correctly. Yep, so settings, you want to open it up
5:01
And then in here we're looking for accessibility menu. We need to enable it, which is in Accessibility section
5:10
If I can actually find it. So it's going to be right here, special functions
5:21
There we go. Accessibility. I'm not sure why they added specific tab for
5:25
specific tab for accessibility when there is only one option there but okay now in here
5:32
we have the accessibility mini you want to click on it and you want to enable it and
5:36
whoops and allow there we go and got it and it will add this little button right
5:41
here which we can interact with we're gonna need it for later okay so we have
5:47
basically prepped the entire device for the bypass now so next thing we're gonna do is
5:55
Back out. Now come on connect to it Okay let try this differently
6:20
I'm going to select forget and I'm going to re-sign into it. If that won't work, I will either need to reboot the device or I'm going to try a different network
6:35
Okay, let's try a different network. Okay, so in the guide, which I am basing this on
6:49
it's telling us that we need to just simply go back. But there is a little bit of a problem because by going back
6:57
the device removes the option to go to the next page and it doesn't automatically go to it itself
7:04
So, I try to forget both of these and... Okay, so it doesn't want to go to the next page, which is a little bit annoying
7:17
So I'm going to hold my power button and I'm going to select the restart, reboot option
7:22
if it actually brings it up. Hello. It was kind of odd
7:29
It just all of suddenly turned off instead of giving me the options, but I guess it works
7:34
Now what I'm hoping for is it didn't enable the Google Play services and all that stuff
7:40
because if it did it's going to be a little bit annoying and it will mean that this process
7:44
probably won't work. So we still have the accessibility menu enabled. So we're going to skip through this
8:04
Oh, well, there we go. I was checking out the guide and it apparently went to the next page. Okay
8:16
So anyway, from here I'm just going to proceed further. So as you can see, the last thing that I did to actually get this to work apparently was this
8:28
forgetting the networks and then going back and then proceeding again forward to the Wi-Fi connection page
8:34
connecting to it and it went to the next page. Okay, now we will have this page right here, so just a few moments
8:42
We will have next the don't copy option, and afterwards we will have the Google basically
8:48
trying to connect to servers and check if this device is unlocked
8:53
And that's where we will then resume the bypass. So we do need to wait for this at the moment
8:58
Okay, so like I said, don't copy
9:09
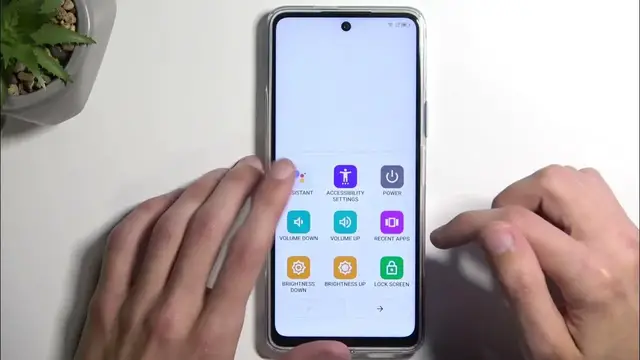
Now that it glitching out as you can see now we going to now click on this little button We going to select Assistant Come on Settings
9:21
And once it opens up settings, you can then select Enable, which is the Google Play Services page
9:27
So we will need to repeat this till it actually allows us to go all the way through
9:36
Come on. Okay, so it's not that I can't see it, it's just kind of not showing up because it's disappearing too quickly
9:55
There we go. So that took significantly longer than expected. As you can see it is
10:11
where the lock is before it was enabled once you enable it becomes disabled
10:16
Anyway, once it's enabled we'll now go back once. Get rid of the talkback right there
10:23
and it will now progress to the next page. So from here it's going to simply
10:29
finish up the setup of the device. Now there is one last thing that we will need to do
10:41
which is reset the device. Now we do so by going into the settings
10:47
Yes, I don't need information on how to use a notification panel
10:52
So into the settings, we're going to scroll down to... or not all the way to the bottom
11:02
Where do they keep the reset options? Come on. Oh, it's right there
11:09
system and then we have reset phone. Now the reason you want to do this is because the device is
11:15
still technically locked. So by performing a reset like this, we will force the device to basically
11:23
unlock itself. Now what happens and why this is the last step is when you perform a reset through
11:31
the settings like this, it forces the device to remove all the data, including the previously used security
11:37
like the screen locks and Google accounts, which we would still need to verify at certain occasions here
11:46
So we're just going to select erase all data, and erase all data, and you'll click on it once more
11:50
to begin factory resetting your phone. Now this will take a couple minutes to finish up
11:55
and once it complete it, you will then be presented with the setup screen, at which point you can go through the setup of the device
12:01
and whatever way you want, because it will be fully unlocked. So, with that being said
12:07
If you found this very helpful, don't forget to hit like, subscribe and thanks for watching