Up next in 10

Find out more: https://www.hardreset.info/devices/doro/doro-8035/
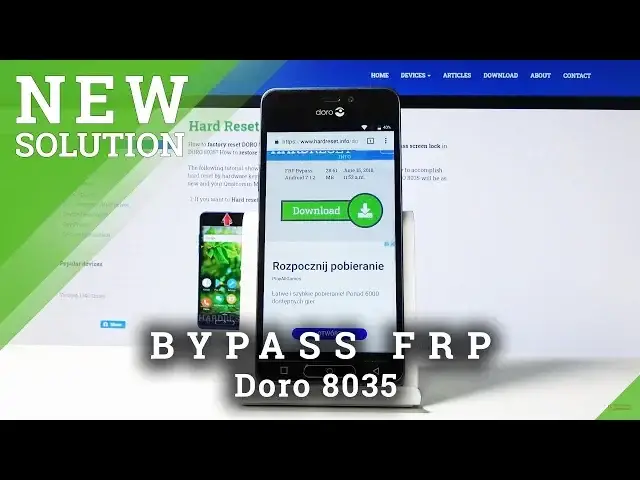
Watch and learn how to skip Google Verification in your Doro 8035. Take a look and discover this effective method of skipping FRP in your smartphone. Follow presented steps and smoothly unlock your device. Find out the best way to skip Google Verification in your Android mobile. Learn how to remove the Google protection and log in with another account.
How to Bypass Google Verification in Doro 8035? How to skip FRP in Doro 8035? How to skip Google Verification in Doro 8035? How to Bypass FRP in Doro 8035? How to unlock Doro 8035?
Follow us on Instagram ► https://www.instagram.com/hardreset.info/
Like us on Facebook ► https://www.facebook.com/hardresetinfo/
Tweet us on Twitter ► https://twitter.com/HardResetI/
Show More Show Less View Video Transcript
0:00
Welcome, in front of me is Adoro 8035 and today I'll show you how to bypass the Google
0:10
verification screen. So I'll progress to the setup a little bit further just to show you that this device
0:15
is locked. You can in the meantime connect to Wi-Fi which we will need
0:22
Now I already have done that so you can see that it automatically skips that step
0:36
Now once you connect to Wi-Fi you probably want to go to basically the verification screen
0:44
and just tap on the field where you need to type in just so the keyboard pops up
0:48
So once you're here tap on it and where you have the add symbol if you hold it it will
0:55
actually show you settings. So tap on the settings then there are keyboard settings
1:03
Scroll down till you see privacy policy, tap on show. Just enable permissions, allow and allow and it will open up the browser
1:20
So from here you want to go into YouTube. Considering this browser it doesn't really work for what we need it to do so let's go
1:28
to youtube.com
1:38
From here you can search for... like so
1:55
Choose the channel right here and click on whatever, whichever video doesn't really matter
2:01
Most of them have a link and a description to the website as you can see
2:07
So tap on the link and this link will actually open Chrome which we will use so just tap
2:12
on accept and we don't want to sign in at the moment so no thanks
2:24
So from here tap on the three bars and go into the download
2:35
Now scroll down and in the field for download you want to type in Android 7.1.2
2:47
So Android 7.1.2 as you can see in the field so let's just search for it now and it opens
3:02
up this. So tap on the download button down here, scroll down and once more tap on the download
3:24
Just open in Cognito if it doesn't want to download it unless I just lost internet
3:49
Tap on continue, allow, okay so load it and tap on okay
3:59
And there is the first one as you can see FRP. So let's go back and disregard this it's again the download and yeah I lost internet so let
4:16
me just fix this
4:43
And this time in the download field you want to search for settings like so and this is it
5:02
So tap on download again scroll down and once more tap on download okay and it's done
5:11
So now that we have downloaded both of them you can tap on three dots right here and go
5:15
into the downloads folder and for some reason I only have one which is amazing so let's
5:23
actually go back and redownload the one that for some reason didn't download
5:28
Let's go to Android, there we go, 7.1.2, there we go, search and again download
5:50
Okay so there we go
6:03
So from here number one you want to install the FRP bypass and the first one which we
6:10
have downloaded which is the Android 7.1.2. So let's go into the settings and allow from unknown sources okay and go back and once
6:22
more tap on it. So once it's done installing you don't want to open it just click on done and now install
7:00
these settings okay and open. Now from here number one we want to go into security so security scroll down to device
7:16
administrators and where you have find my device tap on that deactivate for this administrator
7:23
cool go back and now let's go into apps right here and from here you want to tap on three
7:35
dots and go into system or show system and now scroll down to G we have Google
7:48
Oh there we go. So number one we're looking for Google account manager right here disable and disable app
8:01
go back and now damn it. I'm going to go on the bottom right now so Google Play services there we go
8:19
So that's the second one that we're looking for and disable that
8:27
And now what you want to do is go back to the main page so right here and we want to
8:32
go into accounts tap on add account Google
8:43
So automatically going now once you have the field just log in using your email and address
8:54
you can if you don't have one you can always create it as you can see create account probably
8:58
would be better to do it on a computer than on here but once you create it you can then
9:04
use it to log in here so I actually already have one so I'm not going to create one
9:17
Okay let's tap on next I'm going to put in a password for this
9:33
And you will see this thing right here so terms of service let's agree to it disregard
9:43
the app crashing it doesn't really matter anymore but this update is on the Google account
9:48
anyway before if you were to try this the Google option would not even exist there so
9:54
it doesn't matter that it's crushing it now it did its purpose
9:59
So from here you want to go back and re-enable the apps so let's go back to apps again show
10:13
system and go to G there we go so there we go there is a disabled one Google Play services
10:25
and let's enable it and go up to Google account manager enables that go back and hold power
10:37
key now select reboot okay and wait for the device to boot back up
10:57
Okay so now that we're back in the setup screen now you want to go to the setup now it doesn't
11:13
really matter what you do just skip through most of it and as you will see now we can
11:18
actually skip the verification it will basically detect our account that we have added before
11:24
the reboot. Just tap on okay. And you can see account added and it's the one that we have at least I have added before
11:50
the reboot you should have yours here so you can just tap on next without actually
11:57
adding anything now
12:12
Okay so let's set up as new. Now keep in mind that once we get access to the home screen we will still perform a
12:24
hard reset of the device through the settings that will basically remove any kind of leftovers
12:30
from the previous account and the account that we have added right now and after the
12:34
reset the device will be fully unlocked and you can just completely not add anything there
12:39
won't be any verification needed or bypass it will just work as though the device is
13:44
So you can see that we're now on the home screen so you want to go into the settings
13:49
right here and scroll down to a general option again scroll down to advanced settings and
14:03
from here again all the way down to backup and reset and then choose factory data reset
14:13
reset phone and you can see that it will remove account which shows right here the
14:19
account that we have added but it will also remove the account that was previously blocking
14:25
this device so that's what we want to do. Tap on erase everything and let the reset begin and once it's done you can then set
14:34
up your device as however you like. Okay and as you can see now the process is finished now again I'm gonna skip through
15:16
most of this but the key difference now would be the fact that I can completely not connect
15:22
to Wi-Fi and just skip this which if there would be some kind of verification needed
15:26
I wouldn't be able to do that so
15:36
And like I said you can set up your device as however you like so you can connect to
15:41
Wi-Fi now add name of the device set up your Google whatever you want you can now do it
15:49
Tap on agree. And there we go and as you can see device is now fully unlocked and ready to be used
16:05
so if you found this video helpful don't forget to hit like subscribe and thanks for watching