Up next in 10

How to Bypass Google Verification in BLU Vivo Go - Skip Factory Reset Protection
Jul 19, 2024
Learn more info about BLU Vivo Go:
https://www.hardreset.info/devices/blu/blu-vivo-go/
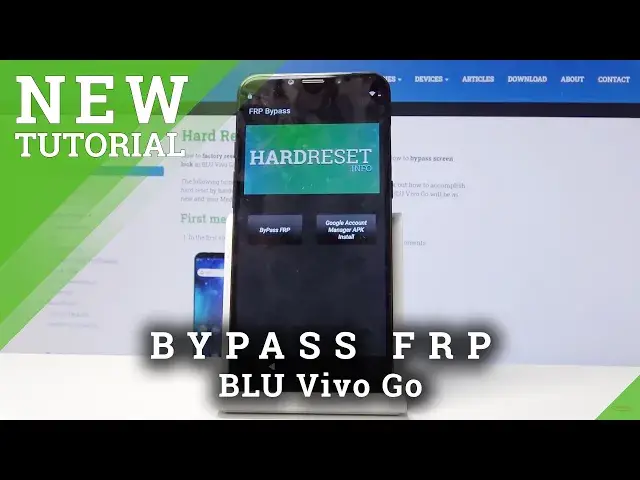
Find out how to successfully skip factory reset protection in Blu Vivo Go device. Watch the above video instruction in order to bypass google verification. You will be able to activate your Blu smartphone without Google account. Follow our few simple steps and discover how to remove FRP protection in Blu Vivo Go.
How to bypass Google verification in BLU Vivo Go? How to skip unlock FRP in BLU Vivo Go? How to bypass Google protection in BLU Vivo Go? How to activate BLU Vivo Go without Google Account? How to remove FRP in BLU Vivo Go? How to delete Google account in BLU Vivo Go?
Follow us on Instagram ► https://www.instagram.com/hardreset.info
Like us on Facebook ► https://www.facebook.com/hardresetinfo/
Tweet us on Twitter ► https://twitter.com/HardResetI
Show More Show Less View Video Transcript
0:00
Welcome
0:02
InFerlome is a blue VVVo Go, and today I'll show you how to bypass the Google
0:08
Verification Screen. And as you can see, the device in front of me is already locked, so without actually
0:14
providing the correct email address and password for it, I wouldn't be able to set up the
0:18
device or with a passcode, which was before that. So if you want to bypass this, number one, you want to connect to Wi-Fi, which I already am
0:27
considering you could see the screenЭто. for verification so connect to Wi-Fi and then go back to the first page
0:34
right here and now we want to tap on start skip and it will bring up this
0:42
page right here so tap on privacy settings then you'll blue's privacy policy
0:50
there we go and at the top you will find privacy policy the second option and it
0:59
brings you up this wall of text so what you want to do here is just hold your
1:04
finger on any kind of word it doesn't really matter where it will select the
1:08
word and it will give you an option to share it so tap on share and you'll find
1:15
here Google or Gmail so instead of tapping on Gmail like you would normally
1:20
to choose it you can actually hold it and it will bring you up up info
1:25
option so tap on that one And let's go to Advanced. Where is it
1:37
Okay, so notifications, I think it is. Then let's go, yep. So once more, it's notifications and then go into Advanced
1:46
and additional app settings in the app like so. And tap on the three dots right here, help and feedback
1:55
Good on press it, there we go. and it brings you into support here so open feedback stop on the search bar and type in morse
2:05
m orr and that's enough and you will see use morse code top on that wait for it to load up
2:14
and you will see the video tap on the video it will start loading so tap on the three dots once it
2:22
has and watch later. Now once it opens up Chrome, just want to tap on Accept and continue
2:37
Okay and we don't want to log in so no thanks. And from here, tap on the search bar and type in hard reset
2:52
There we go, hard reset that info, and let's go
3:04
And from the website you want top on the three bars up here and go into download
3:14
Then in a download field, search for Android 8. And you'll see FRP bypass up right here
3:38
Tap on the download on the bottom right there. And then once more, scroll down, and you'll find another download button right here
3:45
Tap on continue once you do. Allow and okay. And it should download it
3:51
And you will have this pop up and you can tap on open. So just tap on that
3:55
Now, I'm also going to go into an option that can sometimes happen where it doesn't want to download
4:01
So if you already seen the open button disregard what I'm going to say right now
4:06
if you didn't and you can go into downloads from here and you'll see that it's
4:12
stuck at 100% and never finishes I just disregard that top on the three dots and just
4:17
delete it and then go back to to here and instead of just tapping on this you want to hold
4:23
it and open it in incognito tab like so and this will open it up here
4:31
here and provide you with the download then you can Mobile and it will download it
4:35
no problem so like so and from there you can tap on open once it has and now once you
4:43
do open it up you can now follow along once you open it up tap on the settings here once
4:50
it shows up the option and then enable here go back and now you'll be able to install it
4:57
so tap on the install button wait for it to install and once it has
5:01
Step on Open. And here we are in the app that we have just installed
5:06
So first thing first, go into Google Account Manager APK install right here and choose for version 6.0
5:14
Again go into the settings, enable checkbox right here and go back and install
5:25
And once it's installed, click on Done and you will be back in the FRP bypass up and now choose
5:30
the other option, which is bypassed FRP, right here, and choose browser sign-in
5:35
And then tap on a three dots right here, and again, choose browser sign-in, confirm it by
5:40
tapping on OK, there you go, and give it a moment, and it will open up the Google login
5:47
So from here, you can create an account if you wish. I would advise you, if you don't have a Google account to create on your computer rather
5:55
than on here. And once you do, you just want to log in with it over into here
6:00
I'm going to use mine. Let's stop on next
6:11
And I'm going to put in a password for it. So let me just do that quickly And choose sign in And you see that it logging in right now give it a
6:25
moment and once it has it goes straight back to the FRP bypass app so from here hold the
6:32
power key and simply choose restart and wait for the device to actually restart
6:44
Once the device is back up and we go to the setup process again, you will see that instead
6:48
of verifying your account, it will show you the account that you have provided as the one that has been added
6:54
And basically you can now finish the setup process of your device, but the process is not
6:59
finished yet, so keep that in mind. So once we get access to the home screen, we'll still perform a reset of the device
7:10
So basically a factory reset which will remove the account that we have added
7:14
right now plus the old account which is not actually stated there but it performs that
7:21
Okay so let's go to the setup fairly quickly
7:31
Now I advise just to skip through basically everything on here. It doesn't really matter what we choose right now considering we're going to perform a reset of the device anyway
7:44
Okay, so let's don't copy anything
8:03
And you stop on X and you just see right there
8:14
there was account added and it was the one that I have provided before the restart
8:33
Just up on next. more and more and accept
8:44
Skip this. Not now and skip anyway
8:55
No thanks. No thanks. Just tap on next again, yes, next
9:16
And we should be now on the home screen. So from here we want to go straight to the settings Scroll all the way down to System
9:34
And Advanced, and you'll have reset options. Top of that. And here you'll have Reset All Data, Factor Reset
9:41
And it gives you all the list of the things that we'll remove along with the account that we have added
9:46
And also it includes the previous account that it doesn't actually show here
9:50
So I just tap on Revenue. I just tap on reset, erase everything and once the process is actually finished the device then will be fully unlocked and you can then set it up as however you like
10:03
So I'll be back once the reset is finished And as you can see, now the process is finished, so we can now set up the device
10:35
Now this time around you can go to the setup process as however you like, so you can connect to Wi-Fi, not connect if you wish to, set up your Google accounts and all the kind of protections that you want to
10:46
And the device will be fully unlocked and basically yours. So just skip this
10:50
Now again I'm going to primarily skip through everything but I'll stop on the key points that actually matters
10:59
for instance like the Wi-Fi which I am actually able to skip now
11:03
which if the device would be still locked I would not be able to this option wouldn't even there so just stop on next
11:14
more and accept now you can add a fingerprint if you can add a fingerprint if you
11:20
you want to I'm going to skip this just to save one time pattern and any kind of other
11:25
protection you can also add And just stop on next over here
12:02
And yes, next. And we're done with the setup. And you can see there has no need for confirmation anything to confirm anything
12:12
We have skipped the Wi-Fi altogether and everything is working just fine now
12:17
So that is how we would bypass the Google Verification script. Google verification screen on this device and if you found this very helpful don't forget
12:24
hit like subscribe and thanks for watching