Up next in 10

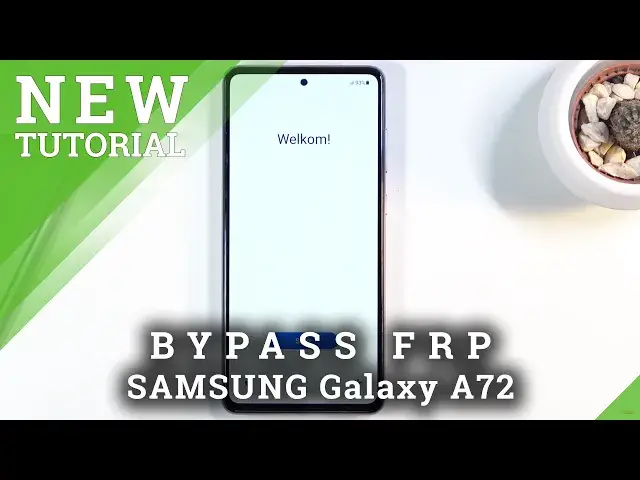
How to Bypass Google Account Protection on SAMSUNG Galaxy A72 | Remove Factory Reset Protection
Jul 14, 2024
Unlock FRP Tutorial for SAMSUNG Galaxy A72:
https://www.hardreset.info/devices/samsung/samsung-galaxy-a72/faq/bypass-google-verification/
In this video you should find out how unlock SAMSUNG Galaxy A72. If you forgot the Google account password you have to find a way to skip Google sign-in. By using our instructions you may activate SAMSUNG Galaxy A72 without Google account. Let's remove factory reset protection on SAMSUNG Galaxy A72. This unlock FRP method works with Samsung device with Android 10 and Android 11. It was tested in march 2021.
How to unlock SAMSUNG Galaxy A72? How to remove factory reset protection in SAMSUNG Galaxy A72? How to bypass Google verification on SAMSUNG Galaxy A72? How skip Google lock on SAMSUNG Galaxy A72?
How to bypass Google Account protection in SAMSUNG Galaxy A72 with Android 10/11 and security patch 01.2021?
Follow us on Instagram ► https://www.instagram.com/hardreset.info/
Like us on Facebook ► https://www.facebook.com/hardresetinfo/
Tweet us on Twitter ► https://twitter.com/HardresetI/
Show More Show Less View Video Transcript
0:00
Welcome, and for now
0:07
I'm here. Samsung Galaxy A72, and today I will show you how to bypass the Google verification
0:13
Now, as you can see, the phone right here is locked and I could unlock it either using the previous pattern
0:20
or by clicking right here and using the Google account that was logged in before on this device
0:25
Now, assuming, I don't know either of those, what I can do is, well, spend, go back
0:29
back, connect to Wi-Fi. Now I, for this process to actually function
0:35
you don't need to be connected to Wi-Fi. And furthermore, you're also gonna need
0:39
to have another Samsung device. Now this I know will exclude a decent amount of people
0:45
from actually completing the bypass, but it is a requirement. So if you don't have another Samsung device
0:54
then don't even waste your time because otherwise it won't work. The reason why we need a Samsung device is because of the Smart Switch application that
1:03
Samsung has, which is required for the actual bypass. Basically what we do is access the Smart Switch and on the secondary Samsung device that
1:13
is unlocked, you basically log in there with your credentials to Google, whatever, and then
1:19
using Smart Switch, you transfer the logged in Google account to the locked device and
1:24
it will override it. That's basically the simplified way of, well, the process that we're going to do
1:31
Now, additionally, you will need a computer and also a cable. I have this one on Type C to Type A. It's plugged into the computer
1:40
And also what I'm going to be using as a Type C to Type C, the one right over here
1:45
So I can connect the two devices together, but that is actually not required. You can do it over a Wi-Fi if you want to
1:51
So now that you're aware of what you're going to need, we can start off by actually beginning with the process on the computer side
2:02
So I'm going to move there and continue and basically show you everything that you need over there
2:07
So let's jump to the computer. Okay, so continuing the process now from the computer, there are several things that we'll need
2:17
Now, I would advise you just to simply start on your phone, connect to Wi-Fi
2:21
on your phone and then leave it aside and on the computer side go to the link that is provided
2:29
in a description and it should take you right over here so there's a couple things that you need
2:35
from this side here so you need the simpson drivers as you can see that is so when you plug in
2:40
your device a computer will actually see it and then simpson by frp bypass tool
2:47
you also need that for the actual process of bypassing So once you have that, I already downloaded it and extracted it right over here
2:57
So let's run it. Now, I have already done this. Now, let me just close this
3:05
This is just some trash that opens up every time you actually open up this application
3:09
So just close off your browser. Ads are the cancer here. But yeah
3:16
So once you open it up and close the browser that it automatically opens, what you want to do is start off by tapping on a disabled driver signature
3:24
It will then pop you up with a message that you do need to reboot your device
3:28
So simply do so. I already have done it. As you can see, once your computer boots back up
3:36
you should see that your Windows is in test mode. As you can see for me, test mode, Windows 10 Pro
3:42
So yeah, I am right now in the test mode, which is what this program does
3:47
It basically boots your device or your computer to test And from here all you need to do is reopen the program again and it plug in our phone so let just the satisfying click
4:02
there we go and once it's plugged in all you really need to do is make sure that you connected to that
4:08
Wi-Fi on your phone and press bypass FRP before start you must connect your device to Wi-Fi it's already connected so
4:17
redundant and as can see it will start the process and there we go it's finished so from here
4:27
all you really need to do is well well you're kind of done with the computer side almost before
4:34
actually progress any further I will just add this little info right here so it's going to be
4:39
relevant later on but at this moment we're done with the computer side so we can kind of
4:46
well, not use it anymore. But at one moment, throughout the bypass on the phone side
4:51
we will need to re-plug it in, and once you re-plug it, just simply top again the bypassed FRP
4:56
just to get the window to pop up again on your phone
5:00
which basically is the necessary window that we need to actually get access to things like the web browser
5:08
So, that being said, let's now switch back to the overhead camera
5:12
and continue the process from there. And once we're done on the computer side, as you just seen, you should see this pop-up right over here
5:23
Now, I will mention, do not press anywhere else. If you do, the pop-up will disappear
5:29
So if you want to keep the screen on, just click on the pop-up instead of anywhere else
5:34
But also, to actually continue the process, simply click on the view option
5:38
and this will open up our web browser. So let's keep a second, there we go. And from here, let's just accept and continue
5:44
No thanks. and right at the top you want to type in hard reset.info slash bypass
5:58
Okay, like so, if you need a moment to write it down, then pause the video
6:02
Otherwise, I'm just going to progress further. And from here, once you're on the site, you want to click on the Galaxy Store
6:09
This will take us to the actual website right here, but it also has a link
6:13
As you can see, try now. Click on the try now. And this opens up the actual Galaxy Store on your phone
6:20
From here, let's just agree and continue. And unfortunately, we do need to update our Galaxy Store
6:27
So let's click on Update, let it run through the update. And from there, for me, it stays still on the browser, which is really nice
6:37
It kind of saves me sometime. But there is a chance that for you it went straight back to the setup
6:43
screen and if that is the case then simply reconnect your device to your computer or
6:48
well if you haven't disconnected it then just go back to the program I would
6:53
recommend you to relaunch it it is kind of wonky it sometimes works sometimes
6:57
doesn't so I do recommend you to relaunch the easy Samsung FRP tool and from
7:02
there all you need to do now is simply press on the bypass FRP you don't need to do
7:07
that disable driver anymore so click on bypass and it should pop you up with this
7:13
window that we had just a moment ago with the view option and simply get back
7:18
here and again click on the try. Now if for you it looked the exact same way as
7:24
for me where it just kind of stayed on the web browser then you don't need to
7:28
go back to the computer simply click on view and that's all. So from here from the
7:33
actual Galaxy Store click on the search button and you should see Smart Switch
7:38
mobile as it suggested somewhere If you don then simply type it in but I do see I just going to click on it and there we go So from here let click on the download button It going to start the download And once it finished give it a moment And go once it
7:57
finished, click on the play button to launch it, click on continue and allow. And now
8:04
here we want to set it up. So this device is going to
8:09
be set to receive data, so select receive from Galaxy Android, and over a cable
8:17
There we go. Now I'm going to unplug this cable because this is connected to the computer
8:22
So once this is basically set as it is right now, I'm going to basically move it out of the way
8:27
because what I'm going to be using for this process is, well, not very conventional
8:33
but I believe it should work. So it's going to be this massive tablet
8:38
but yay. Let's move it a little bit further as well. Okay. So let's get into it. Let me move the lights so they're not actually reflect
8:53
And so number one, you want to start off by going into your settings and then under accounts somewhere, accounts and backup
9:04
Add account if you already haven't. If you have a Google account already on the device
9:08
which I believe you probably have it. Assuming you have used Play Store and stuff like that
9:12
then just leave it. It's good enough. And from there, we're also going to go to the Galaxy Store
9:20
Again, we're going to search for the Smart Switch mobile. There we go, Smart Switch Mobile
9:28
Again, we're going to download it right here as well. And again, let's launch it, continue, allow, and from here we're going to select that we want to send data
9:47
And then we're going to again select cable. And now let's get a cable and connect the two devices
9:54
Now I'll also mention that you don't actually need to use a cable
9:59
You can also use just Wi-Fi, connect to the same network and choose Wi-Fi
10:04
And this will work as well. but cables are a little bit quicker, so that's why I'm kind of going with the cable route
10:11
Now for some reason, let's just allow here and allow here. And again, let's... I guess we don't need to relaunch it
10:18
It just opened up again by itself. There we go. So on the phone side, you can see we have some things showing up
10:31
So what you can see right here is basically all the data from this device
10:35
So I'm going to deselect everything because we only need a couple things
10:40
We need account. Select the account. That is the most important part
10:45
And scroll down and select home screen and settings. And that's it
10:49
Scroll down, click on transfer. Let's work up the device. Click on transfer
10:56
Transfer your account. Copy. So before we can actually transfer the account, we do need to confirm it right here
11:03
or it looks like right here so I'm gonna take it off the screen and actually
11:08
type in the password. I typed it wrong. Oh come on
11:21
There we go. I think I got it correctly this time. Okay, so there's another account I'm just going to skip this one
11:28
We already have the one that I need. And as you can see it right now copying the data I going to select so it doesn put the screen to sleep
11:43
And there we go. So let's click on, go to the home screen start
11:52
and we can get rid of the tablet or whatever you were using for this
11:57
because it's not needed anymore. I'm going to unplug it from here as well
12:04
And just drop the cable. Zoom in. And we can continue with the setup
12:12
So again, like before, we're going to basically progress to the setup
12:19
And you can see right here, this is the page that previously told us that we need to verify our account
12:25
That was before the pattern. And the next page was to input a Google account
12:30
But right now it gives us a message that account was added, and all we can do is just tap on Next
12:36
Works for me. So let's click on Next, next, next, and we should be able to now completely finish up the setup
12:47
Now it allows us also to restore the device, but I'm not going to bother with it
12:51
So let's finish it up. Except, now at this moment in time, I wouldn't recommend you to set up your device fully
12:59
just go through the setup without actually adding anything that you normally do so
13:06
If you want to add protection, just wait. It doesn't really matter at this moment. That is because we still need to perform a reset of the device
13:14
So right now, skip through most of the stuff that you can just to gain access to the home screen
13:20
And once we do, we're going to go into the settings and perform a factory data reset
13:29
Okay, so now that we're on the home screen, let's wait for the apps to actually appear
13:39
And there we go. And we're going to navigate into the settings. Scroll down to general management, I believe it is, yep, and then select reset, factory data reset, and then reset, delete all
13:53
And this will basically remove everything from your account, including the Google account that we have transferred, along with the old account that was blocking
13:59
us from finishing up the setup. So again, this will take a couple minutes
14:04
It is a factory data reset after all. But once it's finished, we should be then back in the setup screen with the device fully unlocked
14:11
at that point. So I'll be back once. Reset is actually complete. And as you can see, the process is now completely finished
14:34
So you can go through the setup, as however you like. Set it up at whatever you want, Google accounts, and all that stuff
14:41
The devices, like I said, fully unlocked and you can do whatever you want
14:45
So I'm going to quickly go through the setup. Again, I'm going to skip most of this stuff
14:50
But number one, you can skip Wi-Fi connection, which normally you shouldn't be able to
14:54
if the device is still locked. But because it's not, we can. And there we go. We're basically finished with the setup with the device being fully unlocked
15:12
So, if you found this very helpful, don't forget to hit like, subscribe and thanks for watching