Up next in 10

Learn more info about NOKIA 2.4:
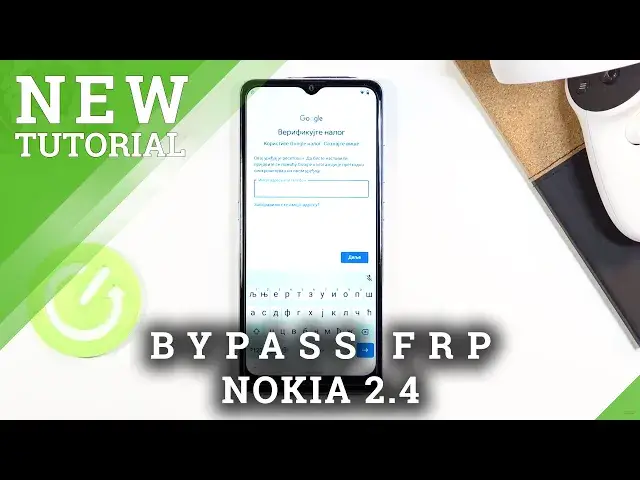
https://www.hardreset.info/devices/nokia/nokia-24/faq/bypass-google-verification/ Do you wonder how to skip Google verification in NOKIA 2.4? Are you looking for a way to login to a different Google account in NOKIA 2.4? We would like to present the video guide, where you will be able to check the amazingly useful operation that removes FRP in NOKIA 2.4. If you would like to bypass Google verification in your Nokia device, follow the attached instruction and use your smartphone with a new Google account. Check out the tutorial and learn how to unlock Factory Reset Protection in NOKIA 2.4 quickly and effectively. Visit our HardReset.info YT channel and discover many useful tutorials for NOKIA 2.4.
How to unlock FRP in NOKIA 2.4? How to remove Google protection on NOKIA 2.4? How to remove factory reset protection on NOKIA 2.4? How to skip FRP on NOKIA 2.4? How to activate NOKIA 2.4 without Google account?
Follow us on Instagram ► https://www.instagram.com/hardreset.info
Like us on Facebook ► https://www.facebook.com/hardresetinfo/
Tweet us on Twitter ► https://twitter.com/HardResetI
Show More Show Less View Video Transcript
0:00
Welcome
0:02
I'm from here. Nokia 2.4 and today I'll show you how to bypass the Google verification
0:14
So if you manage to somehow restart the device without actually needing to confirm anything, then props to you
0:22
So now it's going to be the fun part of actually bypassing this
0:26
So right here we have an option to actually bypass or unlock
0:30
kid in this case using a pattern that was previously said or using a Google account
0:36
So one thing that I'll mention, keep in mind the previous page, which was the pattern for
0:41
an unlocking method, because we're just going to completely mess up with it and change it up
0:47
So obviously you can see that the phone is locked. So now let's go back to the first page
0:52
It's basically where we want to be. And before you actually change the language, I would recommend you to connect to some kind of Wi-Fi
1:00
assuming you are not already. And once you are, from there, go back to the first page
1:04
and change the language to any kind of other language that uses a different keyboard
1:08
So, basically anything from here, upwards, up to, let's see, somewhere. I think somewhere to, like, right over here
1:17
somewhere between, like, Greek and below, should work just fine enough. Now, there's some exceptions to this
1:24
Keep in mind, I'll show you what I mean by this. So, I'm going to top one, whatever
1:30
I guess I picked some Russian but I don't know exactly. So anyway, now we're going to progress through this
1:38
Now if you're just like me and you just pick the language that you do not know, it's kind
1:43
of easy to go through this. Basically you want to top wherever I am pressing
1:47
So right here, I'm going to skip this by tapping right up here
1:51
It's going to take us to the next page. After it basically checks the Google stuff
1:59
off so give it a minute or so there we go so here it asks us to back up or
2:12
restore the device we want to select this button right here so no thanks it's
2:17
gonna go further again and there we go so this is the locked page so obviously
2:26
we don't know the pattern so we're gonna click on right here to use a Google account and in here simply top-compan field will bring up a keyboard and you can see that
2:41
because the keyboard is in different language it gives us the globe icon right here so what I meant almost any language will work if you see this a globe icon that means that the language that you picked is good enough But if you do not actually see this
2:55
globe, then you just need to go back, change it to, I guess, any different language than what you
3:00
picked, and go back here. And if you see the globe icon, then that's great. So once you see it
3:08
what you want to do is hold that icon. It will bring up a language settings right here. So we have
3:11
an option to change it back to QWERTY, which that's what I'm going to go. which is the second option right here and it changes the keyboard then I'm going to hold it again and go to the language settings which is the text below that and in here we're going to add a keyboard which is this blue button at the bottom and in here you want to pick any kind of
3:28
keyboard that doesn't have an arrow as you can see there's one with an arrow so completely disregard that one just pick one without it I'm going to just select whatever and from here once you choose one of those top on the add button which is the blue button right over here
3:43
And there we go, so we have added a keyboard and now what we want to do is again back out to the first page
3:52
and change the language back to our desired language, which for me it's going to be English
3:58
There we go English. And again, we're going back to the verification page
4:11
Again, let's use the Google account instead. Once again top on the field and again hold the globe icon
4:24
And once more we're going to go into the language settings, add a keyboard and this
4:28
time around we're looking for an option with an arrow. So there is one Albanian and English, that is the first one at least
4:36
And once you choose an option with an arrow you can see that it gives us a couple different language options but honestly that doesn't really matter
4:42
matters is the 3.dop option that is visible right now. So once you top on it, it
4:46
will give us the option to choose help and feedback. Let's select it and now in the
4:53
support section for describe your issue right here you want to type in a Morse
4:57
code or just two first letters so M, O and it will bring it up as suggested so use
5:03
Morse code. I want to select it and as you can see this option right here has a
5:08
video so we're going to top on it it it's going to load it up there we go
5:12
and now we have again another three options on the video so let's click on it and
5:16
choose watch later which in turn will open up web browser and there are there we
5:22
go let's stop on accept and continue and no thanks and from here we're gonna type in
5:27
how do we said info slash bypass so that info slash bypass so like so if you need a moment to write it down then pause the video I gonna progress further now so enter and this should
5:47
take you right over here now if you see it can't pop-up just consent to it so
5:55
now we want to scroll down and you can see that there we have settings application
5:59
so simply top on the settings it will open up settings on the phone and now all we need to do is scroll down to security and security
6:09
choose screen pinning enable it and then choose a lock device when unpinning
6:16
and this will basically allow us to set up a screen lock now like I mentioned
6:21
before the attention to the fact that before one of the options to basically
6:25
unlock the device was using a pattern so just to not make it the same I'm gonna
6:29
go with a pin so I'm gonna completely change it up. So here we can set up our pin. It can be whatever you want, four digit. Well, it must
6:40
have four digits and that can be any kind of digits you want. So I'm going to just make something
6:45
super complicated. One, two, three, four. Up on next, one, two, three, four. Now, I would recommend
6:51
you to set it up the same as I do. It's going to make it a little bit easier later on when I'm
6:55
telling you to put in one, two, three, four, basically. So once you have inserted it, confirm it
7:00
and this will basically save your screen lock. And now I'm going to stop this, I don't want to use a fingerprint
7:08
So there we go. You can see that we have now screen pinning enabled and lock device when unpinning also is enabled
7:14
And all we need to do now is hold the power key. Select to restart and let's wait for the device to power back on
7:26
So this will take us back to the first page of the setup screen. So number one, let's pull up
7:32
And as can see, it gives us a dial pad. This is basically the pin that we have chosen
7:37
So one, two, three, four. Shabam, it's unlocked. And now let's again change the language to actual desired language
7:46
There we go. English. And let's go. And once more, we're going to progress to be set up again
7:51
until the point that we get to the verification page. Now, once we do get to that verification page
7:58
you'll see a clear this thing. that has well affected what we have done that has affected the device now so
8:07
let's just wait for to load up through this painfully excruciatingly long load don copy and as you can see right now this is the verification page that we had previously pattern set on here But now it telling us to verify our pin
8:31
So, one, two, three, four. Good enough, unlocked. So let's let it run through it
8:41
It's going to next give us an option to log into... Let's try again
8:47
So it should give us an option to right now log into a Google account once it
8:57
actually unlocks it. Okay, there we go. So you can see sign in
9:05
So I'm going to simply select skip. Now I would still recommend you to perform a factory data reset through settings once
9:14
we have, well, once we have finished the setup right here. just to remove any kind of lettovers from the old account because it is still present on this phone
9:24
So let's actually quickly finish up the setup and I'll show you where you can do that from
9:39
As you can see, I'm skipping basically everything because at this moment it doesn't really matter what we set up
9:44
The device will still need to be resetting. so just skip through anything that you can and there we go so we are right now
9:59
on the home screen from here we're gonna go into these settings scroll all the
10:05
way down to system then tap on advanced where you will find the reset options and
10:11
simply select erase all data factory reset again delete all data Once you tap on it, the process will basically begin removing everything, which in this case it's going to be only the Google account
10:24
And once it's finished, the device at that point will be fully unlocked. And, well, you will be once more in the setup screen
10:31
But at that point, you can set it up as however you like. The device will be fully unlocked and you can do whatever you want with it
10:38
I'm not going to be going through the reset right now because it just would be a waste of time, honestly
10:44
I already most likely seen how the device is reset it and also most likely know how to go to the setup of the device
10:52
so past that there is no real need to go any further
10:56
so that is how you would bypass the Google verification on this phone
11:00
and if you found this video helpful don't forget to like subscribe
11:03
and thanks for watching Thank you