live_tv
Livestream Starting Soon
00
Hours
:
00
Minutes
:
00
Seconds
Up next in 10

How to Bypass Google Account in MOTOROLA One Fusion+ - Remove Factory Reset Protection
Jul 17, 2024
Learn more info about MOTOROLA One Fusion+:
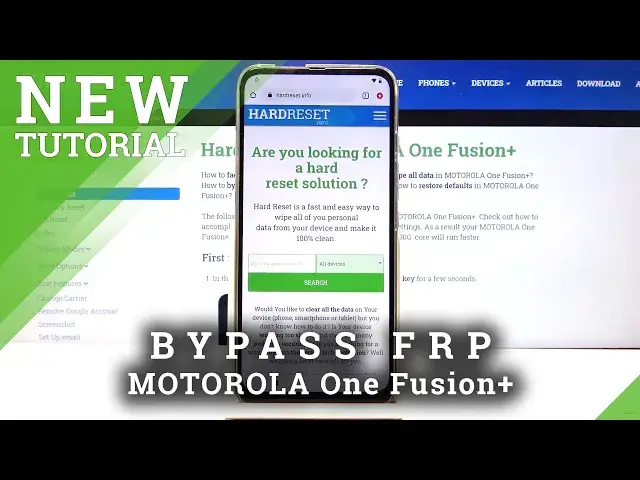
https://www.hardreset.info/devices/motorola/motorola-one-fusion-plus/
In the presented tutorial, we show you how to bypass Google account in MOTOROLA One Fusion+. If you are looking for the best way to remove Google protection from your Motorola device, stay with us and activate MOTOROLA One Fusion+ without a Google account. Let’s check out the attached instruction and unlock Factory Reset Protection in the Motorola device. Visit our HardReset.info YT channel and get more useful tutorials for MOTOROLA One Fusion+.
How to unlock FRP in MOTOROLA One Fusion+? How to bypass Google verification in MOTOROLA One Fusion+? How to remove Google protection in MOTOROLA One Fusion+? How to skip Google Verification in MOTOROLA One Fusion+? How to unlock MOTOROLA One Fusion+? How to activate MOTOROLA One Fusion+ without Google Account?
Follow us on Instagram ► https://www.instagram.com/hardreset.info
Like us on Facebook ► https://www.facebook.com/hardresetinfo/
Tweet us on Twitter ► https://twitter.com/HardResetI
Show More Show Less View Video Transcript
0:00
Welcome Phenomi is a Motorola One Fusion Plus and today I'll show you how to bypass the Google verification
0:13
Now as you can see the phone in front of me is already locked and to begin the process we will need to have an internet connection
0:20
and from there you want to go back to the first page and change the language to any kind of language that uses different keyboard
0:26
So Greek, Russian, things like that will work just one. well enough. So, there is Greek. And let's go forward. And you want to get back to the same
0:38
place that we were just at, which is the Google verification. From here, tap on a field, and
0:50
then hold the globe icon next to the space, and then tap on the last option, text right there
0:57
add a keyboard at the bottom and choose any kind of option that doesn't have an arrow
1:02
because you can see there are several with arrows so choose ones without top on the add
1:07
and top right here again to add another one again choose one without an arrow add and from
1:14
here we can go back again to the first page and change the language back to English and
1:20
again skip the most of this back to the locked screen Again tap on a field, hold globe icon, go to language settings
1:37
add a keyboard and now choose one with an arrow. And from here you will have a couple different options so this regard that we're interested
1:46
in the three dots right up here. And what you want to do is tap on the help and feedback
1:52
This will open up the help and feedback with Describe Your Issue window so you want to top
1:57
on it and let's change the keyboard right here by holding again the globe
2:01
icon and just selecting QWERTY which for me is the second option and type
2:07
in Morse code typing just M-O seems to do the trick so use Morse code so
2:13
as I suggested click on it and from here click on the video and let it kind of
2:23
load up it will give us a option right here so three dots and choose watch later and this will open up the web browser so let's stop
2:33
on accept and continue no thanks and then at the top you want to navigate to hard reset that info website
2:45
Like so, and let's go. And from here, top on the three bars and go to the download category
2:58
And the download search field, you want to look for Android 7.1.2
3:03
point two. Like so, search
3:16
And there should be only one thing, as you can see, so click on the download, scroll down, and this time around
3:22
hold the download link, and choose to open an incognito tab. Now, this way we will skip some kind of problem
3:30
where sometimes the download starts, gets to 100% but never finishes and because it never finishes we can never open it
3:38
opening it up and incognito saves that problem so from here tap on okay as you can see it
3:44
begins downloading once it's done downloading we're going to open it up
3:50
there we go so click on open go to settings enable allow from this source and go back
4:02
click on install and simply let it install once it's done installing click on done
4:11
go back go back once more and this time around in the search bar for the
4:17
download you want to search for settings Like so, let's search
4:27
Click on the download link, again scroll down, and hold the download, choose Open an Incognito tab
4:37
Okay, and open it up. Install, open. Open. And okay
4:47
And from here you want to go to go. to apps and notifications see all 38 apps and top on the 3dads and go to show system
4:56
and scroll down to g there we go so once we're under g you will look for google play
5:06
store and play services so those those two that are right up here and then top on play
5:13
services disable disable app go back play store disable disable app now once you have disabled both of them just go back go back once more and once more now I will
5:35
add if you go back a little bit too far it will bring you back to the web browser if
5:40
that has happened simply re-download the settings up we install it and then click again to open it up to get back here
5:47
There's no other way to get back. So from here, you want to scroll down to accounts
5:54
tap on add account, and choose Google. And once you do, it will give you a message that App has crashed
6:01
the one that we have installed as the first one. So from here, continue
6:06
And there we go, bypass it for PIROM. Stopped working. There we go. Now click off the screen, it doesn't really matter
6:12
It has done its job. and from here you want to tap on the field and log in with your Google account
6:17
Now if you don't have a Google account, you can always create one. It doesn't really matter. It doesn't need to be old
6:21
You can create one specifically for this purpose. And once you do, simply log in with it
6:26
I have my account, so that's what I'm going to use. And I'm going to put in a password
6:43
Tap on next and let it log in. As you can see, once it does, it gives us the terms of service
6:51
So let's choose I agree, let it log in. Again the app will now keep crashing until we perform a reset of the device
6:59
But it doesn't matter, it allowed us to add Google account. That's what the app was for
7:03
So from here, go back, and now you want to re-enable the apps that we have disabled
7:08
So let's again go to C-O-38, top on 3 dots, show system, scroll down to
7:13
and re-enable Play Services and re-enable Play Store
7:25
Once you enable those two apps, hold power key, select Restart, and let's wait for the device
7:31
to restart. So from here, let's go through the setup process. Now you will see a key difference right now that once we get to the verification, we'll
7:42
Once we get to the verification screen, it will tell us that account has been added
7:46
Here we go, and provides me with the account that I have inserted right before the restart of the device
7:52
Top on next completely bypassing this for now Now keep in mind the device is still not fully unlocked So you want to basically progress through the setup as quick as possible and from home screen we going to then go to the settings to reset the device which will then unlock the device
8:10
And as you've also seen there's the app that keeps crashing still
8:16
Let's skip. Okay, so there we go, we're done with the setup for now
8:43
And let's go to the settings. Scroll all the way down to System, tap on Advanced and choose Reset Options, select Erase All
8:54
Data Factory Reset. As you can see it gives us a message that performing this will remove the Google account
8:59
that we have added, but we'll also remove the account that was previously blocking us
9:03
So top on Erase All Data, Erase All Data, and the process will now begin
9:08
Now this will take about a minute or so, or maybe more
9:13
And once it's finished, we will be then reviewed with the Android setup screen once more
9:16
but this time around the device will be fully unlocked. So I'll be back once the process is finished
9:24
From here as can see now the process is finished so you can now set up your device
9:34
as however you like. I'm going to primarily skip again most of this stuff but if you want you can connect to Wi-Fi
9:40
You can skip it if you want so as you can see which previously was not an option
9:44
You can also add your Google accounts, select set protections and all that stuff
9:49
Everything will be working just fine but to save on time I'm just skipping most of it
9:54
And you'll see right now that there is no need to verify anything
10:00
The device basically goes through the setup process as it would as a new device
10:19
And there we go. So you can see we're now completely finished with the bypass
10:24
And if you found this very helpful, don't forget to have like, subscribe, and thanks for watching