0:00
Here I've got Sharpie10 and let me show you how to add and remove Google account on the
0:08
following device. So, at first, let's open the settings, then find and select accounts
0:14
Here they are. And now tap on Google. As you can see, now we have one account added
0:21
So in order to remove it, tap on the More icon over here and click on Remove Account
0:30
Now confirm that you would like to remove this account with all the data, messages, contacts and everything from the phone by tapping on Remove
0:38
Confirm your decision by tapping on OK. Draw the pattern if you have one included in your device
0:43
And that's it. As you can see, your account has been removed, so it's no longer here and you can set this
0:49
device with some other account. So let me set it up with my account
0:53
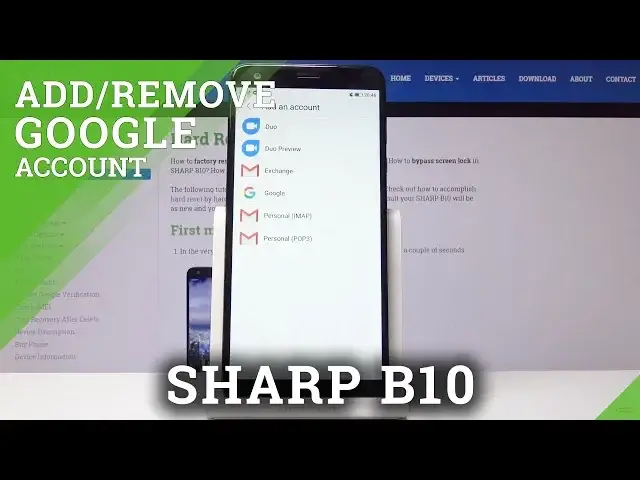
Let's open accounts one more time. Click on Add Account. Then select Google over here
1:02
Make sure that you are connected to Wi-Fi because otherwise it will not be possible
1:07
So this one is mine. Let me do it one more time
1:12
Add Account. Choose Google. And now give your device a while to check all the information
1:25
And it's time to enter your Google account, your Google address or phone number
1:31
And I will enter my email address, which is hard reset
1:41
And gmail.com. And click on Next
1:51
Then enter the password, so let me do it off the screen
1:58
And as only it is entered, click on Next. And now confirm that you agree with all the terms of Google services by tapping on I agree
2:16
And now just activate the backup feature if you want to. You can obviously switch it off, but I truly recommend to have it included and then tap
2:23
on Accept. And that's it. As you can see now, you've got your Google account assigned to your Sharp B10 and you
2:28
can use it in some other functions. So that would be all. This is how you can remove and add Google account to Sharp B10
2:34
Thank you for watching. Please subscribe to our channel and leave the thumbs up