Up next in 10

Check out more info about VIVO Y70:
https://www.hardreset.info/devices/vivo/vivo-y70/
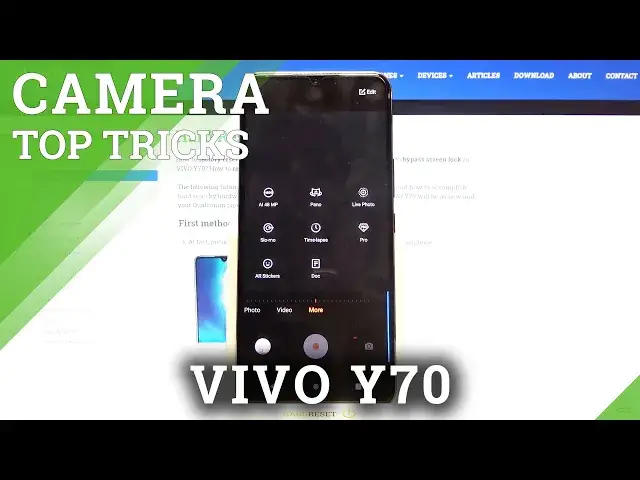
We would like to present the tutorial, where we show you the best camera tricks that you can do on VIVO Y70. If you want to take a perfect picture using a Vivo camera, follow the attached instructions and learn how to get access to the camera settings and locate the best camera options in VIVO Y70. Let’s follow the uploaded video guide and make the usage of the Vivo camera successful. Visit our HardReset.info YT channel and discover many useful tutorials for VIVO Y70.
How to use VIVO Y70 camera? How to find the best options of VIVO Y70 camera? How to make usage of VIVO Y70 camera easier? How to open camera settings in VIVO Y70? How to use top and tricks for VIVO Y70 camera?
Follow us on Instagram ► https://www.instagram.com/hardreset.info
Like us on Facebook ► https://www.facebook.com/hardresetinfo/
Tweet us on Twitter ► https://twitter.com/HardResetI
Show More Show Less View Video Transcript
0:00
Welcome here I've got VivoI-70 and I'm going to show you the top tricks of its camera
0:10
so at first we have to open a camera button here to open it and for now we are in the standard photo mode
0:16
Let's start with this settings bar here as you can see we can change the modes of this camera
0:21
we have the night mode, portrait mode, photo mode, video and by going to the right to end to more
0:28
We have access to other modes of this camera, so Autoidagent, 48 megapixels, panoramic, live photo, slow motion time lapse, Pro, AR stickers and dog
0:38
So this is a lot, I don't have much time to speak about all of this now. I suggest you to making experiments with that and just have a good fun
0:45
Now let me show you one of my favorite modes, the live photo. When we tap on this, we get access to it
0:51
And this mode gives us a two in one. So when we take a picture, we get at the same time the show
0:57
short clip. Let me show you how it works by taking a photo
1:05
And now let's move here to the left corner at the bottom. When we pick this button, we get quick access to the gallery
1:11
And this is our picture. To see the short clip, we have to just simply tap a little bit longer on it
1:18
And as you can see, this is how it works here. So this is really cool option
1:22
Now let's go back to the camera. To go back from the live photo to the standard photo mode, let's just see
1:27
simply tap on the X letter here. So here we are again and let's stay on this. Here let's start
1:34
by tapping on the screen anywhere like that. As you can see we have access to this kind of square
1:40
This is the focusing so we can focus anywhere at the picture we want to and need and this is
1:46
connected with this sun icon from the right. When we tap on this sun a little bit longer
1:51
we get access to the extra slider with exposure compensation. So it allows us to control the
1:57
light of our photo. As you can see by going up, we can make our picture more bright. By going
2:03
down, we can make it more dark. So this is really cool, of course, to go back to the
2:08
auto exposure compensation, we have to just simply tap again on the screen anywhere like that
2:14
Now let's move to these buttons here. We can change here the lenses of this camera, so we
2:19
have the standard lens and the second one, the closer one. This is connected with zoom. So let me
2:26
Let me show you how to use zoom. We can do it by tapping on it a little bit longer
2:30
As you can see we have access also to this slider now So this is how to use this We can use zoom also by using two fingers So we can do it like that by a thing This slider is more precisely
2:45
So let's stay now, let's tap on this and stay on the standard lens. And let's have a look at
2:50
this lens here. When we pick this, we can also pick two more lenses, the Bocca. So this should be
2:58
good for taking portraits because it blur our background. And the next one here is the super macro so this is the best for taking pictures from the close space
3:12
And now let's turn this off and let's have a look at this settings bar here
3:18
Let me start with this button. Here we have the flash. So we can turn on the auto flash
3:24
Now the camera recognizes when it's needed when it's too dark. We can also turn it on every time we take a picture here
3:32
Here we have also access to the fill light so we can turn on the torch and we can turn it off so for now let me stay on this
3:41
Now let's move to this button at the center. Here we have the HDR
3:45
By tapping on this we can turn it on and another tap to turn it off
3:49
I suggest you to keep this turn it on because the HDR helps to improve the details in the brightest and darkest areas of our photos
3:58
and it really helps to making pictures just more beautiful. and lightful. This should be good for taking landscapes especially
4:07
Now let's move to this button. By tapping on this we get access to this slider with the filters
4:13
and as you can see here we can make our picture just more beautiful before we take it. Like that
4:19
We have also access to extra slider where we can add just the intensity of the filter like that as you can see
4:26
So we have really wide spectrum that we can pick. Now let's go back to the
4:32
original one. And let's move to this button in the right corner. When we pick this, we can open the
4:38
advanced camera settings. As you can see, this is a lot. Let me show you a few of them. Let's
4:43
start with the sound by using this button. We can easily manage the camera sounds so we can turn it off and turn it on like that as we need
4:53
The next one option here I want to show you are the geographic locations which are here. So it
5:00
allow us to save the information about the place where we take a picture in the details about it
5:05
By using this button of course we can turn it off and turn it on And also here the important information is that to make it work correctly when we want to save the actual location of our photo we have to be connected with the internet
5:20
for example the Wi-Fi and we have to turn on also the location of this device
5:26
So remember about these two parameters to make it work. Now let me keep turn it on all of the settings
5:31
Let's go back to the camera to take a picture. To see the picture, let's move again to the left corner at the bottom
5:38
So our quick access to the gallery, this is it. Let's tap on the center to get access to the gallery options
5:45
And to check it location, we have to just simply tap on this button with eye letter
5:50
And here we are. As you can see, at the third position, we have the location with the full address
5:55
Greetings from Krakow Poland. Now let's go back to the camera and to the settings in the right corner
6:02
And let's slide down and focus on the photo size. When we pick this, we can manage aspect
6:08
ratio of this camera. Now we are in 4 and 3 ratio. Let's change this to the full one
6:13
And to see that difference we have to go back to the camera. As you can see the background
6:18
has changed it to the full one. Now let's go again to the settings in the right corner to the
6:23
photo size and pick 16 and 9. And in the camera preview it looks like that. And also when we go back
6:31
to the right corner to the photo size we can pick one and one. So in the camera preview we can see that this is the square
6:38
one aspect ratio. Of course, by going again to the settings to the photo sites, we can easily
6:44
go back to 4 and 3 to remind you it looks like that. Now let's go again to the settings
6:51
in the right corner and pick the countdown. Here we can adjust the delay of taking
6:56
picture so we can turn on the camera timer. We can pick from 3, 5 or 10 seconds of delay
7:03
Let me pick 3 seconds to show you how it works and now let's go back to the camera to
7:08
take a picture. Here we have the countdown and as you can see the picture was taken
7:14
with 3 seconds of delay. So let's go back to the settings in the right corner
7:19
pick the countdown to turn it off and let's move to the framing lines. By using this
7:24
button we can turn them on so these are the grid lines of this camera and another
7:29
tab to turn them off of course. Now let me keep this turn it on and in the camera
7:34
preview they are look like that so it shows us the These lines, this is useful for example when we want to use the rule of third in photography or making experiments with composition
7:45
Also remember that these lines are not visible at the real picture so when I take a photo and again when I go to the gallery we can see them at the real one so the gridines are only to help us taking by their photos
7:57
of course when we don't need this we can easily go back to the right corner and use this
8:02
button with framing lines to turn them off so for now they have gone so let's go again to
8:08
the settings in the right corner and slide a little bit down now let's pick the shutter option
8:13
here we have one extra thing tap the screen to take a photo
8:18
By using this button we can turn it on and off. And this is a really cool option
8:23
When we have this turn it on, when we go back to the camera, we don't have to use shutter to take a picture
8:29
We can do it by just simply tapping on the screen anywhere like that
8:34
and it automatically takes a picture. We have also one extra thing here
8:40
Let me show you it. Here we have the volume keys of this camera and of this
8:45
and of this device in the standard usage they allow us to control the volume of the device
8:52
Here in the camera when we tap on this we can also take a picture
8:55
So this is also really cool thing. Now let's go back to this settings in the right corner, let's slide down and pick the watermark
9:05
When we pick this we can add the time watermark and also the model watermark
9:10
By using these buttons we can turn them on and off as you can see we can add just a one
9:15
one of this we can add both at the same time so let me keep this turn it on now let's go
9:21
back to the camera to take a photo now let's move again to the gallery here to see the
9:28
watermarks and here they are at the bottom of the picture let's get closer to it from
9:34
the left we have the Vivoi 70 watermarks of the device and from the right we have the
9:41
time stamp of course when we don't need this we can easily go back to the camera
9:45
to this settings in the right corner, slide down and pick this and use these buttons to turn them off
9:53
So for now when we take another picture, the watermarks should be not visible at it
9:58
And after turn on and off and manage all of this settings, sometimes we want to start again from the beginning
10:06
And we can do it by using the last one option. I want to show you reset settings when we pick this and confirm all of this goes back to the auto
10:14
And we can start playing with that again. And that's all. Thanks for watching, subscriber channel and leave the thumbs up