Up next in 10

Learn more info about MOTOROLA Moto G 5G Plus:
https://www.hardreset.info/devices/motorola/motorola-moto-g-5g-plus/
In the presented tutorial, we show you the best camera features available on MOTOROLA Moto G 5G Plus. If you want to take a perfect picture using your Motorola camera, follow the uploaded video instructions, and without any problem, activate the preferred option in MOTOROLA Moto G 5G Plus. Let’s follow the attached video and locate camera features in your Motorola smartphone easily. Visit our HardReset.info YT channel and discover many useful tutorials for MOTOROLA Moto G 5G Plus.
How to use MOTOROLA Moto G 5G Plus camera? How to find the best options of MOTOROLA Moto G 5G Plus camera? How to make usage of MOTOROLA Moto G 5G Plus camera easier? How to open camera settings in MOTOROLA Moto G 5G Plus? How to use top and tricks for MOTOROLA Moto G 5G Plus camera?
Follow us on Instagram ► https://www.instagram.com/hardreset.info
Like us on Facebook ► https://www.facebook.com/hardresetinfo/
Tweet us on Twitter ► https://twitter.com/HardResetI
Show More Show Less View Video Transcript
0:00
Welcome here I've got Motorola MotoG 5G plus and I'm going to show you the top tricks of its camera
0:11
so at first we have to tap on a camera button here to open it and for now as you can see we are in the standard photo mode so let's see what we've got here
0:20
and let me start with this settings bar as you can see here by tapping on these icons we can change the modes of this camera for now I am in the video mode when I
0:29
go back to the center, we go to the photo mode. And from the left, we have access to other modes of this camera
0:36
And we have photo modes, portrait, cutout, macros, podcolor, night vision, cinemagraph
0:42
panoramic and life filter, and also the video modes. So the macro slow motion and the time lapse
0:48
I'm not going to speak about all of these modes now because I don't have much time for this
0:53
but I suggest you to making experiments with that and just have a good fun. And now let me show you one of my favorite here
1:00
spot color let's tap on this so here we have access to it and this mode gives us
1:06
possibility to tap a selected color so the color stays at the picture and the rest of the
1:12
picture is black and white so let me show you how it works this is my object and when I
1:19
tap on it as you can see all of go to the black and white colors and this stays green
1:27
And also here by using this slider we can change the intensity of this kind of filter
1:34
and decide if we want to less things, the color it or more
1:40
So this is how it works. And now let's go back to the standard camera photo mode and let me show you how it works here
1:49
So let me start by tapping on the screen anywhere like that
1:53
As you can see here we have access to this ring. This is the focusing
1:57
we can focus anywhere we need and this is connected with this slider
2:01
So this is the exposure compensation by using this. We can make our photo just more bright or dark as we need
2:10
As you can see this is how it works here. Now let's go to this buttons here from the left
2:16
Here we can change the lenses of this camera for. Now I've changed it to the ultra-white lens
2:22
When I tap on this again, we go to the standard lens. So this is how it works
2:26
And as you can see, it's connected with the zoom. So for now, let me show you how to zoom
2:31
We can do it by using two fingers like that. And get closer to the subject and also go back
2:38
So this is how it works. For now, let's go back to the standard lens and let's move to this settings bar
2:44
Let me start from the left. The first one option here is the HDR
2:49
So here we can turn this on every time we take a picture
2:53
we can turn it on the auto HDR So the camera recognizes when it needed and I suggest you to keep this on the auto because the HDR helps to improve the details in the brightest and darkest
3:06
and darkest areas of our picture and this is really cool and make our photos just
3:11
more beautiful and really helps. So let's move to the next one button here we have the flash we can turn it on every
3:18
time we take a picture as you can see we can turn on auto flash so the camera
3:24
recognizes when it's too dark and we can also turn this off here
3:30
So let's go to the next one button. Here we have the camera timer
3:33
We can change the delay of taking picture. We can pick from 3 or 10 seconds of delay
3:39
So for now let me pick 3 seconds of delay to show you how it works and let me take a photo
3:45
As you can see here we have the countdown and the picture was taken with 3 seconds delay so
3:50
this is how it works. For now let me keep this turn it off. and let's move to the next one option
3:56
Here we have the active photos. This is also a really cool option
4:00
because here we, when we have this turn it on, we get at the same time the picture and the short clip
4:07
So we can turn this on every time we take a picture
4:11
We can also turn this on the auto so the camera recognizes when it's possible to have this
4:19
So for now let me keep this turn it on and let me show you how it works
4:24
So this is my object again. And when I take a picture, we can go here to the right corner at the bottom to the gallery
4:34
So this is the photo. And we can play it right here
4:39
And as you can see, this is the short clip. So this is really cool that we have two in one
4:47
So let's go back for now let me turn this off. And let's move to the next one button
4:53
Here we can change the auto settings to the manual settings. As you can see by tapping on this, we go to some kind of Pro mode
5:02
I'm not going to speak about this settings now. I can invite you to my other film where I explain how to use this
5:10
Now let's go back to the auto settings. And let's move to the button from the right
5:16
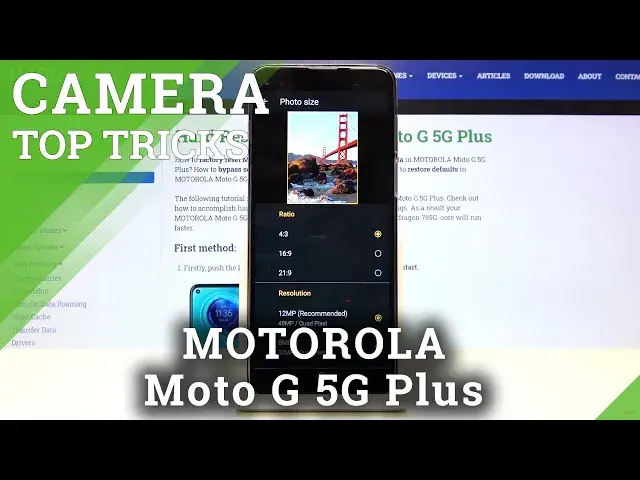
By tapping on this we can open the advanced camera settings. For now let's focus on the rear camera and
5:22
and the selfie camera and the first one option I want to show you here is the photo size
5:28
As you can see here at the first place we have this and also with the selfie camera it works the same
5:35
So by tapping on this we get access to the ratio connected with the resolution
5:40
As you can see here we have 4 and 3 ratio which was now and this is connected with 12 megapixels the recommended resolution and also the 8 megapixels
5:49
So this is how to change this. we can change the ratio to 16 and 9 so this is a little bit shorter one here and this is connected with 9 megapixels the recommended one and the 6 megapixels so let also go back to the camera and let me show you how it looks like as you can see this is a
6:09
little bit longer ratio than 4 and 3 and this is how it works we have also access here to 21 to 9
6:18
and this is the full screen ratio of this camera with 6 and 9 megapixs the recommended quality and
6:27
4 and 6 megapix so this is how it looks like all and
6:33
stay let's stay on this and let's go back again to the camera as you can see this is the full frame
6:40
and we can also easily go back to 4 and 3 the first one and the same thing happens in the selfie camera so by tapping on this
6:48
We also get access to the ratio connected with the resolution. The difference is that we have a different quality to the ratio
6:57
So the 4 and 3 is connected with 16 megapixels or 4, 16 and 9 is connected with 11 and 9 or 3, and 21 to 9 is connected with 9 and 1 and 2 and 3
7:09
So for now let's stay on the 4 and 3, the original one. And let's go to the settings and let's slide to the capture settings
7:17
Now let's focus on the second option here, tap anywhere to capture
7:21
This is also a really cool thing. By tapping on this button as you can see we can turn it on and turn it off like that
7:28
This is how it works. And let me keep this turn it on. Let's go back to the camera
7:33
As you can see here we have also the quick tutorial. So we can tap anywhere to capture a photo
7:40
Got it. And let me show you how it works. By tapping on the screen now anywhere like that, I can easily take a picture
7:47
This is really useful thing here. So now let's go again to this capture settings and let's move to the shooter sound
7:54
Here by using this button we can turn off and turn on the shooter sound of this camera as you can see
8:01
And now let's move to the assistive grid. By using this button we can turn on and turn off the camera grid lines
8:09
So this is how it works. So let me keep this turn on and let's go back to the camera
8:14
As you can see it shows us these lines. lines and this is useful when we want to use the rule of third in photography and
8:21
making experiments with composition. Also remember that these lines are not visible at the real pictures so when I take a photo and when I go again to the gallery
8:30
here we can't see them so these lines are only to help us taking better
8:35
pictures and of course by going again to the settings in the right
8:38
corner sliding to the capture settings we can turn it off so for now they are gone
8:44
So this is how it works and the next one useful thing here in the capture settings is the camera leveler
8:52
so by using this button we can turn it on and turn it off like that So let me keep this turn it on and let go back to the camera And here we have this line And this is useful when we want to keep our photographic topic
9:06
straight up the pictures. You can see this how it works like
9:10
And of course we can easily turn this off by going again to these settings
9:18
and tapping on the leveler option again here in the capture settings
9:23
capture settings so for now also this line is gone and now let's have a look at
9:30
the camera watermark also in the capture settings by tapping on this we can manage the
9:35
watermarks we can add the time stamp as you can see and the device watermark and
9:40
here we have the quick preview and this is how the device watermark looks like
9:44
shot on motto G5g plus and with the device watermark we have also connected the
9:51
signature so this is our own custom watermark We can add here for example hard reset
10:00
And as you can see in the second line we have the custom watermark
10:05
but remember that we can't add the signature without the device watermark so this is connected
10:11
Now let me keep this turn it on and let's go back to the camera to take a picture and let's see
10:18
how the watermarks looks like on the real picture here and as you can see here from
10:23
the left at the bottom we have shot on Moto 5G plus watermark with the hard reset
10:31
so the device with the custom watermark and from the right we have the time stamp
10:36
so this is how it works of course to turn this off we go back to these settings
10:40
slide to the capture settings tap on this and tap on this button so for now this
10:46
option is turned off when we take another picture we can't see at it the watermarks
10:52
And now let's slide again a little bit to the safe settings
10:58
Here we have the safe location option. This is the option I want to show you now
11:03
By using this button we can turn this off and turn it on like that
11:07
And here we can save the location of the picture, but remember to make it work correctly
11:13
we have to be connected also with the internet, for example the Wi-Fi
11:17
and we have to turn on the location of this device. So remember about these two parameters to make it work
11:21
to make it work. And now let me keep turn it on all of these settings and let's go back
11:26
to the camera to take another picture. Now let's go again here to the right corner at the bottom
11:32
to the gallery. So this is the picture to check it location. We have to just simply stay a little
11:37
down as you can see. And here we have the more details and location with map. So greetings from
11:43
Krakow Poland. This is how it works and that's all. Thanks for watching. Subscribe our
11:47
channel and leave the thumbs up
#Online Media
#Camera & Photo Equipment