Up next in 10

Unclock FRP Tutorial: http://www.hardreset.info/devices/nokia/nokia-8/hardreset/first-method/
FRP Unlocker: http://www.hardreset.info/FRP-Unlocker/
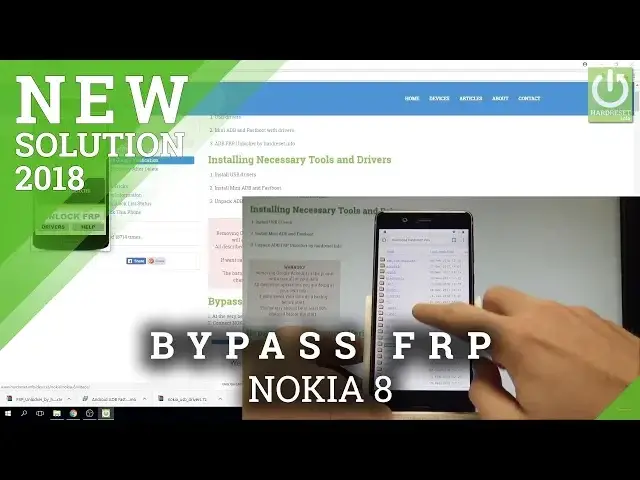
How to unlock FRP in NOKIA 8? How to bypass Google Verification in NOKIA 8? How to remove Google protection in NOKIA 8? How to remove Factory Reset Protection in NOKIA 8? How to bypass Factory Reset Protection in NOKIA 8? How to unlock Factory Reset Protection in NOKIA 8? How to skip Google Verification in NOKIA 8?
The newest way to bypass Google Verifcation in NOKIA 8. This metho works in Android 8.0 and Android 8.1. Check out how to bypass Google Verfication in NOKIA smartphones.
More Info:
http://www.hardreset.info/devices/nokia/nokia-8/hardreset/first-method/
Show More Show Less View Video Transcript
0:00
Here I have Nokia 8 and let me show you how to bypass Google verification on the
0:08
following device so let me show you how to remove the factor reset protection on the following phone
0:14
As you can see at some point of initializing setup process you have to input your Google email
0:18
and password so your Google credentials and let me show you how to bypass this step
0:23
Let's go back to the first screen which is of course the welcome panel and here we start the
0:29
appropriate steps but before we do anything on our smartphone it's good to
0:35
download the necessary tools for our PC so let's use that tutorial from
0:42
hardo cdust to the info that's install the USB drivers mini adb and fast
0:46
blue with drivers and the frp unlocker so I've got everything downloaded
0:52
unpacked and installed it's worth to install both Android fast boot drivers and
0:58
then Nokia USB drivers and of course let's in start and unpack the frp unlocker this is the
1:07
unlocker from the hardoassad. info we will use it later so now on our PC let's
1:14
choose the vision settings select the talkback let's enable talkback tab okay
1:25
let me use volume down to to make the talkback mute and now let's use talkback so let's use the L letter on the screen
1:40
to enable global context menu let's use talkback settings double tap here if you would like to choose
1:47
something you need to tap it and then confirm it by double tap here you can navigate by
1:53
using both keys let's scroll down to choose help and feedback double tap let's use the
2:04
searcher double tap choose voice all right let's choose voice double tap choose get started with voice access double tap let's play this video
2:23
use the Shr key, choose more key, these three dots, double tap
2:31
Let minimize this Alright now let use the following account icon in that corner double tap
2:46
Choose settings, double tap about. Select Google Privacy Policy, also double tap
2:57
Let's select accept and continue. choose no thanks and here you can use the Chrome so let's double tap right
3:09
here and let's just clear it off and let's use the following website
3:15
download dot hard reset dot info here I have this website let me double tap
3:27
let's make it bigger and here here we have to choose the Nokia folder excellent
3:35
so let's press somewhere and let's scroll down to highlight Nokia sorry let me do it again let me highlight Nokia
3:48
all right when i have Nokia highlighted that's double tap now let's open the frp folder but it will be easier to make it bigger
4:00
When I have FRP highlighted, let's double tap. Now let's make it bigger also and let's open the Apex launcher
4:14
Double tap, tap, allow Chrome to access photos, media etc
4:27
Tab okay, double tap. Let's choose open right here
4:37
For security reasons you need to change some settings so let's choose settings of Chrome
4:41
Let's allow from this source. Let's go back. Tap install. Then, okay it is installing the Apex Launcher, tab open
4:56
Now let's use the phone icon, let's activate the keypad and let's use this code
5:06
Asterix hash Asterix HASH 37 3 3 H H Asterix
5:18
H. Asterix. As you can see the following code pops up. The following service menu
5:25
So now you have to open the FRP unlocker. I've got my FRP unlocker opened
5:32
And let's connect your device by using the USB cable so here I have my USB connected to my to my PC and let me connect my
5:46
Nokia 8 the following message should pops up let's choose always allow
5:55
from this computer for all the USB debugging double tab here choose open and
6:02
choose okay of course it now you can observe on your f-rpian
6:08
that the frp unlock a detects your device, your Android version in my case is 8.1
6:16
so it is the newest one with the newest security patch and it's always good to know this
6:20
Now let's choose unlock frp. And as you can see unlocking is successful so now all you have to do is disconnect your device from your PC
6:36
press together power key and volume up to restart the device so let me do it
6:49
As you can see the Nokia 8 is restarting so let's wait until it will be done
7:06
Now we can press power key to switch on the no gate
7:36
Alright, let me choose Apex Launcher right here, double tap just once
7:42
And here you can use your device menu let tap apps icon choose settings Here let me find and select the talkback
7:56
Here I have talkback. Let me disable the talkback. Alright, so now I can use the device without the talkback, so let's go to settings again
8:12
Scroll down and let's show you. system select about phone here you need to find the build number and tab a couple of
8:20
times on build number now you are a developer you can go back choose developer
8:24
options let's enable IAM unlocking tab enable you just allow the bootloader to be
8:30
unlocked you can go back and here let's choose reset options tab erase all data so
8:37
the factor reset tab reset phone and erase everything now the device performing Titan
8:43
operation but this time is also erasing the FRP protection so you have to be patient
8:49
and wait until the operation will be done. Alright now let's simply go through the initializing setup process
9:25
Choose my language. Let me skip all necessary settings just to have access to the home screen
9:32
Let me show you that I can activate my device without the Google verification
9:39
Skip anyway. Tap agree. And now you can choose not now
10:05
And as you can see now you have access to your home screen so everything went well, just activate your device without the device
10:11
a good verification so you just fully remove the factory reset protection
10:15
Thank you for watching, please subscribe our channel leave thumbs up under the video
#Consumer Electronics